JELD-WEN JII030 Retractable Patio Door Screens User Manual
Page 3
INSTALLATION INSTRUCTIONS
for Retractable Patio Door Screens (JII030)
3
5. Repeat for the top
track.
6. Using the screen
housing holes as
a guide, drive the
3" screws into the
accessory groove in
the head and sill of
the door frame.
7. secure the screen
housing end of both
tracks with 1 3/4"
pan head screws. Do
not over-tighten screws.
1. Position screen
housing over the
interlock next to
track ends with the
end cap tabs toward
the screen tracks.
2. Trim the
weatherstrip on
the bottom so that
it will fit over the
frame and allow
the screen housing
to be flush with the
bottom of the sill.
3. Align the bottom
end of the screen
with the bead on
the bottom track
and slide the screen
onto the track.
4. slide the housing
end cap tab into
the track until the
housing is against
the track.
INsTaLL sCREEN HOUsINg
3
Operating
panel
Fixed
panel
Screen
housing
End cap
tab
Screen
housing
bottom
track bead
6. Align top track
end cap with the
exterior of the door
frame.
7. Using the pre-
drilled holes in the
track as a guide,
drive a 1 3/4" pan
head screw into the
accessory groove at
only the jamb end.
The screen housing
end should remain
unsecured until the
housing is installed.
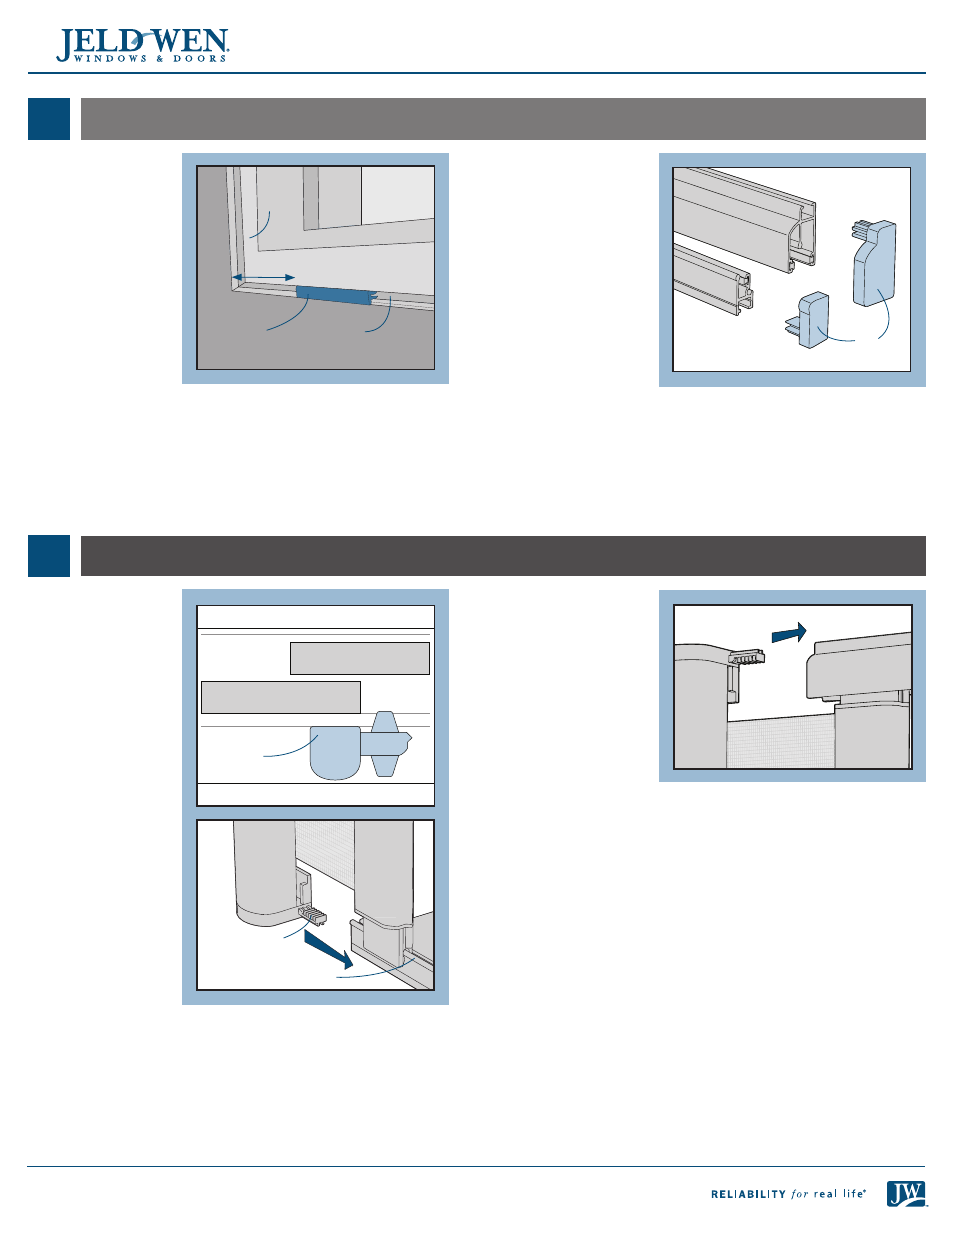
INsTaLL TRaCks
2
1. Snap one groove
filler shim into the
accessory groove
4" from the jamb
and 4" from the
interlock. The
extended leg of
the shim should be
facing downward
and even with the
bottom of the sill.
2.
Place an end cap
on the jamb end of
each track.
Align
the end cap with
the exterior of the
door frame.
3. Hold firmly in place until installation is complete.
4. Using the pre-drilled holes in the track as a guide, drive a 1 3/4" pan
head screw into the accessory groove at the jamb end and center of
the bottom track. Do not over-tighten screws.
5. Snap groove filler shims into the head of the vinyl frame in the same
manner as the sill.
Accessory
groove
Jamb
groove
filler shim
4"
Top
track
bottom
track
End
caps