B. a – Clinton Electronics CE-M24S User Manual
Page 11
11
POWER
AUTO
UP
DOWN
MENU
SD Card
16
GB
SD Card
2
GB
Camera functions and settings can be adjusted or changed by activating the OSD menu. When
the OSD menu is activated text will display on the monitor. The user can then move the cursor
to the desired function to change the setting.
Camera OSD Menu
SETUP Menu
LENS
• DC
EXPOSURE
• BRIGHTNESS • SHUTTER • AGC
• SENS-UP
• RETURN
WHITE BALANCE
• ATW
• OUTDOOR
• INDOOR
• MANUAL
• AWC
SET
SSDR
• OFF
• ON
BACKLIGHT
• OFF
• BLC
• HLC
DNR3
• OFF
• ON
DAY / NIGHT
• AUTO
• COLOR • B/W
• EXTERN
SPECIAL
• IMAGE ADJ.
• MONITOR
• CAM TITLE
• SYNC
• MOTION DET
• PRIVACY
• COMM ADJ
• LANGUAGE
• RETURN
EXIT
• SAVE
• NOT SAVE
• RESET
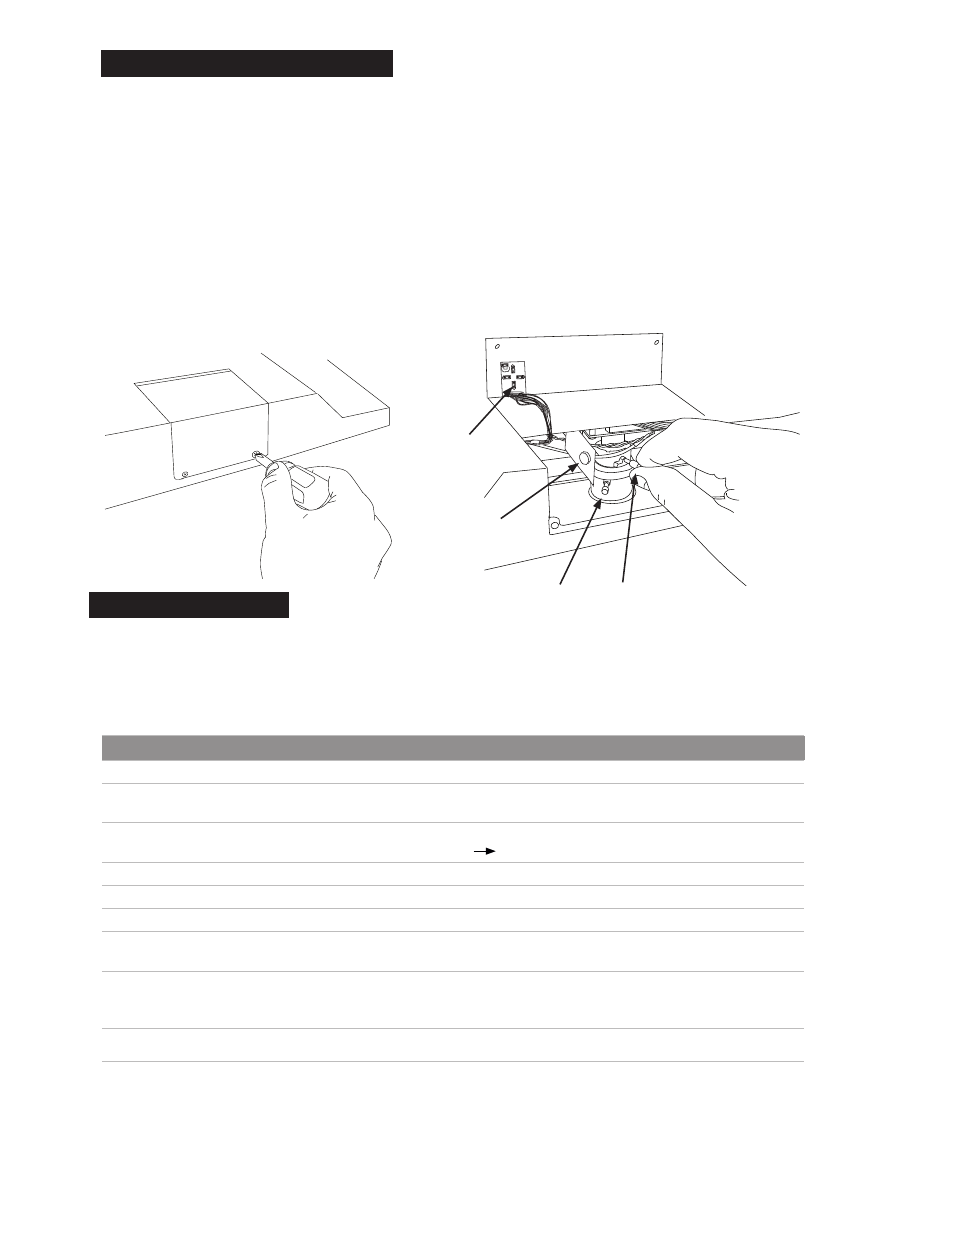
The access door to the camera and OSD Board is located at the bottom of the unit. A Phillips
screwdriver is required to remove the two access panel screws (Fig. A), place the screws in a
location where they will not be lost.
The OSD board is attached to the access panel for easy adjustment of the parameters of the
camera while viewing the front of the screen (Fig. B).
The Zoom and Focus can be adjusted by loosening the two adjustment dials on the lens (Fig. B).
When the desired Zoom and Focus settings are reached, finger tighten the dials; do not over
tighten. The angle of the lens can also be vertically adjusted using the thumb screws on each
side off the lens.
Accessing the Camera OSD Board
Focus
Zoom
POWER
AUTO
UP
DOWN
MENU
SD Card
16
GB
SD Card
2
GB
B.
A.
Lens Angle
Camera
OSD
Board