AirSep MN189-1 User Manual
Page 7
External Battery Charger Manual — 7
inserted into the charger, both battery
status LED’s will illuminate red to show
power to the charger.
5. Align the connectors on the bottom of
the external power cartridge with the
connections in the dock of the external
charging station. Once the connections
are aligned, push downward to connect
the external power cartridge to the
charger.
6. Once the external power cartridge is
inserted into the charger, it will begin
charging. The battery status LED on the
charger in front of the external power
cartridge will be illuminated to indicate
the status of the charging sequence.
Flashing Green Light: External Power
Cartridge is charging
Solid Green Light: External Power
Cartridge is fully charged
Flashing Red Light: Charging Error
Solid Red Light: No battery inserted into
dock
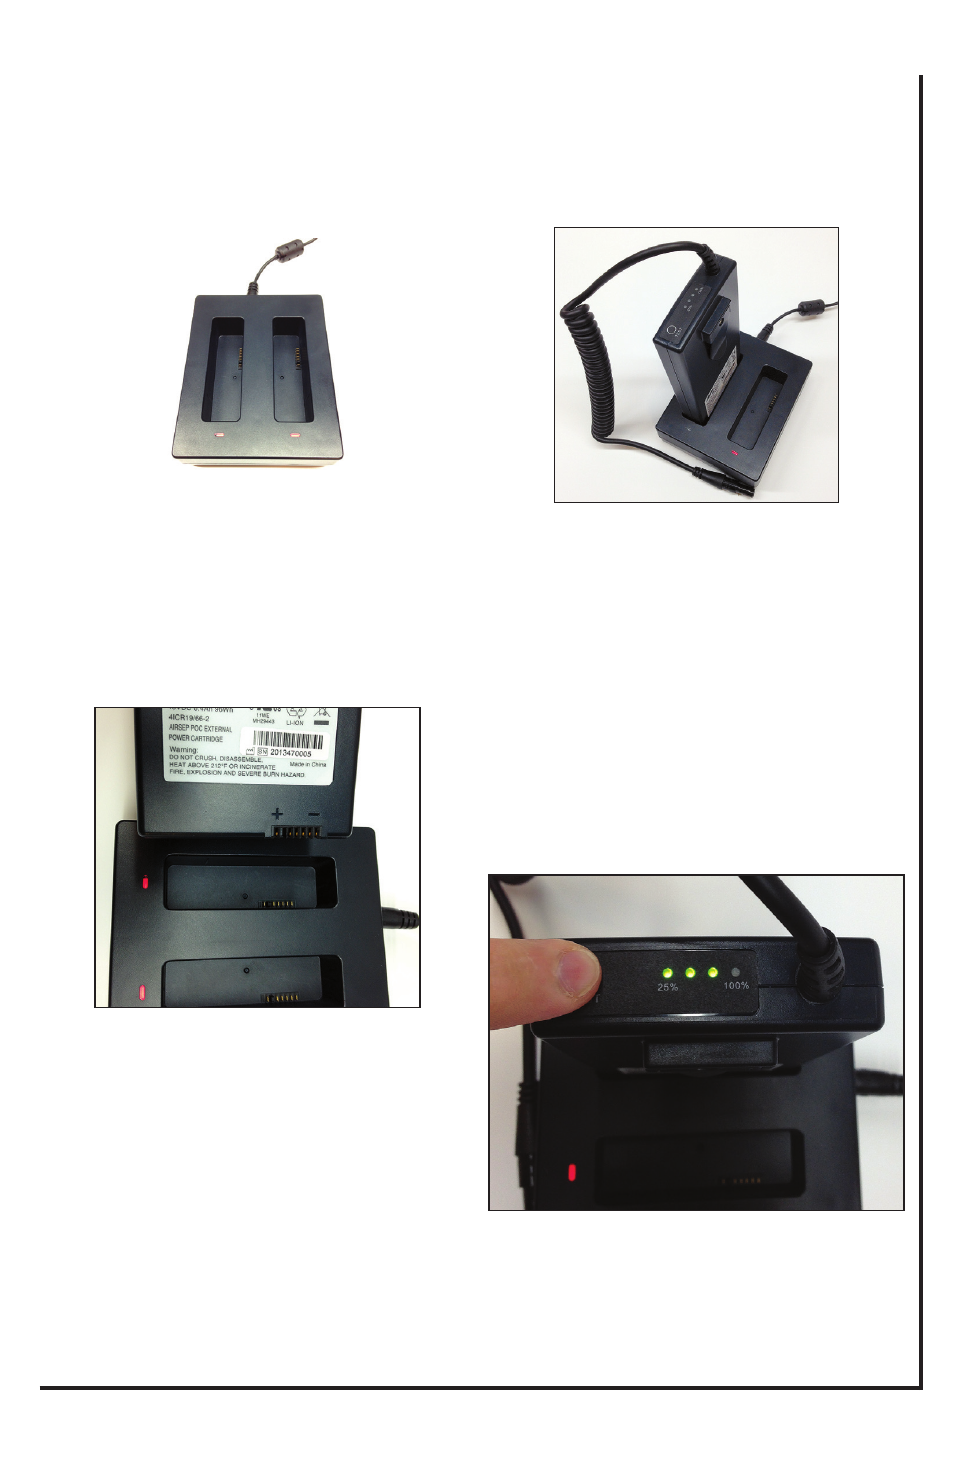
6. The charge will also be indicated by
the built-in gauge on top of the external
power cartridge. The gauge has four
lights (25%-100%) to indicate the level
of the charge. While charging a fully
discharged external power cartridge, the
25% LED will blink until 25% capacity
is reached. The LED will then turn solid
and the LED that indicated 50% will
blink until 50% capacity is reached. This
process will continue until the power
cartridge reaches its capacity.
7. An external power cartridge will fully
charge from an empty state in 5 hours.