Installation instructions, Warning, Avertissement – GE ZV48SSFSS User Manual
Page 14: Step 3 connect ductwork, Step 6 install motor
14
49-80151-8
Installation Instructions
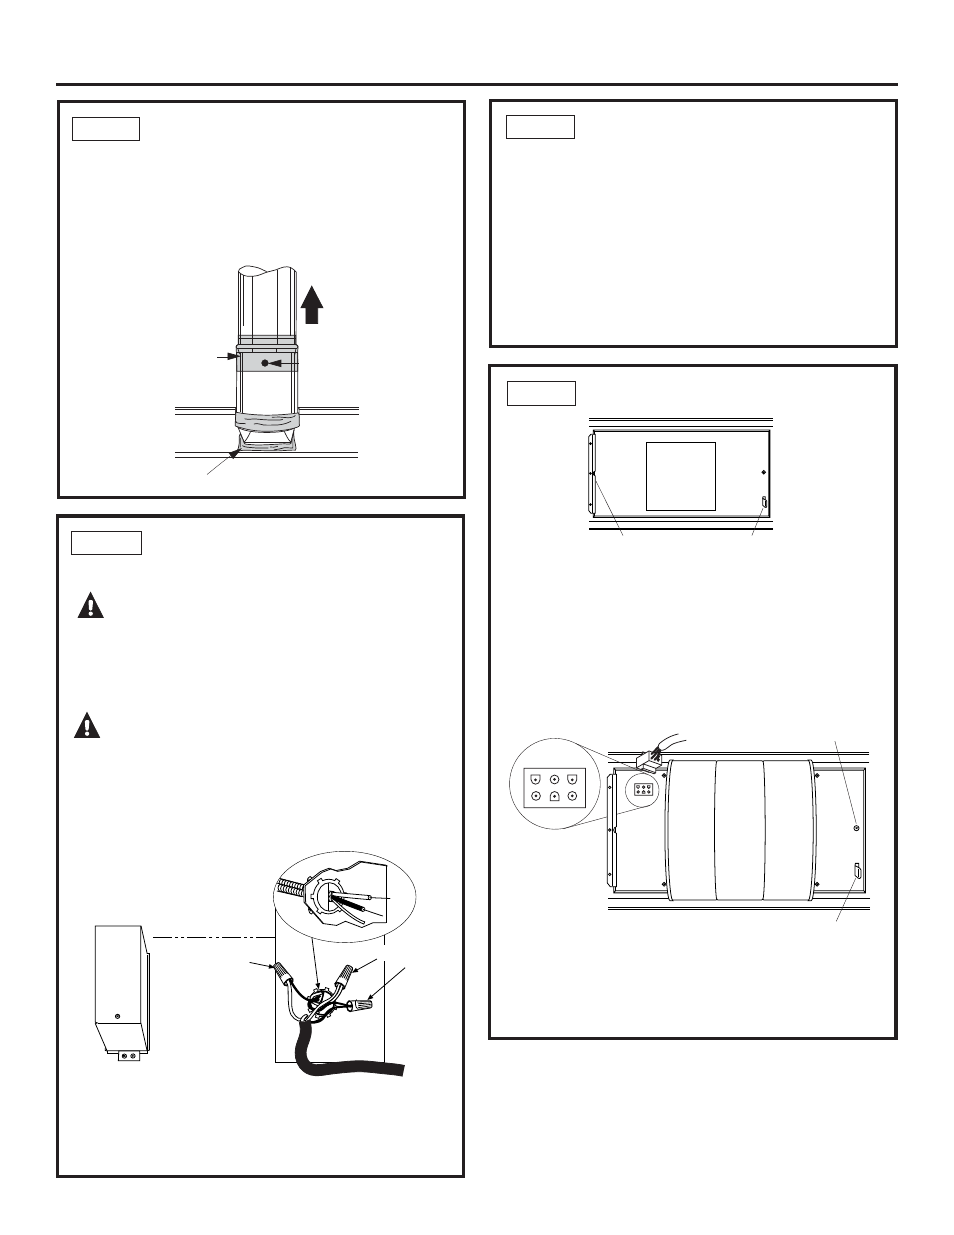
STEP 3 CONNECT DUCTWORK
• Install ductwork, making connections in direction of
DLUÀRZDVLOOXVWUDWHG
• Secure joints in ductwork with sheetmetal screws.
• Wrap all duct joints with duct tape for an airtight seal.
8VHGXFWWDSHWRVHDOWKHÀDQJHFRQQHFWLRQ5HDFK
inside the hood and push the damper up to be sure it
moves freely.
STEP 4 CONNECT ELECTRICAL
67(3,167$//'8&7&29(56
Note: For easier handling, remove cardboard insert after
¿OPLVSHHOHGRII
5HPRYHSURWHFWLYH¿OPIURPGXFWFRYHUV,IPRUHWKDQ
one duct cover is used, secure each piece together with
screws provided.
• Place the duct cover(s) on top of the hood.
• From inside the hood, secure the duct cover to the top
with the small Phillips head screws supplied with the
covers.
Verify that power is turned off at the source.
WARNING:
If house wiring is not
2-wire with a ground wire, a ground must be provided by
the installer. When house wiring is aluminum, be sure to
use U.L. approved anti-oxidant compound
and aluminum-to-copper connectors.
AVERTISSEMENT
Si le câblage de
ODPDLVRQQ·HVWSDVGXW\SHjGHX[¿OVDYHFXQ¿OGH
terre, l’installateur doit fournir un circuit de terre. Quand
OHV¿OVGHODPDLVRQVRQWHQDOXPLQLXPLOSUHQGUHVRLQ
d’utiliser de la pâte antioxidation approuvée par UL et
des connecteurs pour l’aluminium-cuivre.
• Use wire nuts to connect incoming ground to green,
white to white and black to black.
• Push wires into junction box and replace cover. Be sure
wires are not pinched.
White
Ground
Black
Remove
Junction Box
Cover
Insert Power
Conduit Thru
Strain Relief
and Tighten
Use UL Listed
Wire Nuts
A
B
C
Screw
Duct Tape
Over Seam
and Screw
Air Flow
Duct Tape
Over Transition
STEP 6 INSTALL MOTOR
• From the inside of the hood, slip motor into the
attachment slot on the left.
• Rotate motor upwards until it snaps into the spring clip
on the right.
• Secure the motor to the hood with the machine screw
and lock washer. (Screw is marked with red or blue
paint.)
• Plug connector into the motor.
Spring
Clip
Outlet
Attachment
Slot
Top
Attachment
Screw
Spring
Clip
IMPORTANT: Connector
ends are designed to mate
RQO\RQHZD\0DWFKÀDWDQG
round connectors as shown.