Installation instructions, Choose venting option, Cut holes – GE JVE40DTBB User Manual
Page 12: For recessed-bottom cabinets only, Run wires, Screw in partway, Feed in wires, Secure hood, Optional power cord kit jxhc1
12
49-80622-4
CHOOSE VENTING OPTION
8
The hood can be set to vent outside or to recirculate air
back into the kitchen .
•
To vent to the outside, refer to steps 5 and 6 .
•
To recirculate air into the kitchen, remove two
screws securing the duct block off plate . Discard
plate . Replace two screws .
Note: Hood is E
nergy
S
tar
®
certified only when it vents
air to the outside.
Installation Instructions
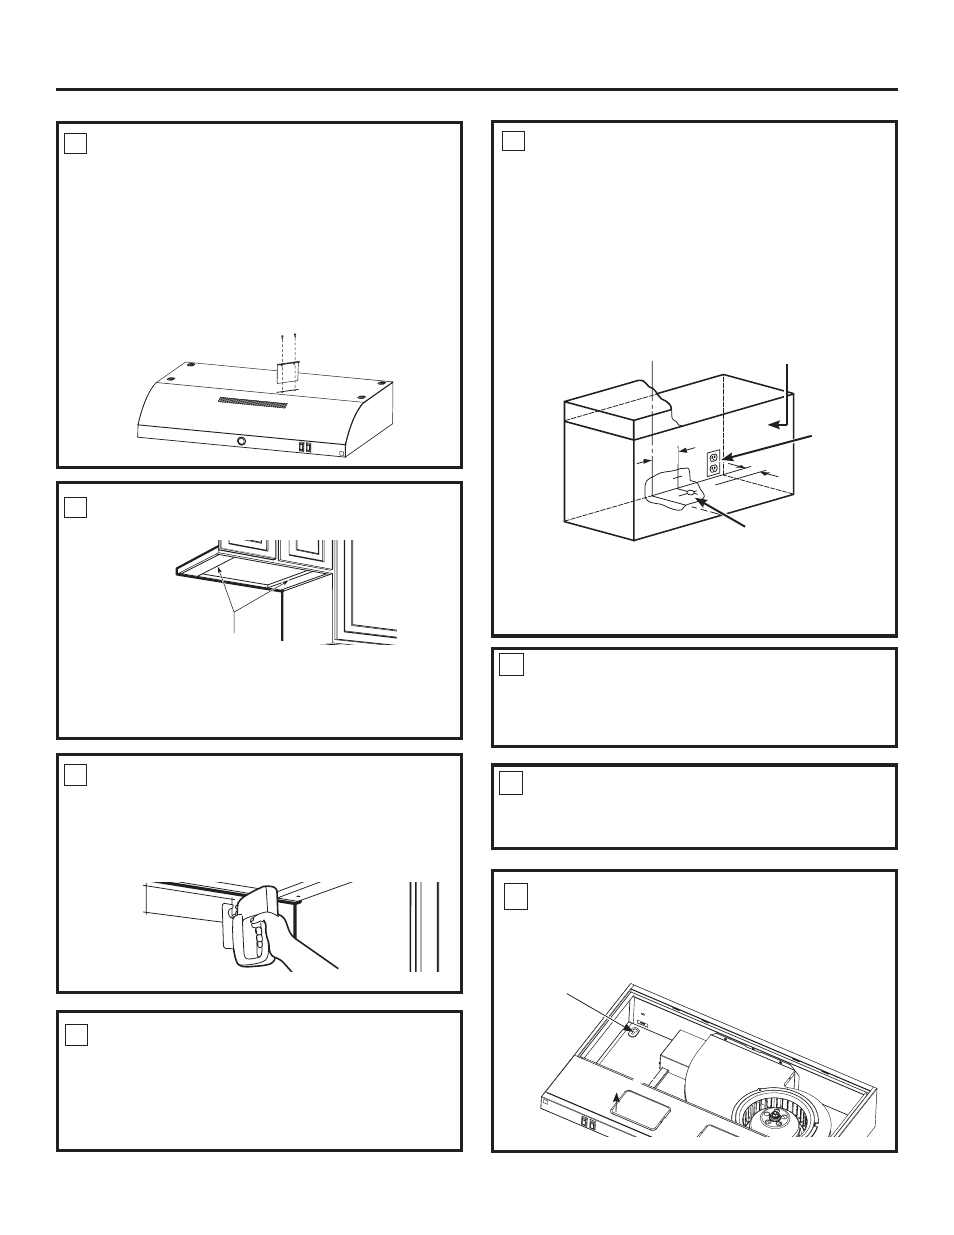
CUT HOLES
Cut holes at marked locations for duct and electrical
wiring . For the vertical duct, cut out 3/4” extra toward
the front of the cabinet so you can move the duct
freely when installing the hood . It may also ease
installation by cutting the hole 10
1
⁄
2
” instead of 10” .
FOR RECESSED-BOTTOM CABINETS
ONLY
10
9
Wood shims
• If the cabinets have front, side or back trim, make
2 wood shims the width of the trim and attach them to
the cabinet bottom recess on both sides . See Step 7 for
marking locations .
RUN WIRES
Run the electrical wires through the wall or cabinet
according to National Electrical Code and applicable
local codes .
NOTE: DO NOT turn the power on until installation is
complete .
11
SCREW IN PARTWAY
Drive a mounting screw (from the hardware packet)
partway into each center of the narrow neck of the
keyhole slots marked on the cabinet bottom .
13
FEED IN WIRES
Lift the hood into position and feed the house
wiring through the wiring knockout .
14
SECURE HOOD
Slide the hood back against the wall . Tighten the
mounting screws . Be sure the screw heads are in
the narrow neck of the keyhole slot .
Keyhole (4)
15
OPTIONAL POWER CORD KIT JXHC1
Use only with range hood cord-connection kits that
have been investigated and found acceptable for
use with this model range hood .
For installation with a standard 3-prong, grounded
wall outlet, Power Cord Connection Kit model
JXHC1 must be used . This kit contains a power
cord and the hardware required to connect it
to the range hood . It is available at extra cost
from your GE supplier . Follow the Installation
Instructions packed with the kit .
12
NOTE:
If using optional Power Cord Kit JXHC1, feed
the power cord through the hole in the top cabinet
while raising the hood . Loop any excess length of
cord and tie away with a suitable tape or tie .
Cabinet
7
3
⁄
4
″
3-prong
wall outlet
(if using cord
connection)
1
1
⁄
4
″
1
3
⁄
4
″ dia . clearance hole
for optional power
supply location
CL