Battery-backed write cache battery pack option – HP ProLiant ML310 G5p Server User Manual
Page 42
Hardware options installation 42
1.
Power down the server (on page
2.
3.
Remove the access panel (on page
4.
Remove the expansion slot cover that corresponds to the parallel and serial connector ("
" on page
5.
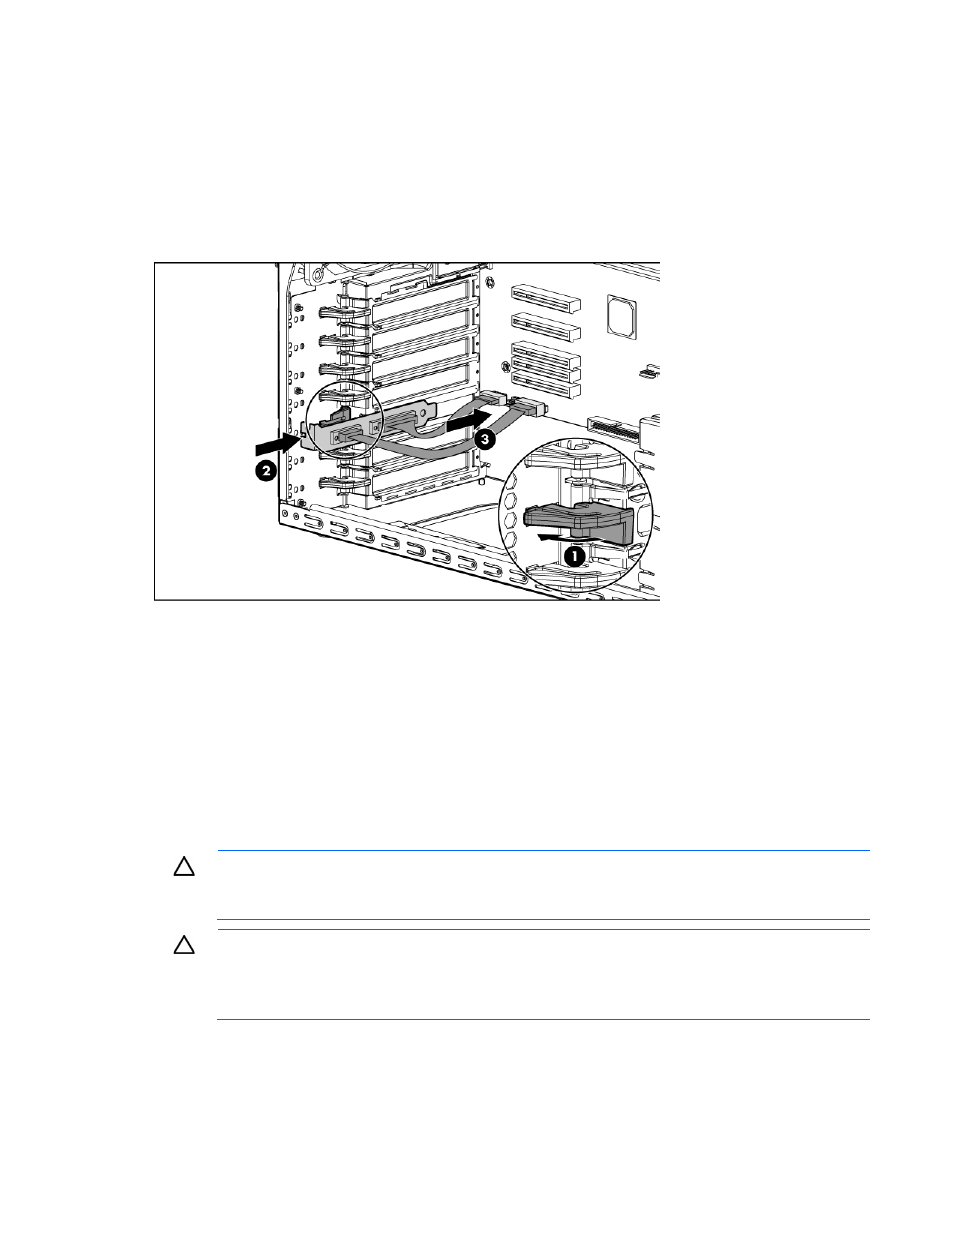
Install the parallel and serial connector bracket.
6.
Connect the parallel and serial cables to the parallel and serial connectors on the system board.
7.
Close the PCI retainer.
8.
Install the access panel (on page
9.
Lock the bezel.
10.
11.
Enable the feature under the System Options menu in RBSU. For more information on RBSU, refer to the
HP ROM-Based Setup Utility User Guide on the Documentation CD or the HP website
Battery-backed write cache battery pack option
CAUTION:
To prevent a server malfunction or damage to the equipment, do not add or remove
the battery pack while an array capacity expansion, RAID level migration, or stripe size migration
is in progress.
CAUTION:
After the server is powered down, wait 15 seconds and then check the amber LED
before unplugging the cable from the cache module. If the amber LED blinks after 15 seconds, do
not remove the cable from the cache module. The cache module is backing up data, and data is
lost if the cable is detached.