Attaching the cable management arm – HP Netserver L Server series User Manual
Page 133
Chapter 13
Alternative Rack Mounting (4–Post)
127
Attaching the Cable Management Arm
The Cable Management Arm (CMA) allows the cables and power cord to move in
and out with the HP Netserver chassis without being accidentally disconnected.
The Cable Management Arm installation is tool-less.
1. Ensure the HP Netserver is pushed all the way into the rack.
2. Attach the Cable Management Arm to the rack:
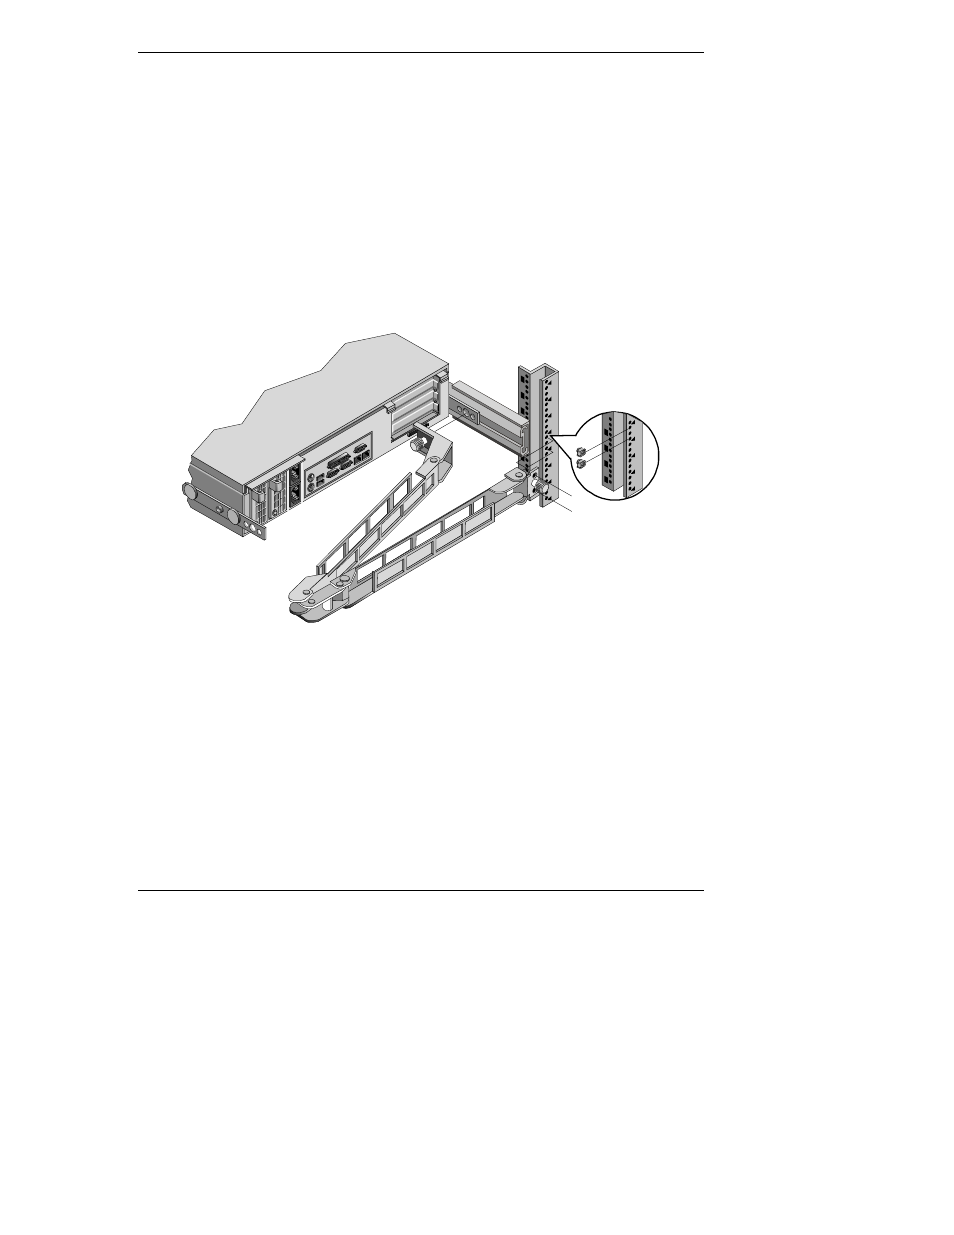
a. Attach the clip nuts to the 1st and 2nd holes of the rear right column
(counting from the base of the HP Netserver). See Figure 13-9.
b. Insert the outer flange thumbscrew into the 2nd hole, and tighten it.
c. Insert the screw into the 1st hole, and tighten it using the Torx driver.
Figure 13-9. Attaching the Cable Management Arm
3. Attach the Cable Management Arm to the HP Netserver:
a. Insert the inner flange thumbscrew into the hole in the chassis slide mount.
See Figure 13-9.
b. Tighten the thumbscrew to secure the Cable Management Arm.
4. Extend the HP Netserver out of the rack to ensure the Cable Management
Arm moves with the chassis without binding.
5. Plug the HP Netserver’s power cable and any data cables into the back of the
HP Netserver.
6. Dress the cables in the Cable Management Arm, and then slide the HP
Netserver into the rack to verify that the cables do not bind in the tray.