Axis Communications 25734 User Manual
Page 7
- -
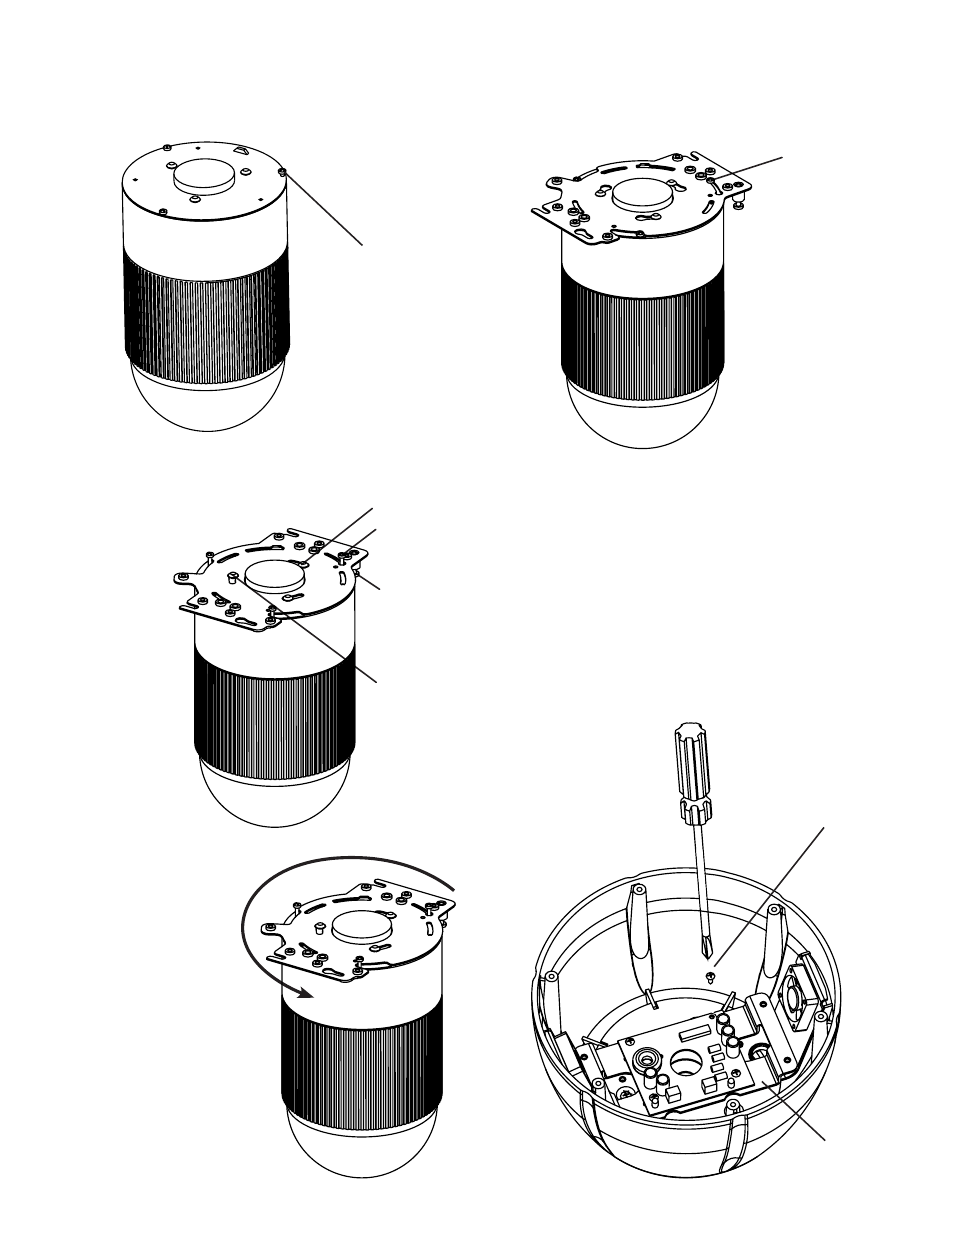
Installing Axis 231D/232D Camera
1. Install the camera onto the quick release bracket. Loosen
one of the screws on the bottom of the camera, see
diagram below.
2. Place quick release bracket onto the bottom of the
camera, making sure that the (3) locking buttons line up
with the keyhole slots in the Q/R
bracket. Also make sure
the screw that
you loosened
up in the
previous
step lines
up with
the slot
located
next
to the
captive
insert.
Locking
buttons
Locking screw
Captive insert
Keyhole slots
4. When the locking buttons hit the end of the keyhole slots.
Tighten the locking screw. Then put the camera assembly
aside.
Locking screw
3. Turn the camera counter
clockwise.
5. Since the 231D/232D camera operates on 24vac, the
power board that is located inside the housing is not
needed. The remove the power board, start by loosening
the screws on the terminal block and disconnect the
orange and red wires.
Machine screws (4)
Base Bracket
6. With a Phillips head screwdriver remove the (4) machine
screws holding the power board to the base bracket.
Loosen screw