Installing axis 233 camera – Axis Communications 25734 User Manual
Page 10
- 10 -
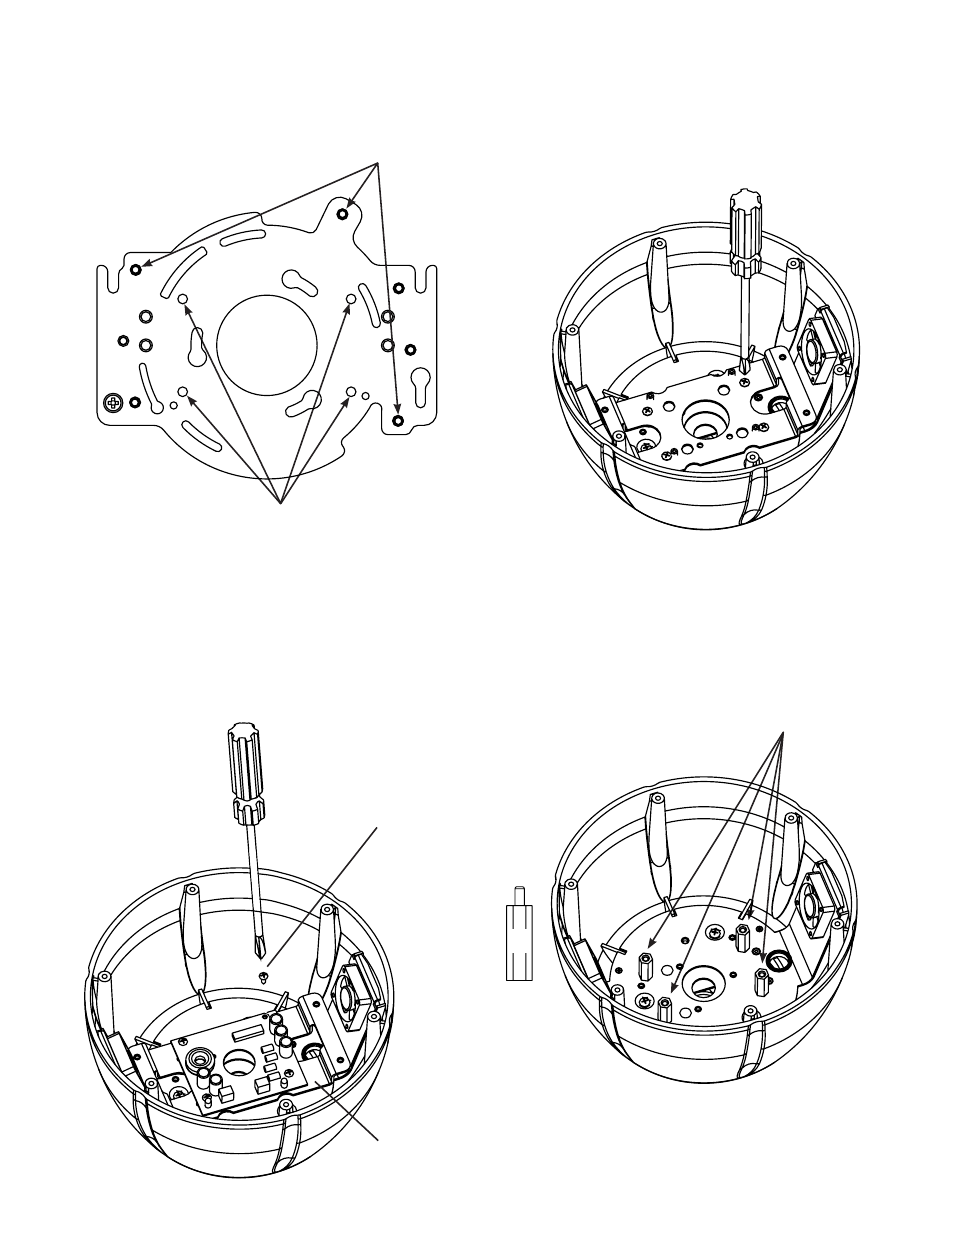
Installing Axis 233 Camera
1. Note the position of the mounting holes on the camera
bracket (see diagram below).
5. Now attach (4) 1” spacers (located in the packet that
came with the housing) to the base bracket.
2. Since the 233 camera operates on 24vac, the power
board that is located inside the housing is not needed.
The remove the power board, start by loosening the
screws on the terminal block and disconnect the
orange and red wires.
3. With a Phillips head screwdriver remove the (4) machine
screws holding the power board to the base bracket.
Remove the power board.
Attach (4) 1" spacers
1"
Machine screws (4)
Base Bracket
4. Now remove the Base Bracket.
Mounting holes for housing
Camera Bracket Mounting holes
See also other documents in the category Axis Communications Video surveillance systems:
- Camera Station (47 pages)
- Fixed Dome Network Camera AXIS P3301 (74 pages)
- AXIS 214 PTZ (70 pages)
- AXIS MFD-R (75 pages)
- AXIS 213 PTZ (2 pages)
- 232D (55 pages)
- 232D (2 pages)
- AXIS 223 (1 page)
- Fixed Dome Network Camera AXIS P3301-V (50 pages)
- 2100 (2 pages)
- 210 (66 pages)
- AXIS T8311 (34 pages)
- AXIS 206W (34 pages)
- 209FD/FD-R (71 pages)
- AXIS 206M (36 pages)
- 213 PTZ (3 pages)
- 216FD/FD-V (64 pages)
- HPV42K1A000 (2 pages)
- AXIS T95A00 (73 pages)
- AXIS 209MFD-R (73 pages)
- AXIS T8310 (10 pages)
- AXIS 209FD-R (73 pages)
- 2120 (2 pages)
- 2120 (68 pages)
- AVTPSC (2 pages)
- AXIS Q1755 (59 pages)
- Axis 216MFD (74 pages)
- AXIS FD-R M12 (46 pages)
- AXIS 209MFD (73 pages)
- 207W (59 pages)
- 230 MPEG-2 (62 pages)
- 2130 (2 pages)
- Axis 211A (76 pages)
- Axis 210 (83 pages)
- AXIS 233D (69 pages)
- AXIS 221 (64 pages)
- 211 (66 pages)
- 207 (54 pages)
- Axis 216FD-V (4 pages)
- IP-Surveillance (8 pages)
- AXIS 207 (73 pages)
- AXIS 223M (70 pages)
- 2401 (87 pages)
- AXIS 211M (2 pages)
- 207MW (60 pages)