Raid activation key, Removing the raid activation key, Installing the raid activation key – Acer Altos R910 User Manual
Page 90
3 System upgrade
80
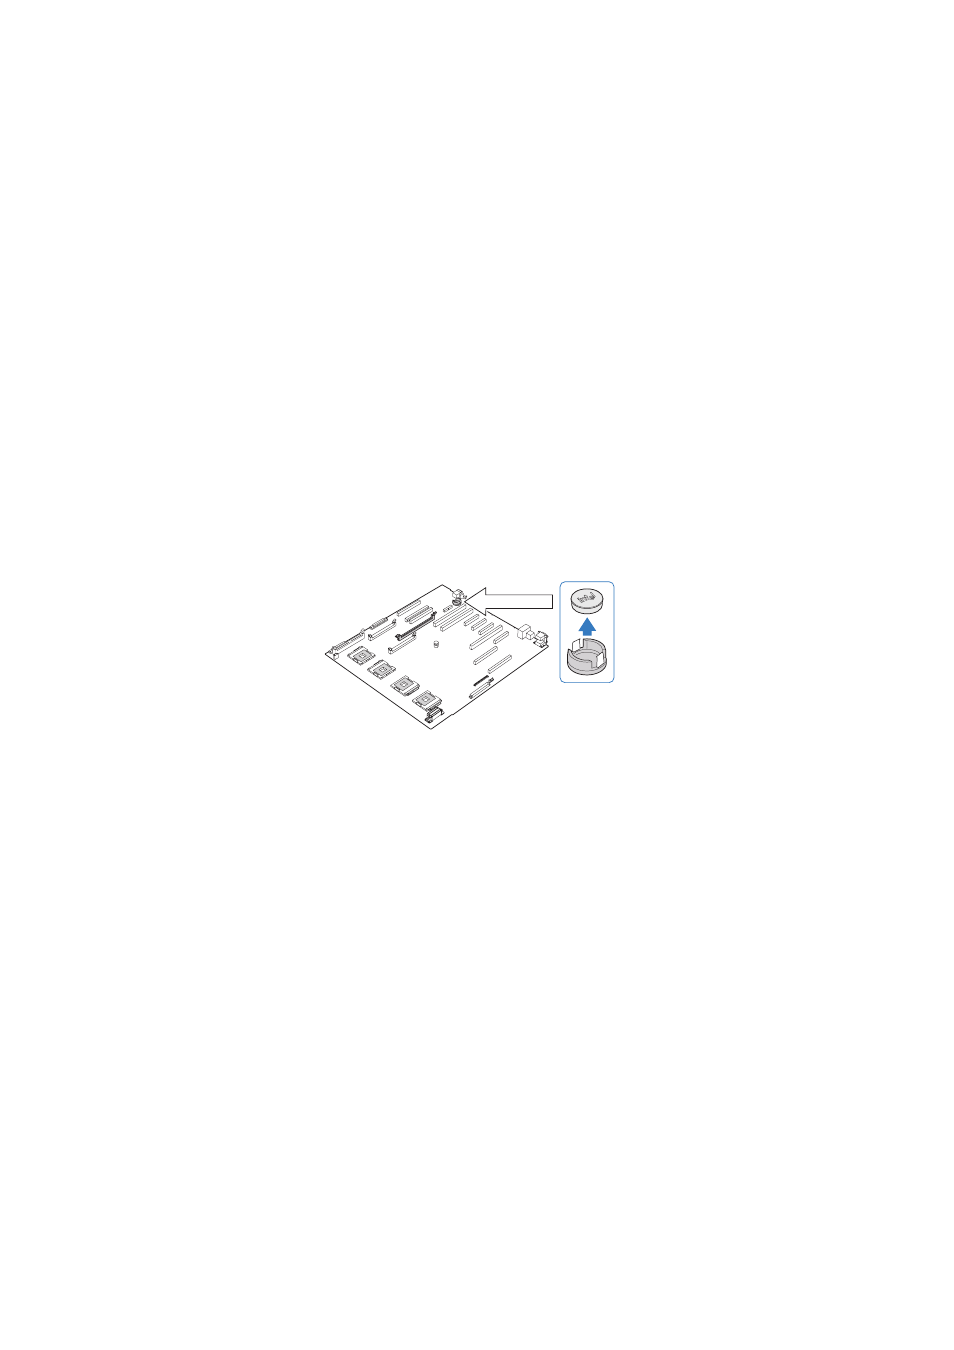
RAID activation key
Removing the RAID activation key
1
Observe the ESD precautions and pre-installation instructions
described on page 33.
2
Remove the memory boards or memory air baffles from DIMM
slots C and D. See “Cold Removal of Memory Board” on page 70
and “Removing a memory board air baffle” on page 42.
3
If a PCI card is installed in PCI-X Slot 7, remove the card. For
instructions on removing a PCI card, see page 76.
4
Insert the tip of a small flat-bladed screwdriver under the plastic
tab on the retainer holding the activation key to the mainboard.
5
Gently push down to detach the activation key.
6
Store the activation key in an anti-static bag.
7
Replace the memory board air baffle.
8
Replace the PCI card.
9
Observe the post-installation instructions described on page 34.
Installing the RAID activation key
1
Observe the ESD precautions and pre-installation instructions
described on page 33.
2
Remove the memory boards or memory air baffles from DIMM
slots C and D. See “Cold Removal of Memory Board” on page 70
and “Removing a memory board air baffle” on page 42.
3
If a PCI card is installed in PCI-X Slot 7, remove the card. For
instructions on removing a PCI card, see page 76.
4
Remove the RAID activation key from its protective packaging.