Engraving a stamp, Making a stamp – Brother SC-2000USB User Manual
Page 44
40
MAKING A STAMP
Engraving a stamp
1
After the data is printed onto the draft sheet, which is then fed over the
xenon lamp unit, the message “INSTALL STAMP !” appears in the LCD
of the SC-2000USB.
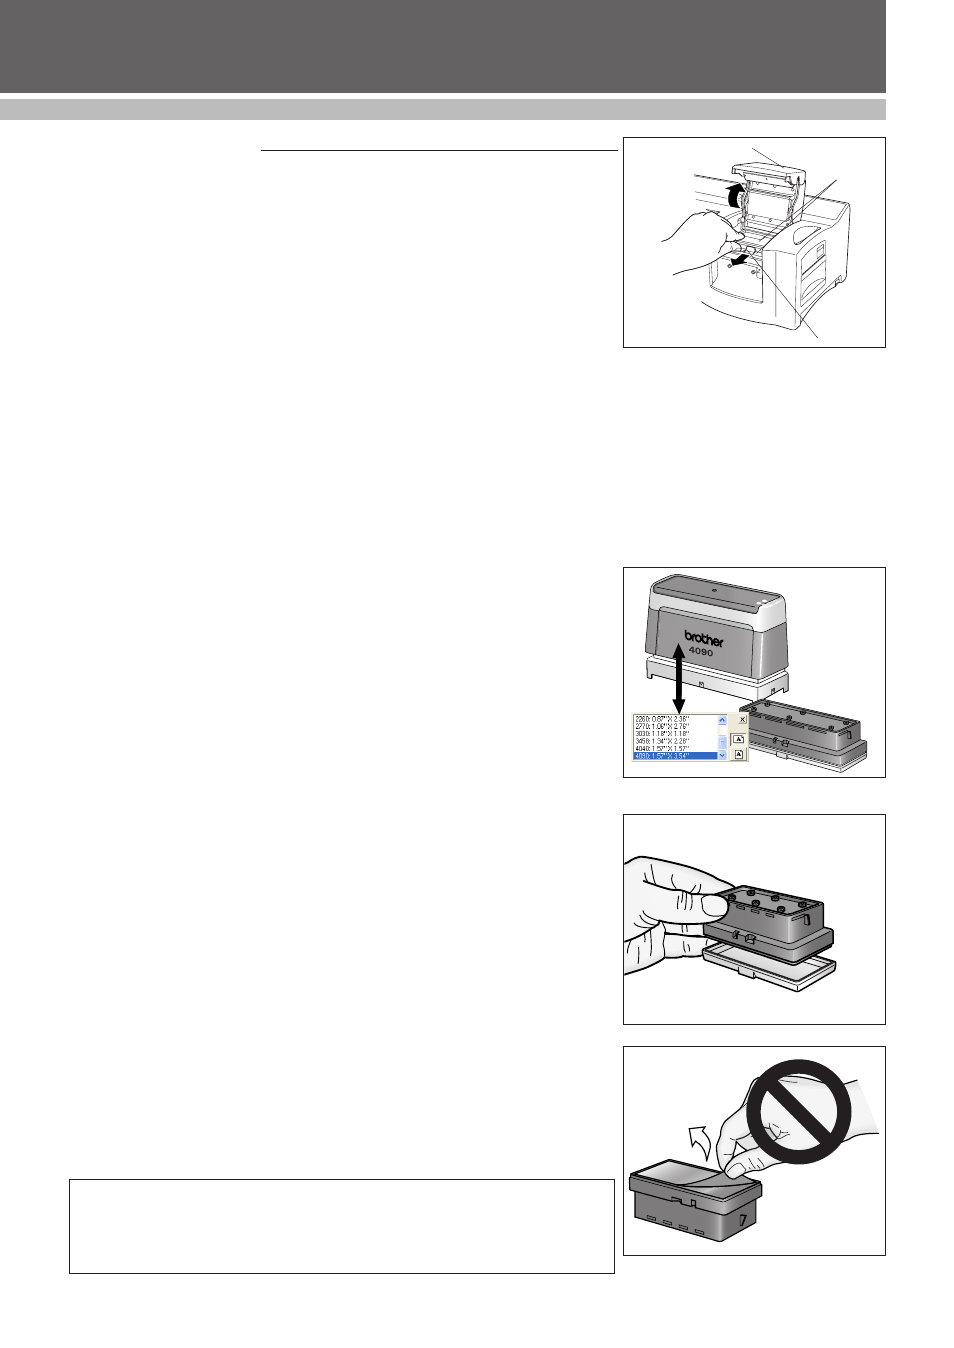
2
Lift open the stamp compartment cover, slowly pull the lever toward you
to open the doors in the stamp compartment, and then check that the
printed draft sheet has stopped over the xenon lamp unit (see figure 1).
☞ NOTE: Be careful not to touch the draft sheet that
has stopped over the xenon lamp unit.
Do not allow the clear plastic surface of the
xenon lamp unit to become dirty or
scratched. Use a soft cloth to wipe off any
dust on the clear plastic surface.
To cancel engraving, press the Mode button
on the SC-2000USB until “CANCEL” appears
in the LCD, and then press the Set button to
feed out the draft sheet.
3
Select a blank stamp pad in the desired size.
Make sure that the stamp size you have selected in the drop-down list
matches the size indicated on the stamp holder (see figure 2).
4
Remove the cap from the stamp.
☞ NOTE: Do not reuse an ink pad after ink has
permeated the pad’s surface (see figure 3).
☞ NOTE: Do not peel off the clear protective film
before engraving the stamp (see figure 4).
IMPORTANT NOTE:
• Do not touch the printed draft sheet.
• Do not remove the stamp’s clear protective film before engraving.
Doors
Lever
Stamp compartment
cover
figure 1
figure 3
figure 4
figure 2