TOHO ELECTRONICS TTM-10L User Manual
Page 5
Displays at
18
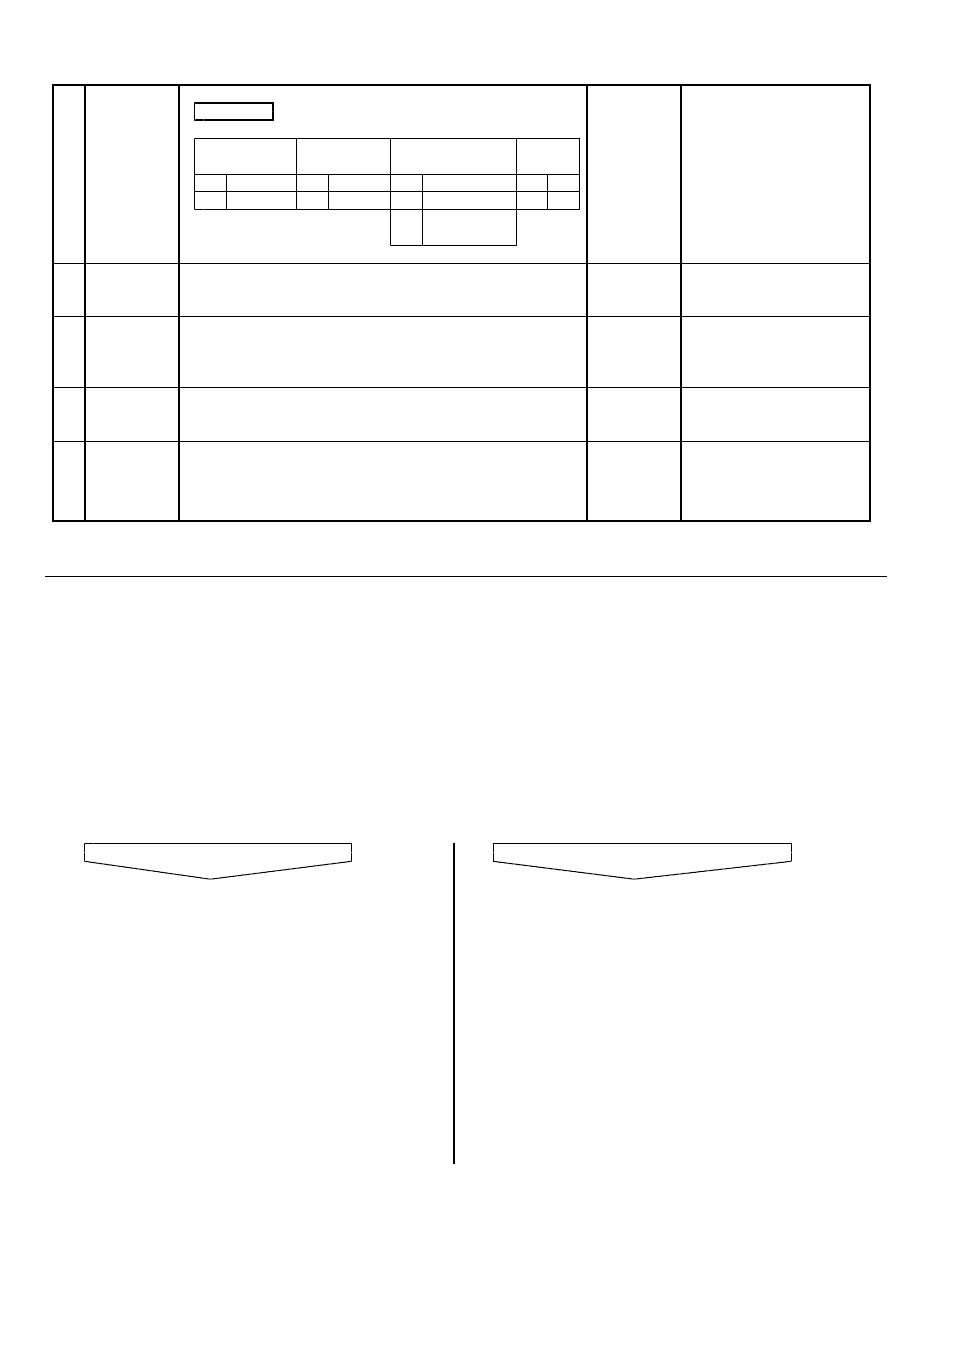
Communication.
Communica-
●◆■▲
tion
parameter
●BCC CHECK
◆DATA
■PARITY
▲STOP
LENGTH
BIT
None
7 BITS
None
1
Yes
8 BITS
odd Number
2
Even
Number
Same as above.
19
Communication Speed:1200/2400/4800/9600BPS
Communica-
tion Speed
Setting range
Displays at
20
:1∼99
Communication.
Communica-
tion
Address
Setting range
Displays at
21
:0∼250
Setting unit
Communication.
Response
:mSEC
Delay Time
Lock OFF
Display at all cases.
22
・・・
Lock
LL Parameters Lock
・・・A
g
・・・
Settin
Parameter Display Lock
・・・
except SV
Lock
PRECAUTION OF CONTROL
6
6
6
6.
.
.
.
This unit uses a fixed memory device to memorize setting value. Therefore, the setting value remains in memory even after
Power Off. At actual selection, please arrange to match the kind and initial setting of the sensor.
For the setting of input kind, please refer to "Kinds of Input/Output in Parameter Display
". This unit is able to
7
control 2 types such as ON/OFF control and PID control(Time Proportional Control).
PID CONTROL
Advantage
: Better result of control compared with ON/OFF Control.
・
Disadvantage: The life period of relay contact becomes short as it switches On and OFF so frequently.
ON/OFF CONTROL
Advantage
: Generally, the life period of relay contact last longer as it switches ON at temperature
・
increase and OFF at temperature decrease from the level of setting value.
Disadvantage: The result of control is not as good as PID Control.
As for the Setting of the KIND OF CONTROL, please select and set at the display of "KIND OF CONTROL"of
"PARAMETER DISPLAY
".
・10
PID CONTROL
ON/OFF CONTROL
The initial value for Parameter of "Proportional Band"
The parameter of sensitivity is set initially
=
”.
"
=
".
set at "
at
Though the control can be done by this initial
In case the sensitivity flutters at control,
setting, please do Auto-Tuning for getting
use larger parameter of sensitivity to
better result of control. While Auto-tuning is operational
stabilize the fluttering.
the setting of all necessary parameters for each value
can be done automatically.
(,,)
At the time of Auto-Tuning, set the unit to the condition
of actual control by connecting heater and sensors.
It may take a time to finalize Auto-tuning.
For start of Auto-tuning, please press
key for more
▲
than 2 seconds at AT Start Display of
Mode Display
".
"
E
After start up, Auto-tuning and Parameters Setting
will be done automatically, and the control is to be
started soon.
Due to the above procedure, the parameter can be set to match the unit to be controlled.