2 assembly – Dwyer MFS2 User Manual
Page 9
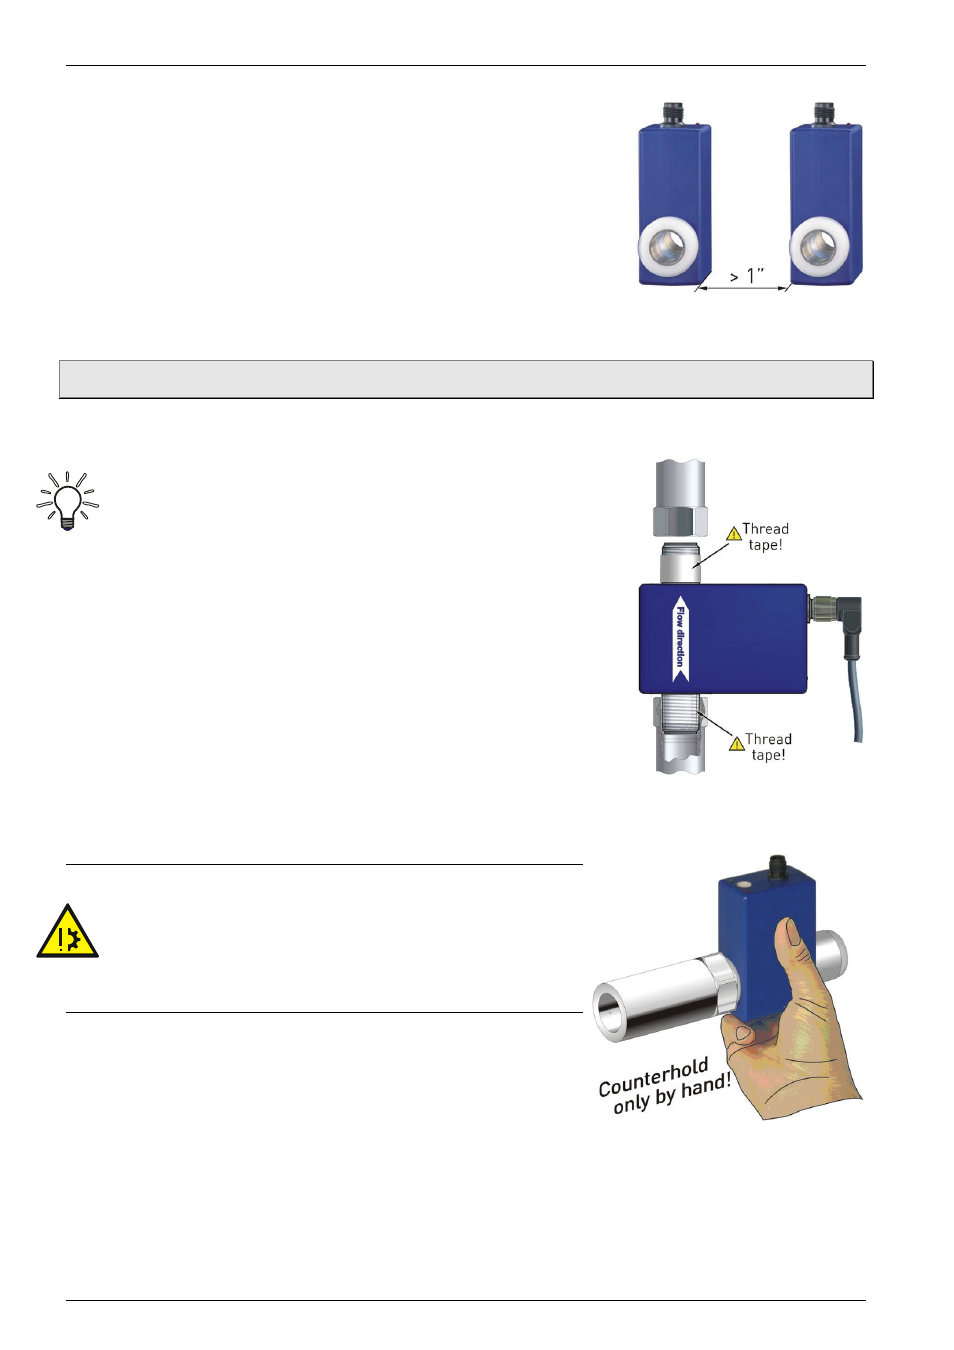
If two or more MFS2 devices are used side by side, maintain
a separation of at least 1" between adjacent devices.
If adjacent devices are too close together, operation of both
devices may be impaired due to mutual interference.
4.2 Assembly
The MFS2 is installed directly into the pipeline. The compact design and light weight of the
unit make wall-mounting unnecessary.
IMPORTANT NOTICES:
• Observe the flow direction indicated on the type plate.
• Observe the mounting dimensions ( § 9.4 "Dimensions").
Select an appropriate location for installation ( § 4.1
"Installation instructions").
To ensure the best possible measuring accuracy, a vertical
installation position with increasing flow is preferable (no
collecting of dirt deposits).
Wrap the MFS2 connections with 1 to 2 wraps of thread tape
(e.g. Teflon
®
tape). Wrap tape in a clockwise direction,
viewed form the end, leaving the first two threads uncovered.
Make sure the tape does not intrude into the flow path.
Attach the MFS2 with arrow pointed in the direction of flow.
The fittings should be screwed into MFS2 hand tight.
CAUTION! Material damage!
Do not use excessive force. The MFS2 can be
damaged.
While tightening, counter the MFS2 only by hand!
If you use an open-end or a pipe wrench, the MFS2 can
be damaged.
To tighten the MFS2, use an open-end or a pipe wrench
for the fittings and only the hand for the MFS2.
Tighten the MFS2 an additional ¾ to 1 turn.