Spk solar panel – Dwyer SPK User Manual
Page 3
SPK
Solar Panel
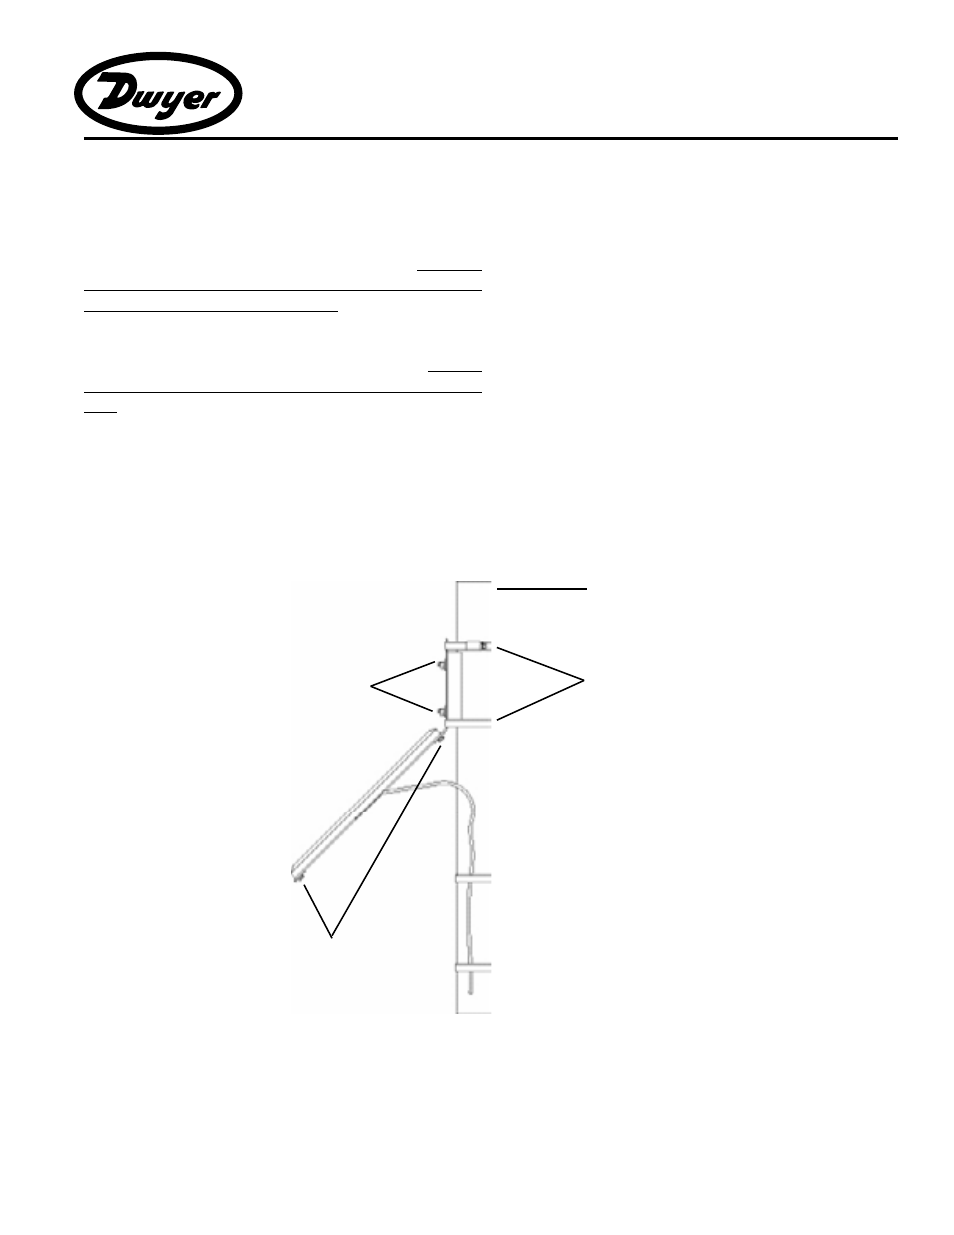
The solar panel is designed to mount to a either a 1-1/2 to 2
inch diameter vertical pipe. First attach the 45 degree angle
bracket to the panel with the two M6 bolts, flat washers and
nuts provided as shown. Before tightening the bolts. Be sure to
position the bracket to the side of the black cable cover rather
than over it to avoid stressing the panel. (At latitudes above 50
degrees performance may be improved by bending the bracket
so that the angle of the panel to the horizontal is increased
to approximately the local latitude plus 15 degrees. To avoid
damage to the panel, do this before bolting the bracket to the
panel). Next use the two sets of ¼-20 bolts, nuts, flat and
lock washers to attach the angle bracket to the pipe mount
C-channel. Then attach the entire assembly to the pipe using
the two band clamps as shown. Turn the panel to face true (not
magnetic) south in the northern hemisphere or north in the
southern hemisphere before tightening the clamps securely.
Connect the solar charge controller, flow meter and battery
as shown in the wiring diagram. Clean battery terminals and
secure connections to the battery using grease or other means
of preventing corrosion. For safety, an in-line fuse holder should
be installed at the positive battery connection with a 1 Amp
time lag (slow-blow) fuse. In unprotected locations a weather-
proof fuse holder (such as Bussmann HFB-R) and outdoor-rated
wirenuts should be used.
INSTALLATION
1-1/2 to 2 inch pipe
band clamps
C-channel
1/4-20 hardware
solar panel
M6 hardware
TM