List – Crystal GaugeCalXP Rebuild Kit User Manual
Page 5
GaugeCal
XP
Service Instruction Sheet
•
Page 5
C R Y S T A L
engineering corporation
23
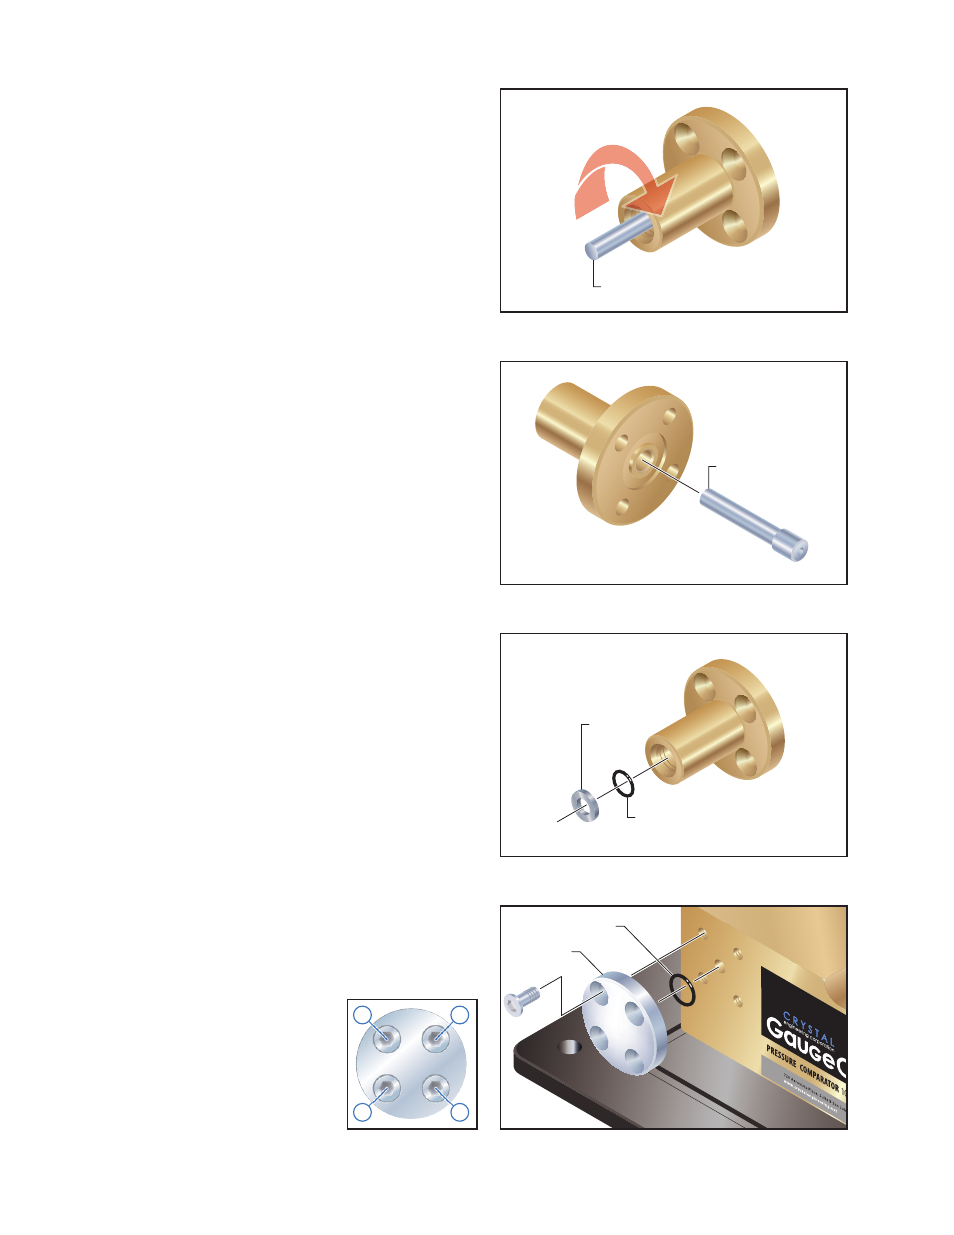
From the front of the Fine Adjust body,
remove the o-ring (
PN
3129) and the backup
ring (
PN
3150) (figure 18).
Note:
The o-ring and backup ring may be
firmly seated in the Fine Adjust body. If so,
they can be extracted with a pair of tweezers
or other appropriate tool.
24
Use a 4mm Allen key to remove the four (4)
screws holding the Accessory Cap to the side
of the Manifold Block, then pull the cap and
its o-ring (
PN
2018) away from the Manifold
Block (figure 19).
25
If the comparator is not fitted with an
optional Fine Adjust, remove the second
Accessory Cap located on the other side of
the Manifold Block. Follow the procedure
outlined in step 24.
26
Clean all of the parts. Crystal recommends
you use an ultrasonic bath and a cleaning
solution that is compatible with the media
used in the unit.
In addition, we recommend that you use a
round brush to clean the piston hole in the
Manifold Block.
27
Reassemble the GaugeCal
XP
pressure com-
parator and optional Fine Adjust by follow-
ing the preceding steps in reverse order.
Replace all o-rings, backup rings, and main
seal with those supplied in the rebuild kit.
Refer to the illustrated parts list on page 6.
Dow Corning
®
111, or similar silicone-based
lubricants, are recommended for use on new
o-rings to ensure proper sealing.
When installing the gauge
bases, accessory caps, and fine
adjust; tighten the screws in the
order shown at right: first to a
snug fit, and then fully-torqued
to 85 in-lbs / 9.6 N-m.
List
Figure 16
Figure 17
Figure 18
Figure 19
1
3
2
4
Fine Adjust Piston
Fine Adjust Piston
Backup ring
(
PN
3150)
O-ring
(
PN
3129)
O-ring
(
PN
2018)
Accessory
Cap