Crystal GaugeCalXP Rebuild Kit User Manual
Page 2
Page 2
•
GaugeCal
XP
Service Instruction Sheet
C R Y S T A L
engineering corporation
6
Turn the comparator over to gain access to
the underside of the Baseplate.
Be aware that water or other test fluid may
still be present in the system, and may drain
out as the comparator is turned over.
7
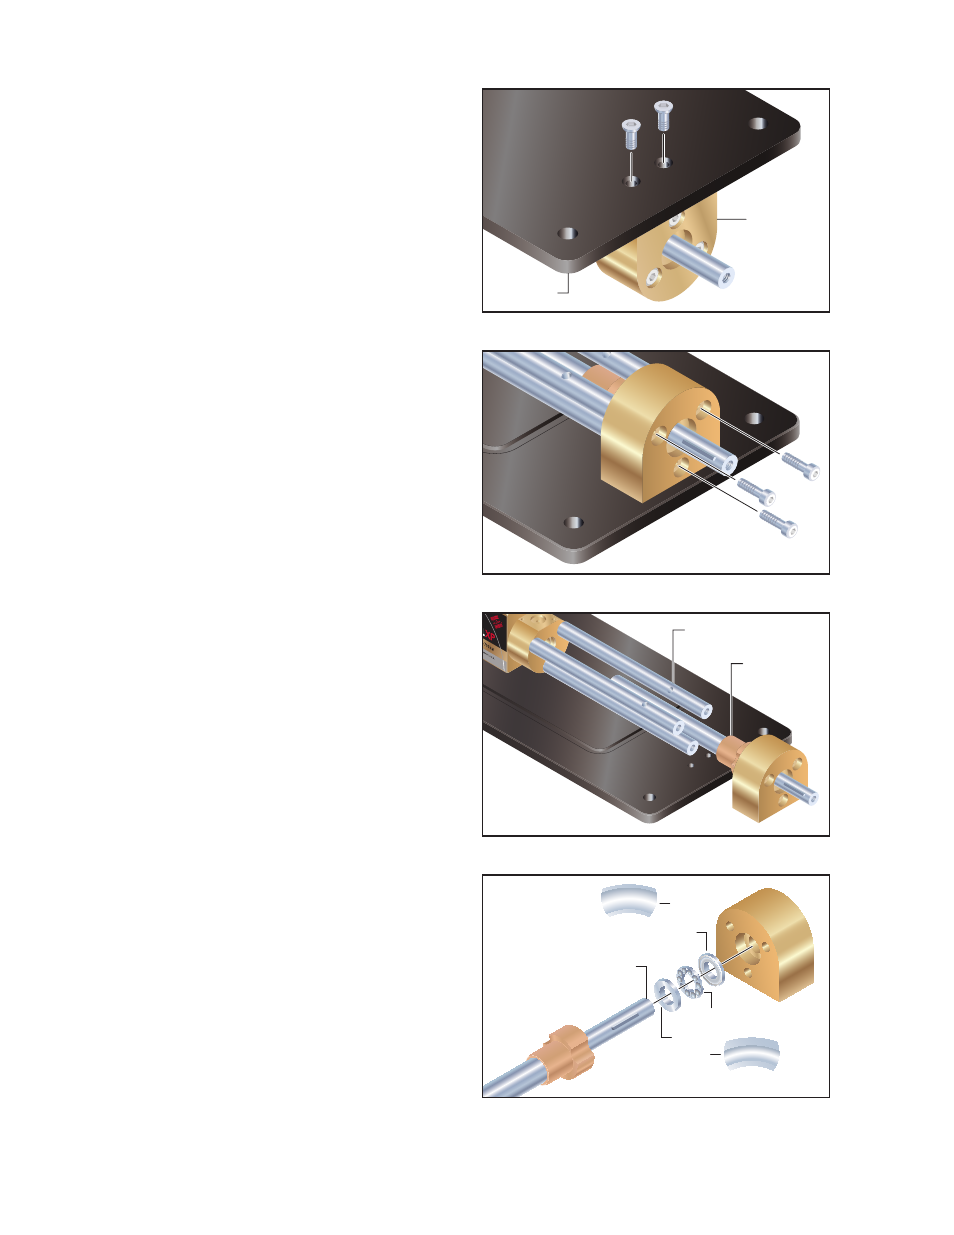
Use a 4mm Allen key to remove the two (2)
cap screws holding the Bearing Block to the
Baseplate (figure 4).
8
Turn the comparator back over, and then use
a 5mm Allen key to remove the three (3) cap
screws from the front of the Bearing Block
(figure 5).
9
Carefully pull to slide the Bearing Block and
Piston Assembly from the Manifold Block
and Baseplate, taking care to avoid making
contact with the three guide rods (figure 6).
10
Pull to slide the Piston Assembly from the
rear of the Bearing Block, and then remove
the Bearing Ring and Bearing Washer from
the front of the Leadscrew (figure 7).
Note:
A Bearing Ring may stay inside the
Bearing Block. Please note the correct
orientation of the Bearing Rings in relation
to the Bearing itself. The correct orientation
is the “open” side of the Bearing faces the
Wide Channel Bearing Ring . The “closed”
side faces the Narrow Channel Bearing Ring.
This will center the Bearing between the two
rings.
11
Unscrew the Piston Shaft from the Piston
Assembly for cleaning, and then apply a
light coat of multi-purpose lithium base
grease before reassembling
(figure 8).
Note:
The Piston Shaft has a left-hand
thread, so you will turn it clockwise to
remove it, and then counter-clockwise to
replace it.
Figure 4
Figure 5
Figure 6
Figure 7
Bearing Block
Baseplate
Piston
Assembly
Guide
Rod
Narrow
Channel
Bearing
Ring
Bearing
Wide
Channel
Bearing
Ring
Leadscrew