Crystal nVision Lab Reference User Manual
Page 19
Modules
17
nVision Operation Manual
5
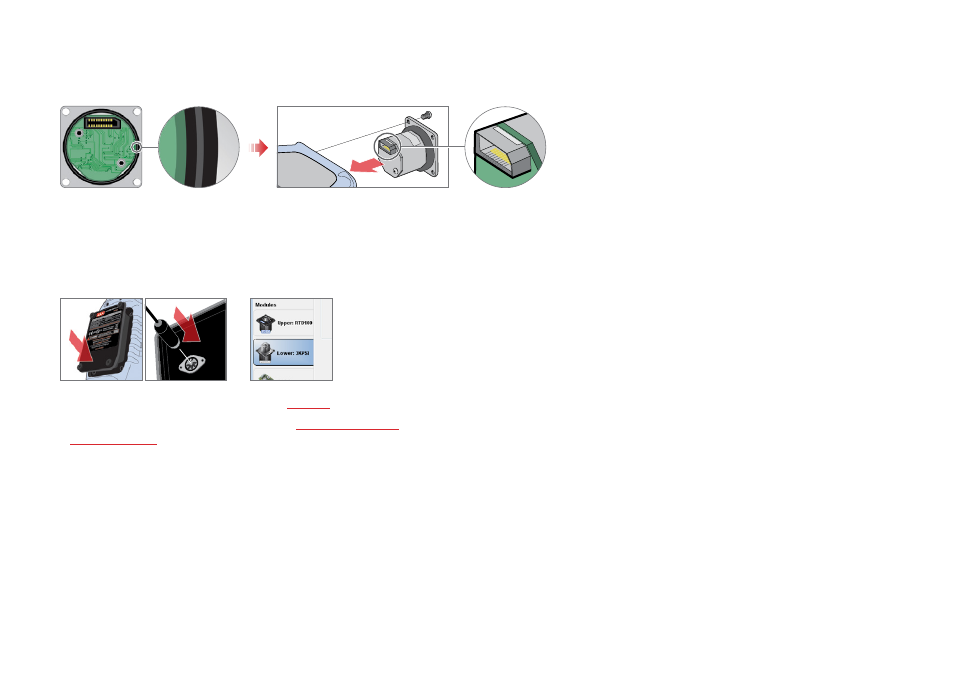
Install a new module in the same orientation as the one removed in step 4. The tri-lobe design of the module will not allow improper installation; do not
force installation of the module as permanent damage may occur. To ensure an IP67 rated seal, lightly lubricate the module’s o-ring (P/N: 4110) with Dow
111 silicon lubricant or equivalent.
(4x)
Lightly lubricate the o-ring, then install the module in the proper orientation.
Note:
If installing a Blank Plate, confirm orientation is flat and even within the module bay for proper sealing.
6
Tighten face plate T10 Torx screws to 50 in-oz (0.35 newton meter (N-m)) torque.
7
Replace power module/plug and tighten to 50 in-oz (0.35 newton meter (N-m)) torque to ensure IP67 seal. When power is first applied the unit will automatically
turn on. Ensure that nVision recognizes the new module by confirming in CrystalControl or the Summary screens.
8
Before using the nVision to record, Erase All Data. See
in the Chassis chapter.
9
If you have any problems during this process, check the
for relevant information or contact us at
or (805) 595-5477.