About this manual, Product description, Installation – Badger Meter Registers User Manual
Page 5: Panel installation
ABOUT THIS MANUAL
This manual contains information concerning the installation, operation and maintenance of the Badger Meter®
Model ER-6/R electronic registers
Installing, wiring and programming this unit is simple and straightforward This manual provides you with a step-by-step
guide for this purpose
The troubleshooting section lists the most common problems that can be encountered, their most likely cause and the
recommended solution If a problem persists, please contact our technical support group at:
Badger Meter, Inc
Customer Service
1-800-876-3837
PRODUCT DESCRIPTION
The ER-6 register is a remote totalizer designed for use with all Badger Meter product lines
The supertwist LCD display with 8 digits for totalizing, provides easy viewing at a glance For conditions where ambient light is
poor, the display can be backlit by connecting an external DC (10…28V DC) power supply A single unit can accept NPN or dry
contact inputs for low or high speed applications
The ER-6/R is powered by one replaceable 3V Lithium battery You can install a new battery before removing the old one,
thereby retaining count total A low battery indicator appears on the screen to provide a warning a couple of weeks before
the end of battery life If two batteries are used simultaneously, the individual expected life doubles to 10 years
INSTALLATION
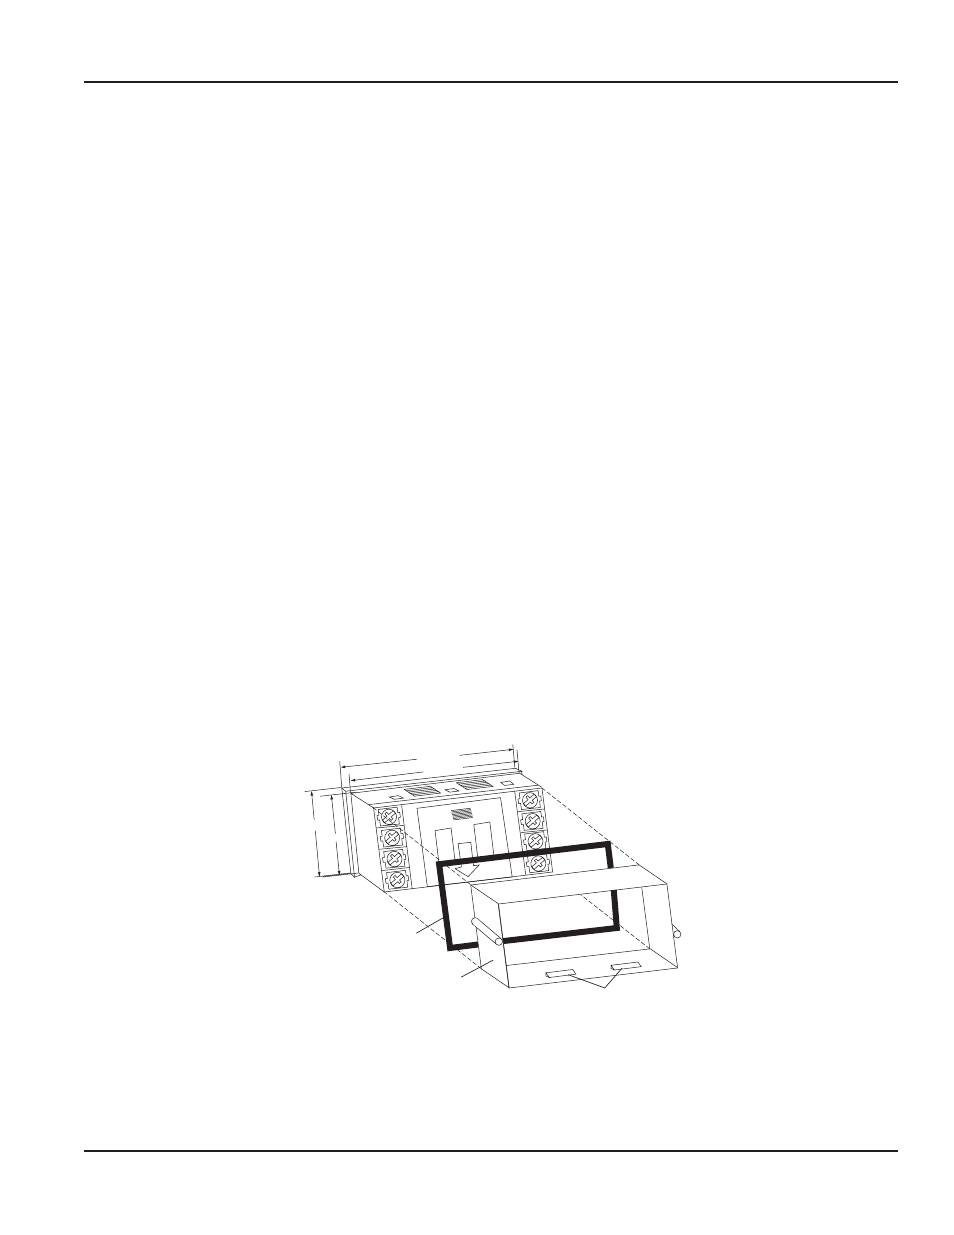
Panel Installation
Place the unit in the panel through a 33 mm x 68 mm cutout Slide the included gasket over the rear of the unit, then slide
the panel mount bracket into place so that the 4 tabs catch in the grooves on the top and the bottom of the unit (the bracket
should be oriented so that the tabs are on the side nearest the panel) Use the provided panel mount screws to tighten the
bracket until there is a secure seal against the gasket Do not over tighten
72 mm
8
7
6
5
1
2
3
4
68 mm
33 mm
36 mm
Mounting
Bracket
Gasket
Tabs
Figure 1: Panel installation
Installation & Operation Manual
Page 5
February 2013