Anti vibration mounting, Ultima compact condensing units, Installation data – Airedale Ultima Compact Condensing Unit 30kW - 450kW User Manual
Page 32
ULTIMA COMPACT
Condensing Units
32
Condensers & Condensing Units
Technical Manual : Part No 904-047 V1.4.0_02_2013
Installation Data
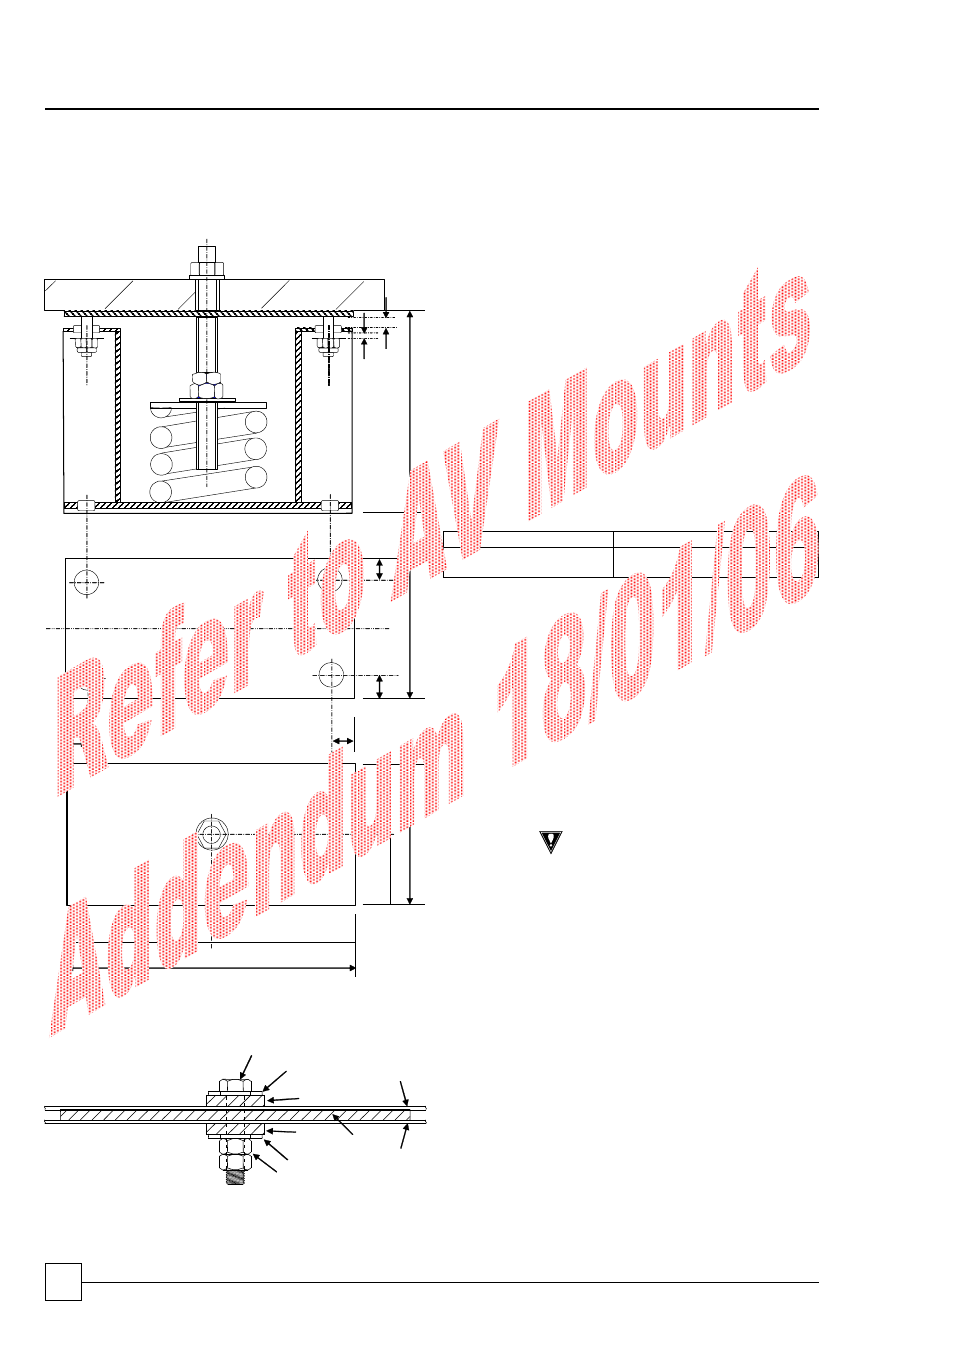
ANTI VIBRATION MOUNTING - OPTIONAL
Spring Type (CLS)
C
C
C
C
A
D Ø
15
16
A
B
14
1
2
3
4
5
6
7
8
9
10
11
12
13
13
5
X
=
=
=
=
3
- 5
m
m
3
- 5
m
m
1
High deflection steel spring
2
Spring pressure plate
3
Height adjusting nut
4
Locking nut
5
Load bearing supports
6
Load bearing top plate
7
High frequency isolation pad
8
10 dia holding down bolt holes
9
High frequency isolation grommets
10 Steel spring location rings
11 Transportation/restraining bolts
12 Machine frame
13 Machine holding M16 stud/nuts
14 ELEVATION
15 BASE PLATE
16 TOP PLATE
Selection:
Model Size
A
B
C
D
X
30 - 80 (ex 75)
mm
75 150
15
10 120 - 150
75 - 450 (ex 80)
mm 100 200
20
14 180 - 210
Installation:
1
Locate and secure mount using bolting down holes
provided in base plate.
2
Ensure mounts are located in line with the
chiller base.
3
Position the machine using the centrally located
stud, which allows the machine to be bolted
down securely.
4
Loosen transit bolts and turn nut 3 clockwise until
top plate 6 lifts clear of support posts. Tighten lock
nut 4 when machine is at desired height and level.
5
Adjust and lock nuts on transit bolts such that a
small (3-5mm) gap is left between washer and
grommet. Refer to diagram.
CAUTION
Mountings must be adjusted in increments of no
more than 1mm in turn. Do not adjust 1 mount
completely at a time as this may overload and
damage springs.
Do not connect any services until all anti vibration
mounts have been fully adjusted.
FINALLY, recheck/adjust mounts following unit
connection to services and system is filled.
Pad Type
1
2
3
2
5
4
3
6
7
1
M16 Bolt (Not Supplied)
2
Washer (Not Supplied)
3
Fixing Pad 506-063
4
A V Pad 506-062
5
2 x M16 Nut (Not Supplied)
6
Unit Base
7
Unit Mounting Plinth