System setup, System settings (system system tab) – Revo R4CMB-500 User Manual
Page 17
4 Channel Digital Video Recorder
11
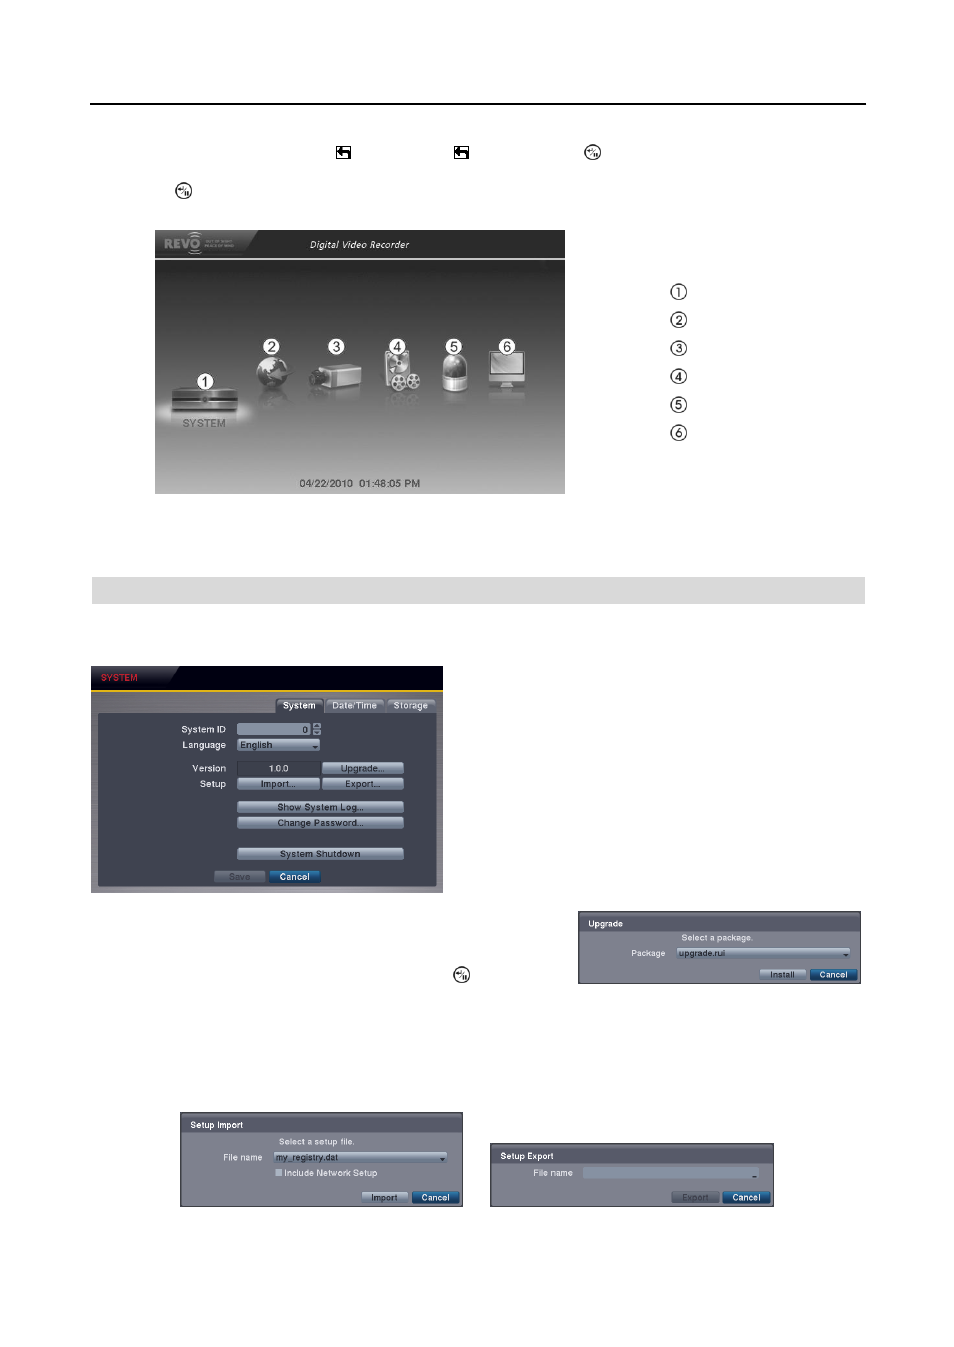
Throughout the screens you will see . Selecting the and pressing the
button on the remote control gives you
the opportunity to reset that screen to its default settings. You can save your changes by selecting the Save button and
pressing the
button. Selecting the Cancel button exits the screen without saving the changes.
System Menu
Network Menu
Camera Menu
Record Menu
Event Menu
Display Menu
NOTE: When the installed hard disk drive is not formatted, a message box appears asking you to format the
hard disk drive. If you want to record video, you must format the hard disk drive.
SYSTEM SETUP
System Settings (SYSTEM System Tab)
System ID: Set the system ID. Use the Up and Down
arrow buttons or scroll the mouse wheel to increase or
decrease the number.
NOTE: It is possible to have multiple DVRs with the
same System ID in the same area. In this case, all DVRs
with the same System ID will be controlled at the same
time when using the infrared remote control for that ID
number.
Language: Select the desired language.
Version: Displays the software version of the DVR. To upgrade the
software, connect a USB flash drive containing the upgrade package
file (.rui) to the DVR. Selecting Upgrade… displays the Upgrade
screen. Select the desired upgrade file and press the
button. The
system restarts automatically after completing the upgrade.
Setup: Imports saved DVR settings or exports the current DVR settings.
Import... – To import saved DVR settings, connect a USB flash drive containing the setup file to the DVR and select the
desired setup file. Checking the Include Network Setup box changes the network settings.
Export... – To save the current DVR settings in .dat file format, connect a USB flash drive to the DVR and enter a file name
for the settings.