KROHNE DA Flap-type EN User Manual
Page 12
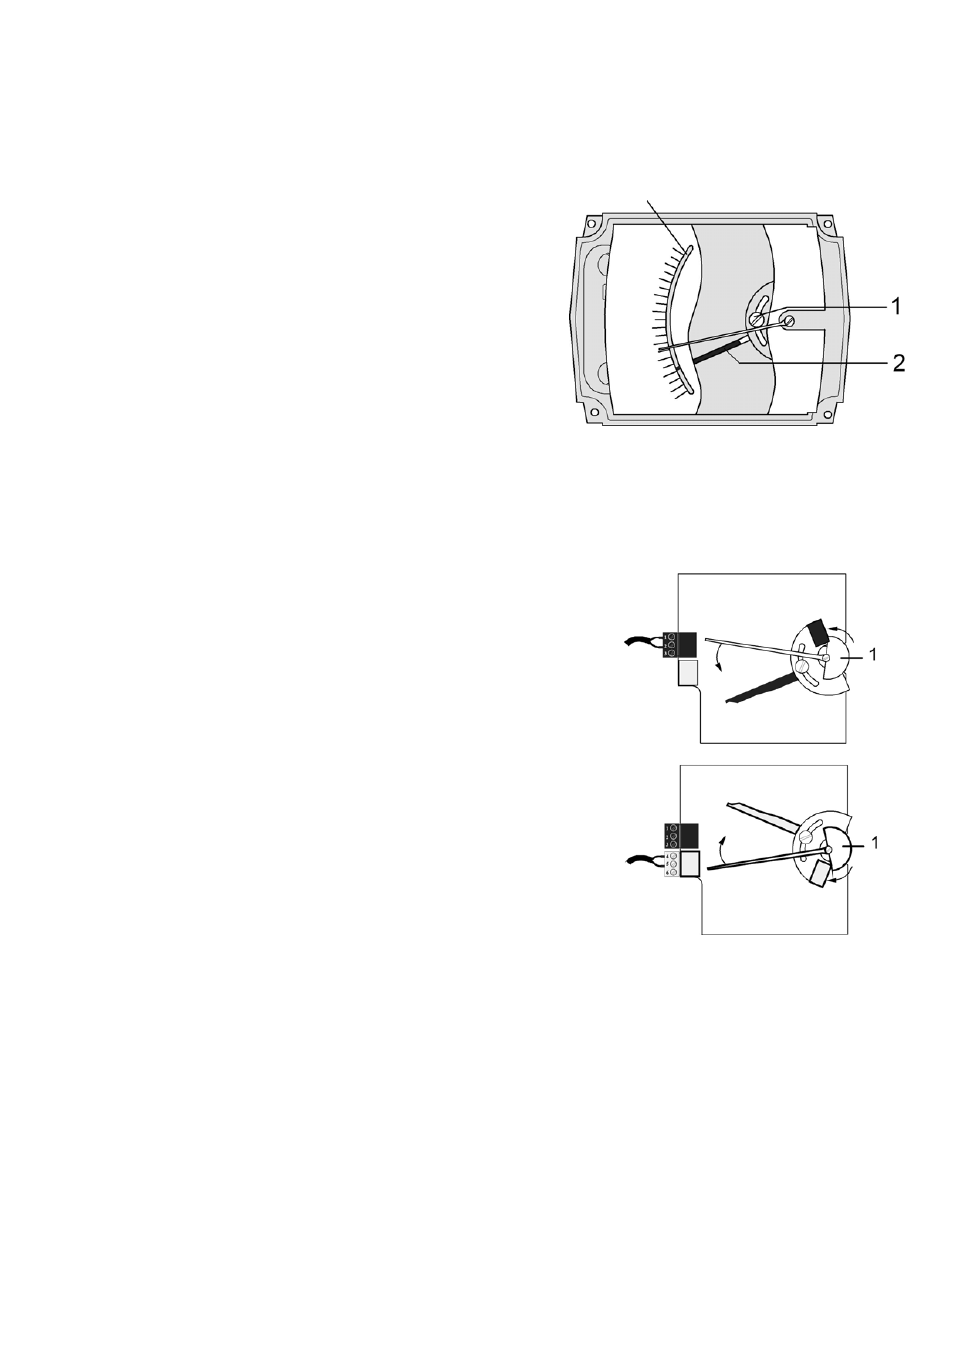
8.1.2 Limit
setting
The setting is carried out directly via the contact pointer (2):
Scale opening
- Slide the scale away
- Loosen the locking screw (1) slightly
- Slide the scale back to the latching point
- Set the contact pointer (2) to the desired switching point
- After setting, the contact pointer (2) is to be fastened
hand-screwed again with the locking screw (1) (max. 40 Ncm).
- Screw on the housing cover.
.
8.1.3
Switch contact definition
MIN
contact
If the pointer vane (1) enters the slot, an alarm is triggered. If the
pointer vane lies outside the slot initiator, a wire break also causes
the alarm to be triggered.
No wire break recognition at SB3,5-E2
Option: Implementation as a maximum contact
In the alarm status the vane lies outside the slot.
Wire break recognition is not available here.
MAX
contact
If the pointer vane (1) enters the slot (and thus dampens this initiator),
an alarm is triggered. If the pointer vane lies outside the slot initiator,
a wire break also causes the alarm to be triggered.
No wire break recognition at SB3,5-E2
Option: Implementation as a minimum contact
In the alarm status the vane lies outside the slot.
Wire break recognition is not available here.