GW Instek GDS-2000A series Quick start quide for DS2-LAN User Manual
Lan & svga card
LAN & SVGA Card
DS2-LAN
QUICK START GUIDE
GW INSTEK PART NO. 82DS-23042MA1
ISO-9001 CERTIFIED MANUFACTURER
Installing the LAN & SVGA Card
The DS2-LAN card needs to be installed into the
module slots on the rear panel.
Do not insert or remove the modules with the power
on.
1. Slide the tabs holding the
module cover to the unlock
position and then remove.
2. Install the LAN & SVGA card. Be sure to make
sure that the groves on the module line-up to the
slots in the module bay.
3. Slide the locking mechanisms back to the locked
position.
4. Turn on the GDS-2000A.
5. The GDS-2000A is now ready to operate
Configuring the Ethernet Settings
The Ethernet interface is used for remote configuration
of the oscilloscope over a network using the integrated
web server or for remote control using a socket server
connection.
1. Connect an Ethernet cable to LAN port on the
DS2-LAN card.
2. Press the
key and select I/O > Ethernet.
From the Ethernet menu use the Variable knob,
Select key and arrow soft-keys to edit the
Ethernet settings.
Instrument Name, User Password,
Instrument IP Address, Domain Name, DNS
IP Address, Gateway IP Address, Subnet
Mask
Note: HTTP Port is fixed at 80.
Configuring the Socket Server
The GDS-2000A supports socket server functionality
for direct two-way communication with a client PC or
device over LAN. By default, the Sockets Server is off.
1. Configure the Ethernet settings as described
previously.
2. Press the
key and select I/O > Socket
Server > Set Port. Use the Variable knob to set the
socket server port number.
3. Press Set Port to confirm the port number.
4. Press Server to toggle the socket server on.
The socket server is now ready. Please see
the user manual for more details.
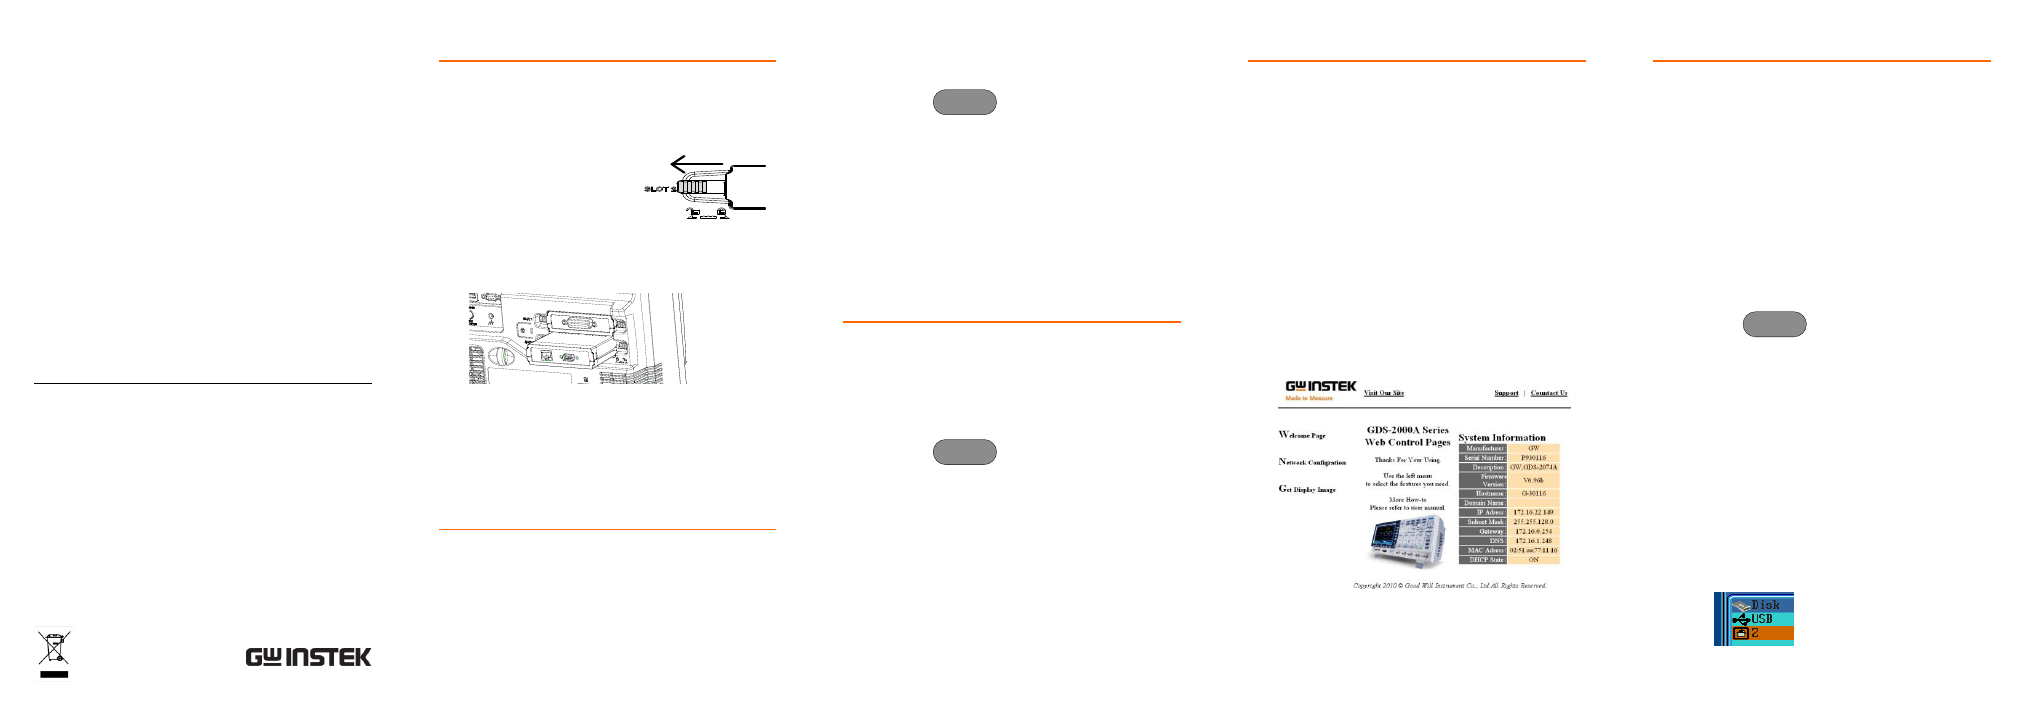
Accessing the Web Server
The GDS-2000A has an inbuilt web server that can be
used to:
View the system information (Welcome
Page)
Set/view the network configuration settings
(Network Configuration)
Remotely view the current display image on
the unit (Get Display Image).
1. Configure the Ethernet settings as described
previously.
2. Enter the IP address of the GDS-2000A into the
address bar on a web browser. For example:
http://172.16.20.255
3. The GDS-2000A Welcome page appears.
Using the Remote Disk App
The remote disk app will allow you to access and save
files to a network disk. The following instructions
assume that you have already installed the remote disk
app. See the GW Instek website to download the app.
1. Configure the Ethernet settings as described
previously.
2. Create a network share on a remote disk for use
with the remote disk app.
Make sure the share path is on the C: drive.
Create a user name and password for the
network share.
3. Press the
key and select Mount Remote
Disk.
4. Enter the details of the remote disk:
IP address of the remote disk.
The path name of the remote share.
User name and password for share.
5. Press Mount from the side menu.
When the mounting is successful, Complete!
will be displayed on the screen.
In the file utilities menu, the network
disk/share will be shown as Z: drive.