Figure 4 main 880 terminal blocks and connections, Figure 5 remote rs-422 connections, Figure 6 remote interconnect wiring – Detcon 880RS-N4X User Manual
Page 8
880R-N4X
880R-N4X Instruction Manual
Rev. 0.0
Page 4 of 16
TXD+
TXD-
RXD+
REMOTE
OUTPUT
RXD-
0V
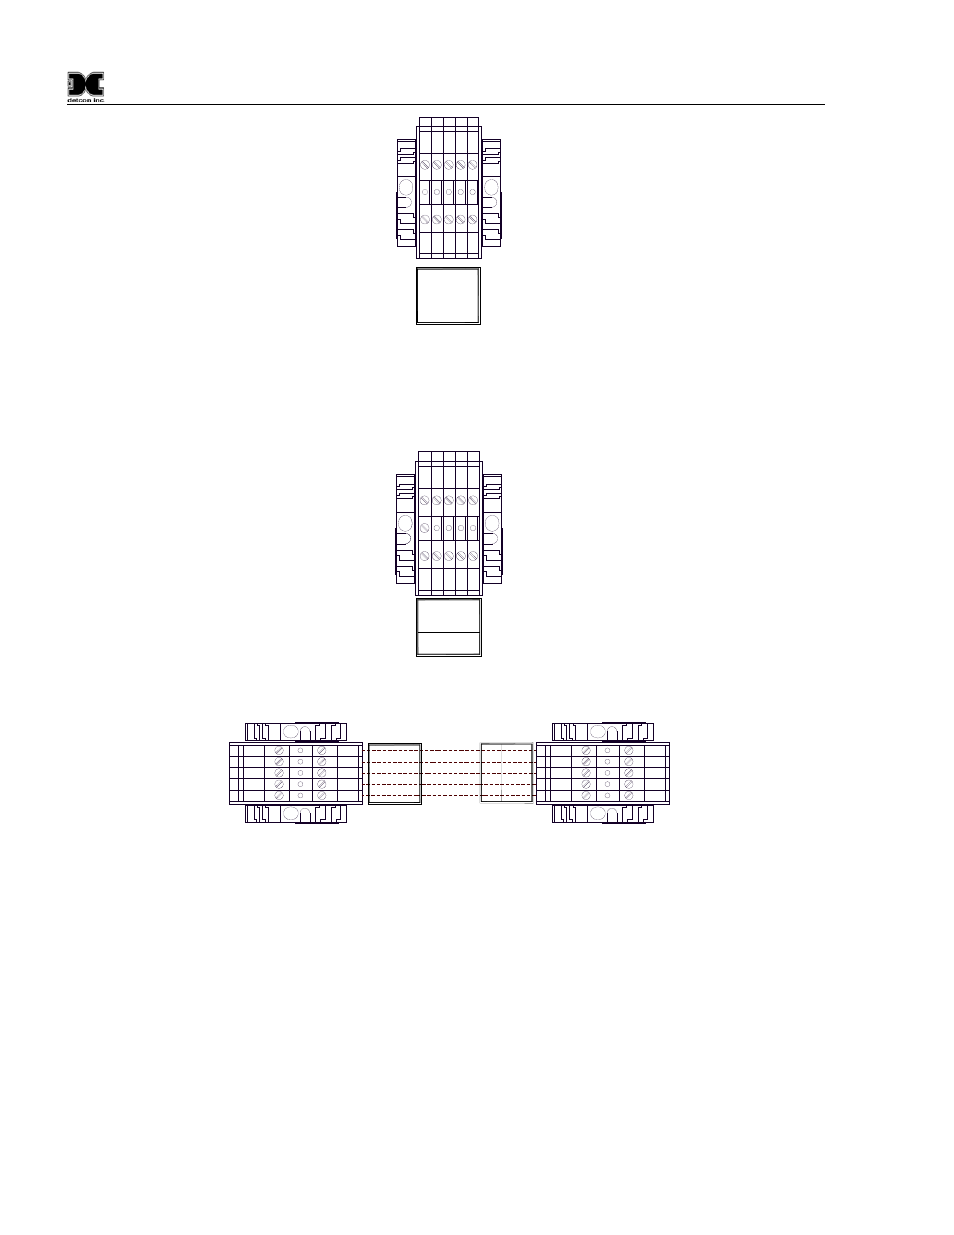
Figure 4 Main 880 terminal blocks and connections
4. Connect the RS-422 Serial communications cable to the input terminal blocks inside the 880 Remote
Display labeled “TERMINAL INPUT” as shown in (Figure 5).
TX
D
+
TXD
-
RX
D
+
TERMINAL
INPUT
RXD
-
0V
Figure 5 Remote RS-422 connections
0V
RXD-
REMOTE DISPLAY
RXD+
TXD+
TXD-
CUSTOMER SUPPLIED
WIRING
TXD+
TXD-
RXD+
T
E
R
M
IN
A
L
IN
P
U
T
RXD-
0V
TXD
+
TXD-
RXD+
RE
MO
TE
OU
T
P
U
T
RXD-
0V
MAIN 880
Figure 6 Remote Interconnect Wiring
5. Connect 110-220VAC input to the Fuse Block labeled “VAC (L1)” in the lower left of the enclosure.
Connect Neutral (or L2) to terminal labeled “NEU (L2)” and Ground to the Green/Yellow terminal
labeled “GROUND” (Figure 7). The power supply is able to accept AC input voltages from 100 to
240 volts at 50 or 60Hz.