Start up, Flow fault detection, Figure 2 power and rs-485 connections – Detcon 974-071170-BCR User Manual
Page 6: 1 flow fault detection
Ballast Monitor I.M.
Ballast Monitor Instruction Manual
Rev. 0.0
Page 2 of 8
2. Install four lengths of tubing from the desired sample points to the appropriate ‘Sample Port’ inlet on the
Ballast Monitor. There are four input ‘Sample’ ports that should be connected to for separate sample
points.
Note: When detecting for NH3, CL2, CLO2, or HCL care must be taken to use a minimum
amount of stainless steel tubing and connections because stainless steel readily absorbs these
gasses and will cause significant error in the detection process. Teflon tubing is recommended
for these applications.
3. If applicable, connect tubing from the ‘Vent’ and the ‘Bypass’ ports to a “Safe” area for proper ventilation.
4. Connect the RS-485 Modbus™ wiring to the terminal blocks labeled RS-485 ‘A (+)’, ‘B (-)’, and ‘Shld’.
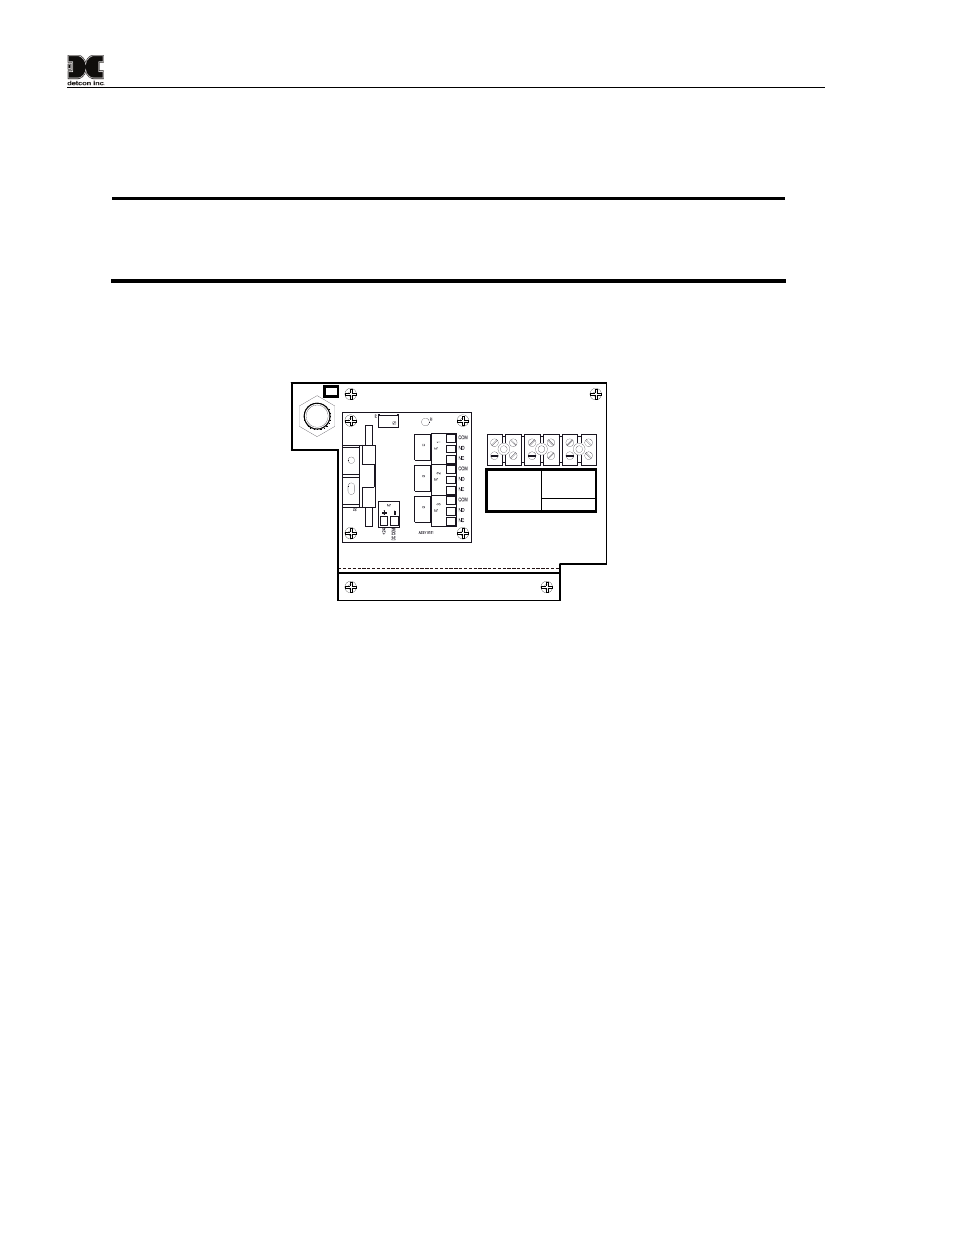
F1
VA
C
(
L
1)
NEU (L
2)
Gr
ou
nd
A (+)
B (
-)
Sh
ld
RS-485
Figure 2 Power and RS-485 Connections
5. Connect 120VAC to the terminal block inside the enclosure labeled ‘VAC (L1)’, ‘NEU (L2)’ and
‘Ground’.
3. Start Up
Upon completion of all tubing connections and field wiring turn on the power switch located on the front of
the enclosure. If applicable, note that the sensor LCD indicator activates. Varying readings may occur during
sensor warm-up. Allow approximately 1 hour for sensor readings to stabilize (24 hours is best).
Set sample flow through the flow meter. Adjust the sample flow meter as necessary to achieve the desired
flow rate. Assure that all field tubing connections are secure by obstructing the end of the sample lines and
observing that the flow meter decreases to “0” flow.
3.1 Flow Fault Detection
Flow fault detection consists of a flow fault circuit assembly located inside the enclosure. If the sample flow
rate falls below a predetermined set point the Ballast Monitor Controller will flag a ‘Flow Fault’.
Because the pressure inside the sample and vent flow tubing differs according to the tubing length, the flow
fault circuit will require calibration after installation.
To calibrate the flow fault circuit, first determine at what point it is desired that the flow fault circuit is
activated. Typically, air flow should range between 500 and 1000 ml/min. (milliliters per minute) as seen on
the flow meter located on the left of the enclosure. It is recommended that the flow fault circuit be set to
activate at a flow of approximately 300 ml/m.