Assembly and adjustments (continued) – WEN 6501 4 x 6 Belt / Disc Sander User Manual
Page 14
Assembly and adjustments (continued)
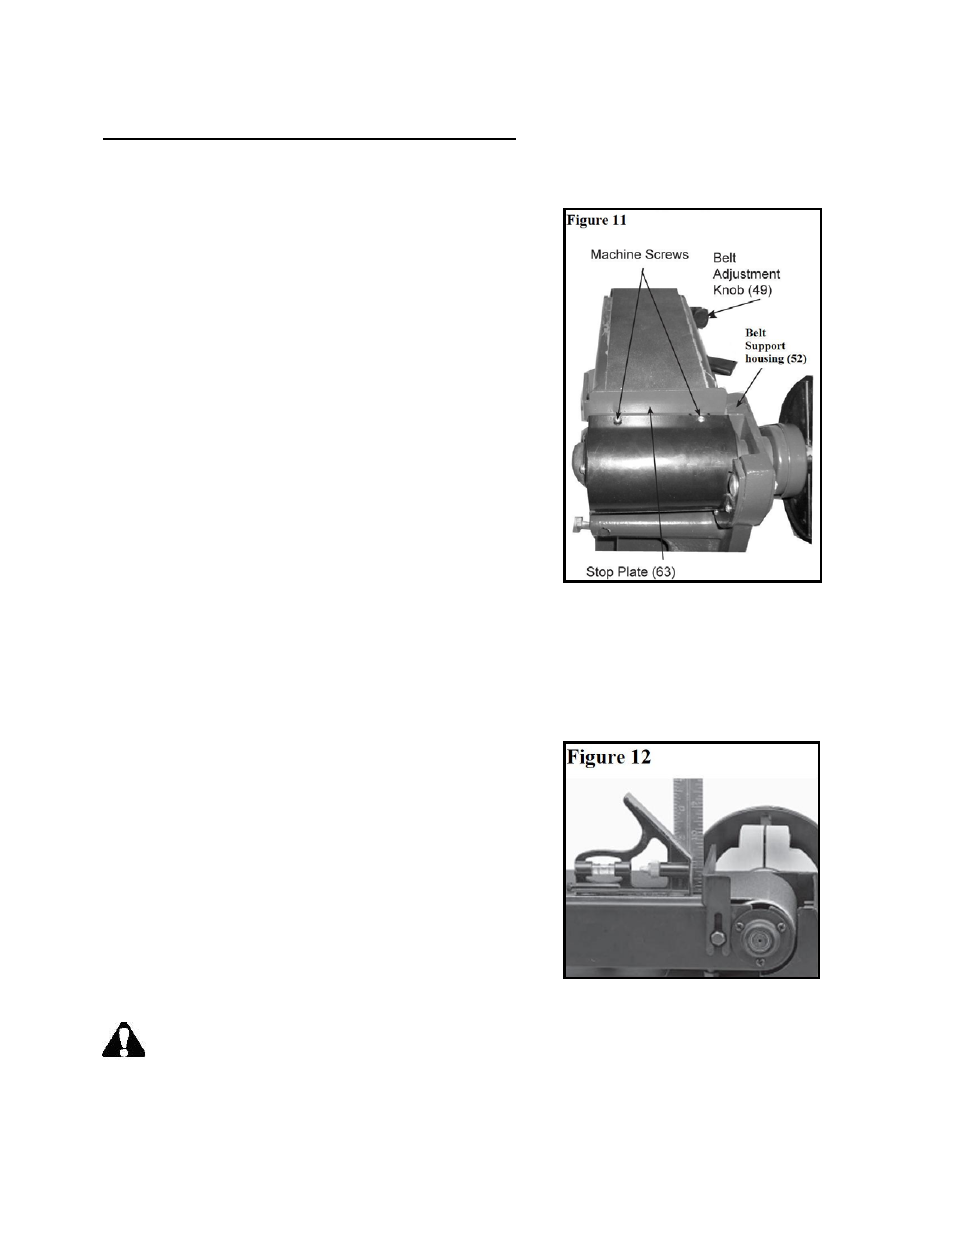
Mounting stop plate
This Stop Plate (63) fits across the top of the sanding belt
and is for preventing workpiece from moving to the rear
when sanding.
1. Align the two Tabs on the Stop Plate (63) with the two
Holes on the top of the Band Support Housing (52).
The Tabs will be underneath the Flange on the Band
Support Housing (52).
2. Insert two Machine Screws into the two Holes and
thread them into the Tabs on the Stop Plate (63).
3. Mount the Stop Plate (63) to the Band Support
Housing (52) using Bolt (32), Flat Washer (26) and
Lock Washer (27). (See Figure 11)
Square the stop plate
(Figure 12)
The stop plate (63) must be square to the sanding belt when using the belt sander in a horizontal
position. To keep the workpiece from being carried along
the belt:
1. Make sure the sanding belt is tight; also check that the
tension handle is fully tightened.
2. Place the combination square (not provided) on the belt
with the ruler against the stop plate (63).
3. Adjust by loosening the stop plate locking bolt (32),
square the backstop.
4. Tighten the stop plate locking bolt (32).
WARNING: To avoid trapping the workpiece or fingers between the sanding belt and the
stop plate, the stop plate edge should be adjusted to a maximum of 1/16 inch from the sanding belt.
Model: 6501
wenproducts.com
14