Installation (cont'd.), Maintenance, Trouble shooting – Van Air Systems AHP High Pressure Alloy Filter Series IOM User Manual
Page 3: Warning
PAGE 3
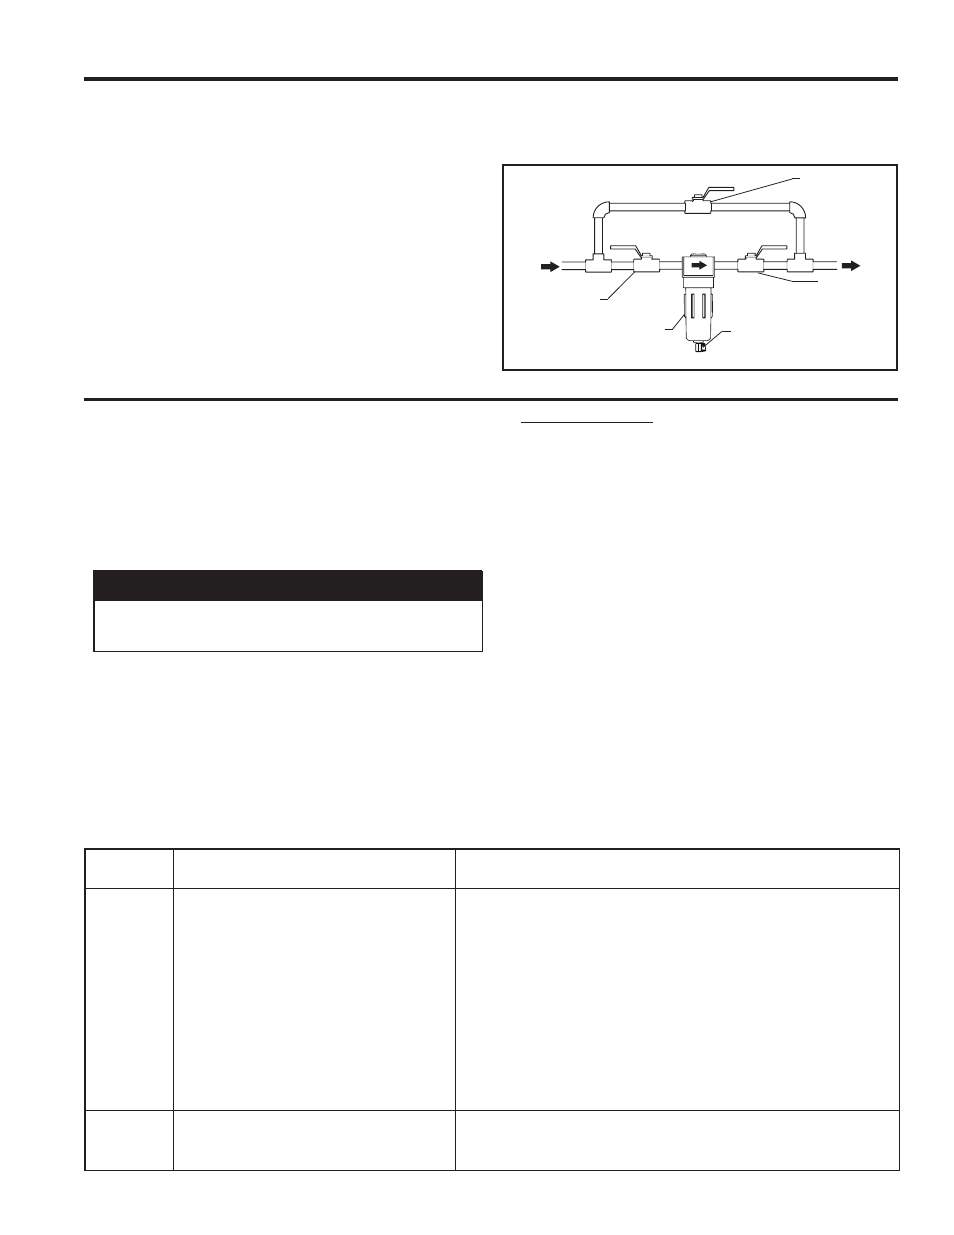
FIGURE 1A BYPASS PIPING
INSTALLATION (Cont'd.)
INLET
SHUTOFF
VALVE
FILTER
OUTLET
SHUTOFF
VALVE
9. Check to make sure that the housing o-ring is in the
proper position. Thread filter bowl into filter head and tighten
either by hand (models AHP-25 through 40) or with strap
wrench (models AHP-65 through 470). Do not over tighten.
Overtightening could damage filter bowl or make it difficult
to remove.
10. Install a drain valve (customer supplied) rated for the filter
MWP into the drain connection and make sure drain valve is
closed. If a drain valve is not used, install the drain plug into
the filter bowl drain connection and tighten.
11. Pressurize system and
SLOWLYopen inlet and outlet shutoff
valves.
12. Check piping for leaks. Depressurize system and repair
leaks as needed.
13. Re-pressurize system and slowly open inlet and outlet
shutoff valves.
14. Filter is now in service.
MAINTENANCE
Drain coalescing filters every shift.
Check differential pressures weekly on coalescing and par-
ticulate filters (AA, A, B, C, RA, RB, and RC grades). When
indicator is in the red, install clean elements. On adsorbing
filters (grade RD), install clean elements when hydrocarbon
vapors are first detected downstream or every six months,
whichever comes first.
•
•
CHANGE ELEMENT
TROUBLE SHOOTING
CONDITION
POTENTIAL CAUSE
RECOMMENDATION
Oil carryover
Oil present in system before installing filter.
Clean piping.
Excessive inlet oil >50ppm.
Check compressor and/or gas/oil separator if compressor is rotary vane or screw type.
Check lube rate if reciprocating compressor. Install coarse coalescer for prefiltration.
Filter installed backwards.
Check flow direction (See page 1).
Filter bowl not being drained.
Drain more frequently.
High differential pressure.
Check filter idicator, replace element if necessary.
Defective seal
Check o-ring in element.
Unfiltered gas entering from source down stream of
filter.
Relocate filter or install additional filter.
High operating temperatures.
Install, clean, replace or relocate aftercooler, or relocate filter.
Short element
life
High compression temperatures causing varnish/car-
bon formation.
Use compression lubricant with good temperature stability. Lower lube rates where
possible. Use coarser grade filter element.
Oil/water emulsion overloading element.
Inspect moisture separator. Remove water with better separation.
WARNING
RD elements do not remove carbon dioxide (CO2),
carbon monoxide (CO) or other toxic gasses or fumes.
1. Shut off compressed air supply to the filter housing.
2. Completely depressurize filter housing.
3. After all pressure is removed form the filter housing, grasp
the filter bowl and turn it counter-clockwise to unscrew it from
the filter head. Strap wrenches can be used on the bowl if
necessary.
4. Remove used element by pulling downwards. Dispose of
used element properly.
5. Check housing o-ring for nicks or cuts. Replace as needed.
Make sure o-ring surface on bowl is clean.
6. Make sure o-rings are in place on new element. Grease
o-rings lightly with silicone free grease.
7. Clean and lubricate the threads on the filter bowl with a light
coat of silicone free grease. This allows the bowl to be easily
removed during next service.
8. Place filter bowl over element and turn it clockwise to screw
it into the head. Do not over tighten.
9. Close drain valve on filter (if installed).
10. Slowly repressurize the system and check for leaks. If leaks
are present, depressurize the system completely and check
the head to bowl o-ring and replace if necessary. Repres-
surize the system.
BYPASS
VALVE
DRAIN VALVE
(CUSTOMER
SUPLLIED)