Safety rules when using a stapler, Dismantling & assembly instructions, Operating – Universal Air Tools UT021A (HP021) User Manual
Page 2: Reassembly, Disconnect tool from air supply
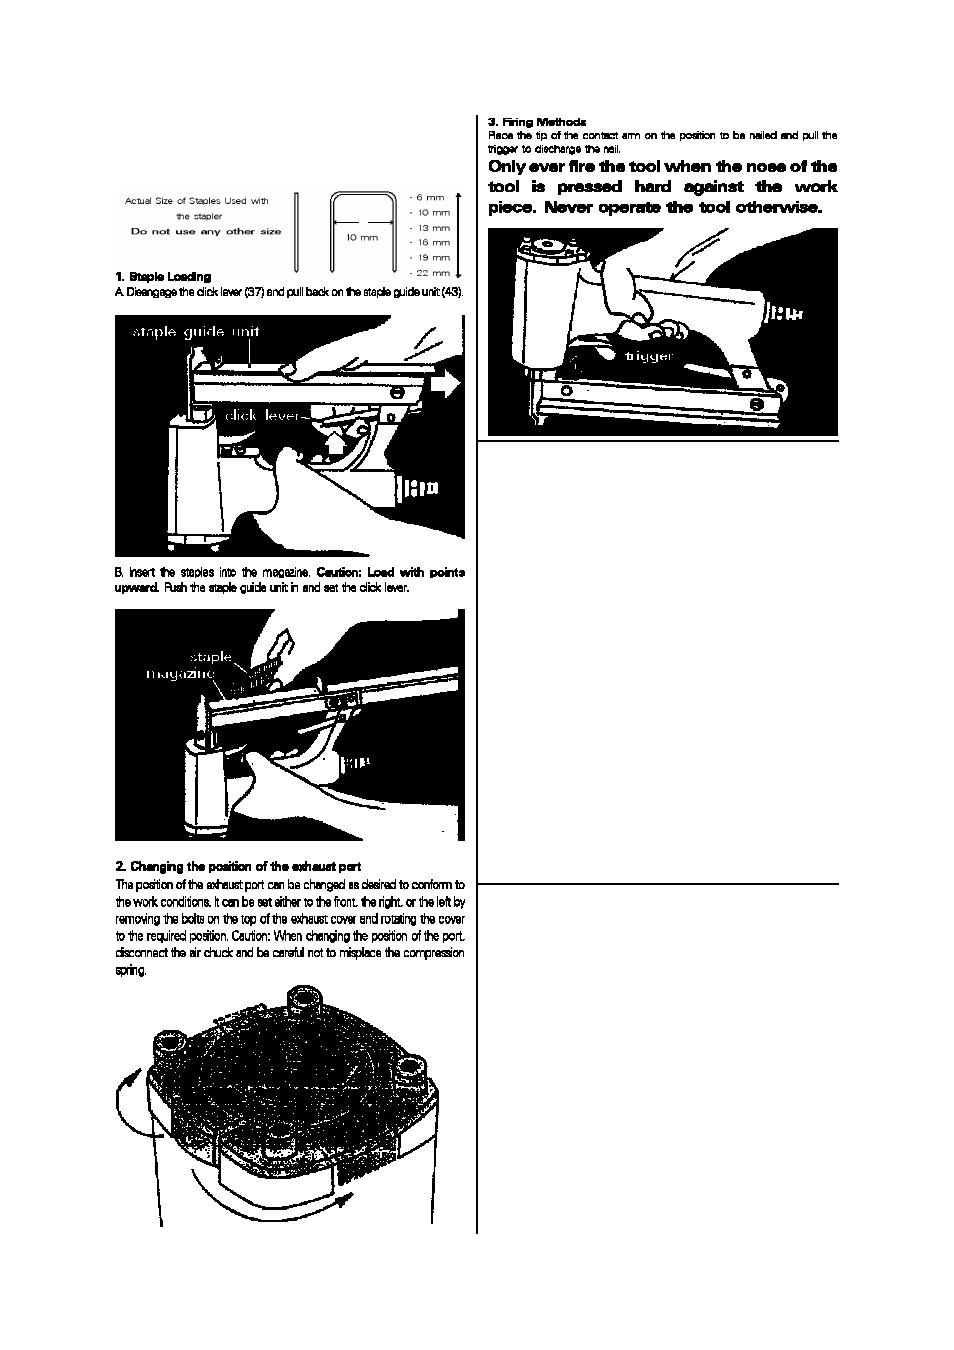
Page No 2
Safety Rules When Using a Stapler
1) Read all the instructions before using this tool. All operators
must be fully trained in its use and aware of these safety rules.
2) Do not exceed the maximum working air pressure.
3) Use personal safety equipment.
4) Use only compressed air at the recommended conditions.
5) If the tool appears to malfunction remove from use
immediately and arrange for service and repair.
6) If the tool is used with a balancer or other support device
ensure that it is fixed securely.
7) Always keep hands away from the working attachment fitted
to the tool.
8) The tool is not electrically insulated. Never use the tool if there
is any chance of it coming into contact with live electricity.
9) Always when using the tool adopt a firm footing and/or
position and grip the tool firmly to be able to counteract any
forces or reaction forces that may be generated whilst using the
tool.
10) Use only correct spare parts. Do not improvise or make
temporary repairs.
11) Do not lock, tape, wire, etc. the on/off valve in the run
Dismantling & Assembly Instructions
Disconnect tool from air supply.
Grip body (19) in a vice fitted with soft jaws and remove air plug
(32). Take out 2 off screws (38) and operate click lever (37) and
slide off staple guide unit (43). Slide off pusher (42) and
disengage from each end of pusher spring (41). Unscrew nut
(36) from hex bolt (1) and remove both items. Unscrew 2 off
screws(1) and remove spacer (34) and pull off magazine unit
(35) with driver guide (44). Remove ‘E’ ring (30) and pull out
stepped pin (39) and remove click lever (37) and coil spring (40).
Remove a second ‘E’ ring (30) and pull out stepped pin(22) and
take off trigger (21), spring (29) and unscrew trigger valve guide
(27) and separate seal (23), trigger valve head (24), trigger valve
stem (25) and O-rings (26) and (28). Take out 4 off screws (1)
and remove exhaust cover (2), spring (3) and seal (4). Remove
O-ring (16) and pipe (17) and O-ring (18) from body (19). Take
off cylinder cap unit (5) and remove O-rings (6) and (7) from it.
Pull out piston assembly (31) and head piston valve (9). Remove
O-ring (33) from piston assembly (31) and flat washer (8), piston
stop (10) and O-rings (11) and(12) from head piston valve (9).
Remove collar (13), cylinder (14) and bumper(15) from body
(19) and remove O-ring (11) from cylinder (14).
Reassembly
Clean and examine all parts, particularly seals and O-rings for
wear and reassemble in the reverse order. Use only
manufacturer or authorised distributor supplied spare parts.
Operating
Disconnect tool from air supply.