U.S. Sunlight 2014ST Rigid Tube Kit User Manual
Removal of the old fl ex tube material, Required tools box contents / parts list
www.ussunlight.com
Rigid Tube Kit for Model 2014ST
Installation and Mounting Guide
The Rigid Tube Kit can be installed as a retrofit to the standard flex tube that has
already been installed, or as part of a new installation of the 2014ST. Please read the
entire installation guide before beginning your installation.
Tel: 877 55 US SUN
(877-558-7786)
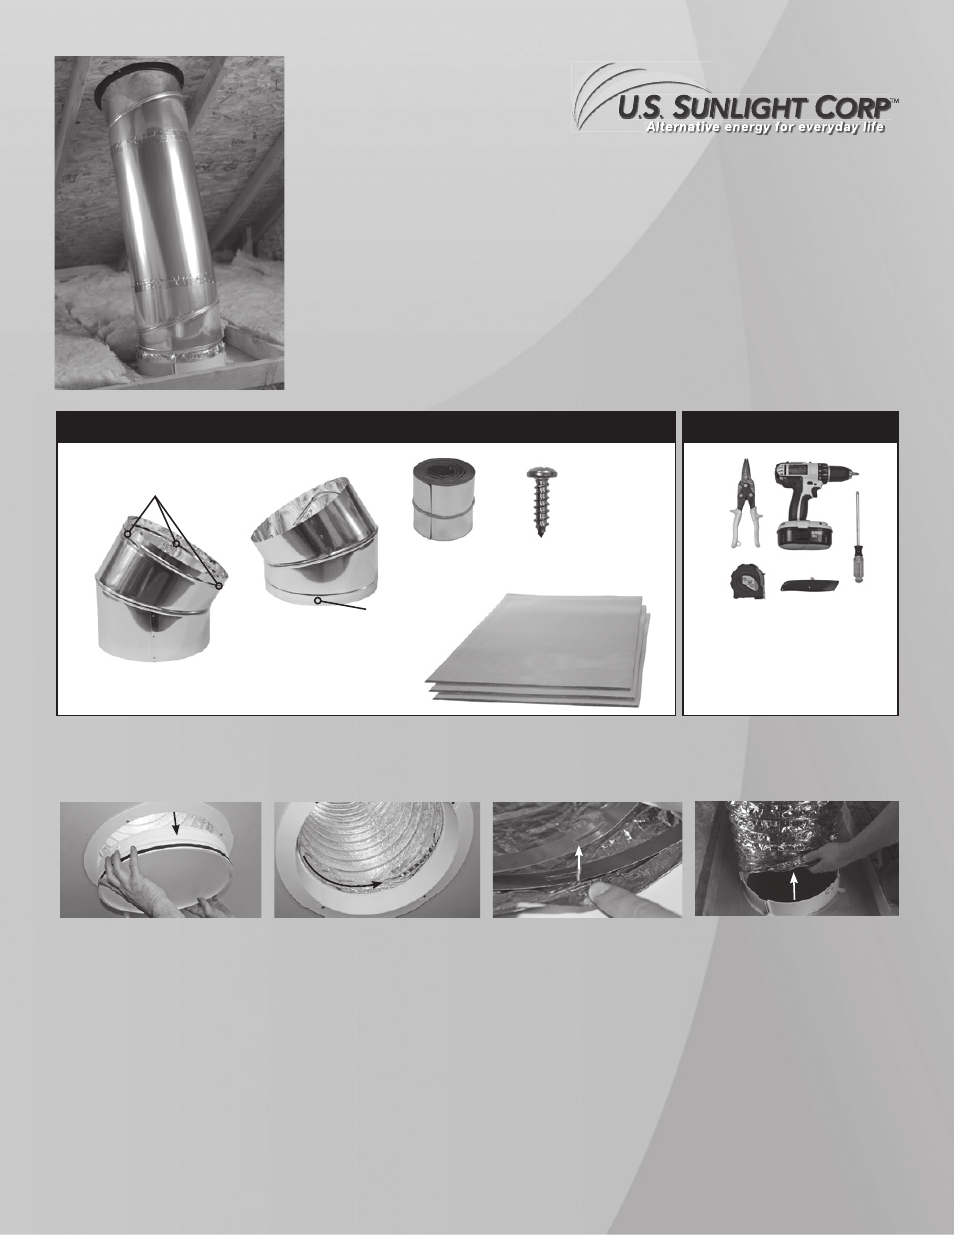
Removal of the old fl ex tube material
fig. 1
fig. 2
fig. 3
fig. 4
Step 1
You will need to remove the diffuser assembly and retaining
band from the diffuser housing first. Start by removing the trim
ring and diffuser assembly.
(fig. 1)
Step 2
Using a utility knife, cut the flex material around the inside of
the housing to expose the retaining band.
(fig. 2) If you have a
Light Kit installed you will need to remove that as well, consult
the Light Kit install instructions for removing.
Step 3
Remove the retaining band from the housing by removing the
three nuts and washers from the screw posts.
(fig. 3)
Step 4
From inside the attic, lift the flex tube out of the diffuser hous-
ing, make sure to compress it to clear the screw posts.
(fig. 4)
© Copyright 2011 US Sunlight Corp, Inc. 2014ST-RT-C01_ver1
REQUIRED TOOLS
BOX CONTENTS / PARTS LIST
14” Rigid Tube Upper Elbow
Part# 29-02-004
14” Rigid Tube Lower Elbow
(with crimped bottom)
Part# 29-02-005
1. Tin Snips
2. Drill with a Phillips Bit
or a Phillips Screwdriver
3. Measuring Tape
4. Utility Knife
1.
2.
3.
4.
Foil Tape
29 ft.
2’ Straight Tube - 3 pieces
Part# 29-02-007
#8 Panhead
Screws
(3 each)
Cut around edge to
expose retaining band.
Pre-drilled mounting holes
Crimped edge