U.S. Sunlight Thermal Switch User Manual
For installing on the solar powered attic fan, For installing on the all purpose ventilator
www.ussunlight.com
Thermal Switch
Installation and Mounting Guide
for All U.S. Sunlight Corp Ventilation Products
The Thermal Switch allows the fan to turn on when the temperature reaches 80˚F or shut off if the temperature dips below
65˚F. This allows allows the fan to shut down if you’d prefer the fan to not run on cooler days. Here are the following steps
to install.
Tel: 877 55 US SUN
(877-558-7786)
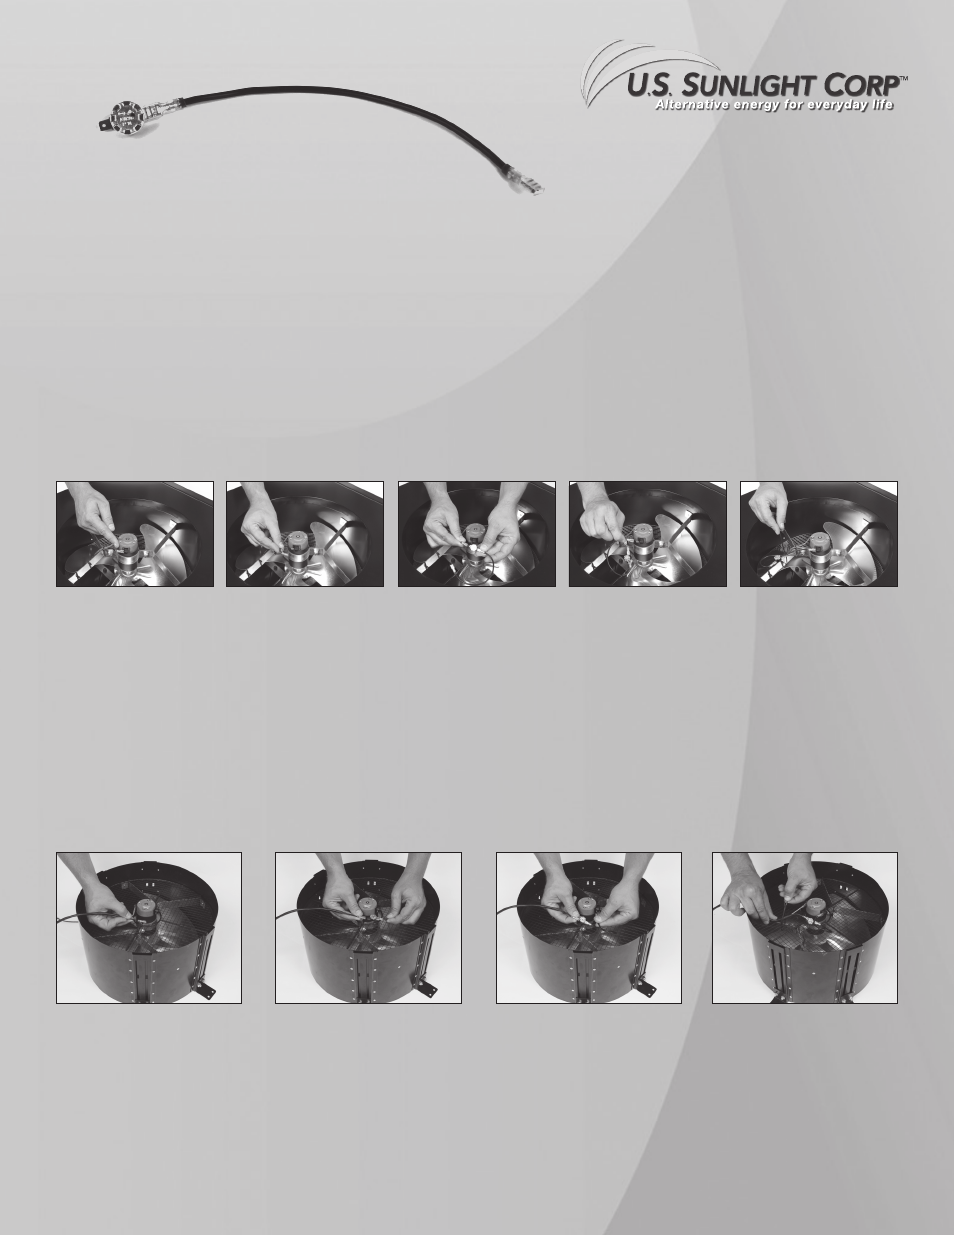
For Installing on the Solar Powered Attic Fan
fig. 1
fig. 2
fig. 3
fig. 4
fig. 5
Step 1
Locate the black terminal on the motor
(fig. 1) and remove the
black lead.
(fig. 2)
Step 2
Connect the black lead directly to the open terminal on the
thermal switch.
(fig. 3)
Step 3
Now connect the black lead from the thermal switch harness
to the black terminal on the motor
(fig. 4)
Step 4
Secure the thermal switch to the motor mount with a zip tie.
(fig. 5)
For Installing on the All Purpose Ventilator
Step 1
Locate the black terminal on the motor
(fig. 6) and remove the
black lead.
Step 2
Connect the black lead directly to the open terminal on the
thermal switch.
(fig. 7)
Step 3
Now connect the black lead from the thermal switch harness
to the black terminal on the motor
(fig. 8)
Step 4
Secure the thermal switch to the rodent screen with a zip tie.
(fig. 9)
fig. 6
fig. 7
fig. 8
fig. 9
© Copyright 2011 US Sunlight Corp, Inc. 8910TS C01 rev 1