Assembly – RIKON Power Tools 25-010 User Manual
Page 8
8
Assembly
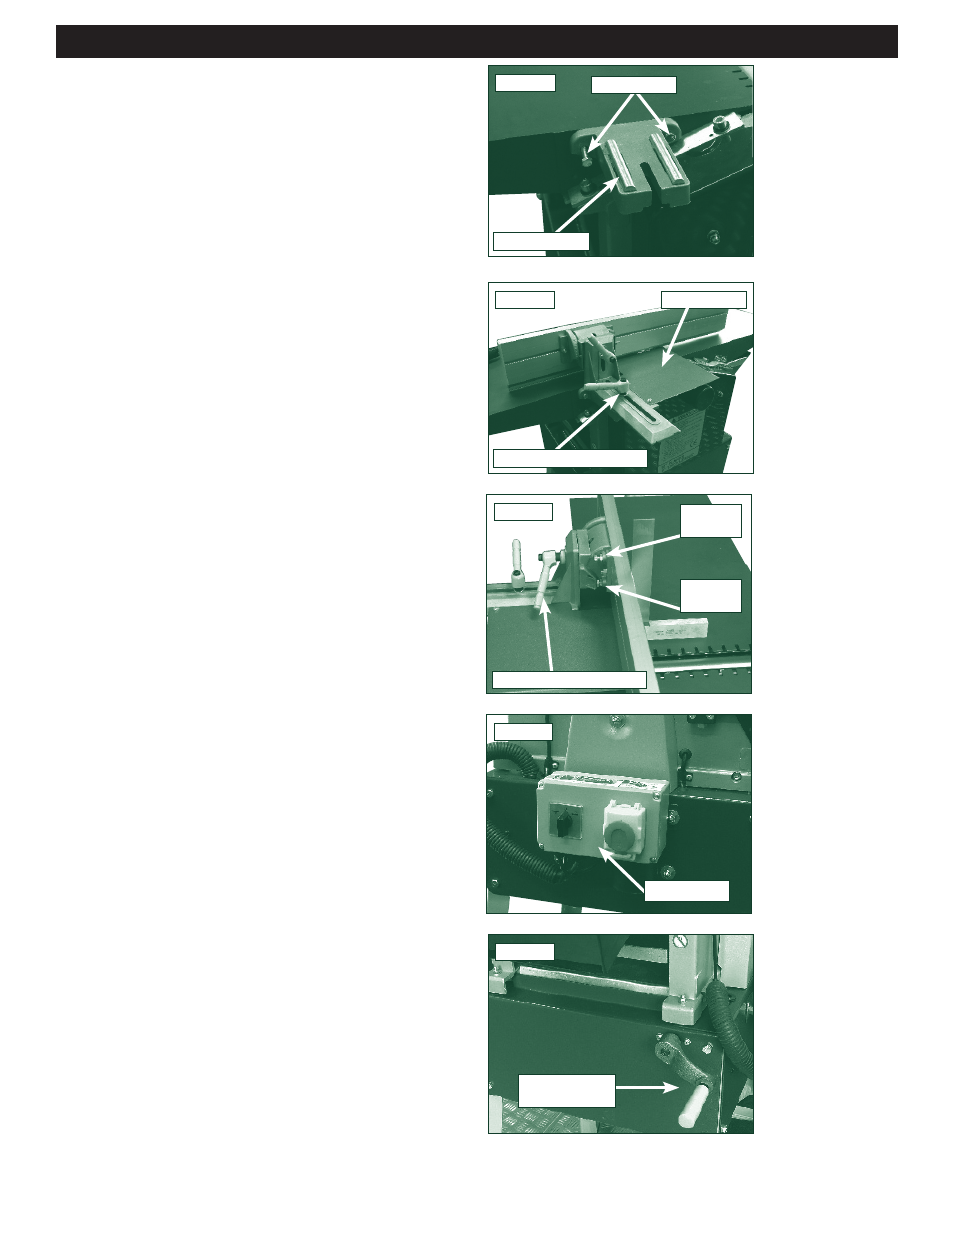
4.5 Installing the fence:
1. Attach the fence carrier casting to the side of the
infeed table using 2 x 10mm bolts Fig.4.11.
2. Slide the fence assembly on to the fence carrier
and tighten the lower ratchet handle to secure. Now
fit the guard plate Fig.4.12.
4.6 Setting the fence:
Once the fence is in position it must now be accu-
rately set at 90º. To do this you will need an accurate
square. Loosen the upper ratchet handle and adjust
the fence into position against the square. Once at
90º tighten the upper ratchet handle to secure the
position. Now adjust the 90º stop screw against the
registration point this will ensure that the fence al-
ways returns to 90º. Fig.4.13.
This same operation should also be carried out for
the 45º stop screw.
4.7 Switch box:
Install the switch box to the side of the machine with
the supplied hardware Fig.4.14.
4.8 Planer handle:
The planer handle should now be attached with the
long Phillips head screw. Fig.4.15.
Fig.4.11
Fence carrier
10mm Bolts
Fig.4.12
Lower Ratchet handle
Guard plate
Fig.4.13
Upper Ratchet handle
90º stop
screw
45º stop
screw
Fig.4.14
Fig.4.15
Switch Box
Planer
Handle