Maintenance – RIKON Power Tools 25-010 User Manual
Page 15
Maintenance
Replacing Blades
CAUTION! This procedure involves close contact with the
planer blade. Ensure that gloves are worn at all times to pre-
vent injury to the hands.
To remove the planer knives
1. Disconnect the machine from the electricity supply.
2. Remove the jointer fence.
3. Raise the cutterhead guard extrusion and pull it outwards
fully.
4. Turn each of the four screws of the planer knife lockbar
fully inwards.
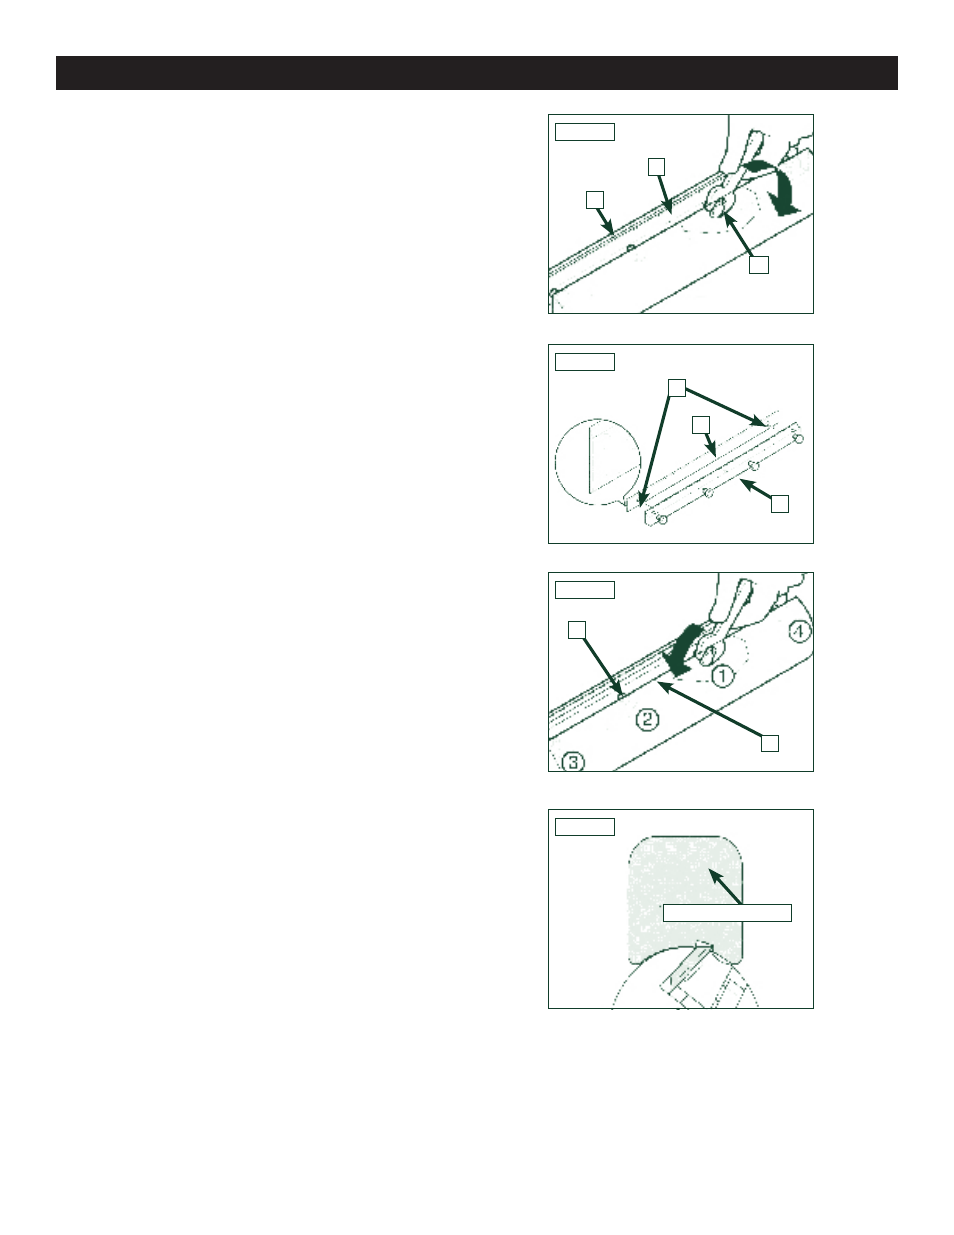
5. Remove the planer knife lockbar Fig.6.2A and the planer
knife Fig.6.2B from the cutterblock Fig.6.2C.
6. Clean all surfaces of the cutterhead and planer knife lock-
bar.
4.8 Installing the planer knives
1. Place the new planer knife on the planer knife lockbar mak-
ing sure that both pins of the planer knife lockbar fit into the
holes on the planer knife Fig.6.3A.
2. Place the planer knife lockbar Fig.6.3C with the planer
knife Fig.6.3B into the cutterhead, ensuring that the knife
does not slip from the two pins on the planer knife lockbar.
3. Turn the four screws of the planer knife lockbar so far out
that the planer knife lockbar Fig.6.4B and knife Fig.6.4A can
barley be moved longitudinally to the cutterhead axis.
4. There are two ways to check the projection of the knives:
A: By using the setting gauge Fig.6.5 (supplied).
Place the planer knife setting gauge on the cutterblock.
The knives must project so much that they touch the setting
gauge. This check must be performed on both the planer
knives and at both ends of the cutterblock.
Fig.6.2
B
A
C
Fig.6.3
A
C
B
Fig.6.4
A
B
Fig.6.5
SETTING GAUGE
15