Set the ip address – LumaSense Technologies MCS320 Quick Start Guide User Manual
Page 3
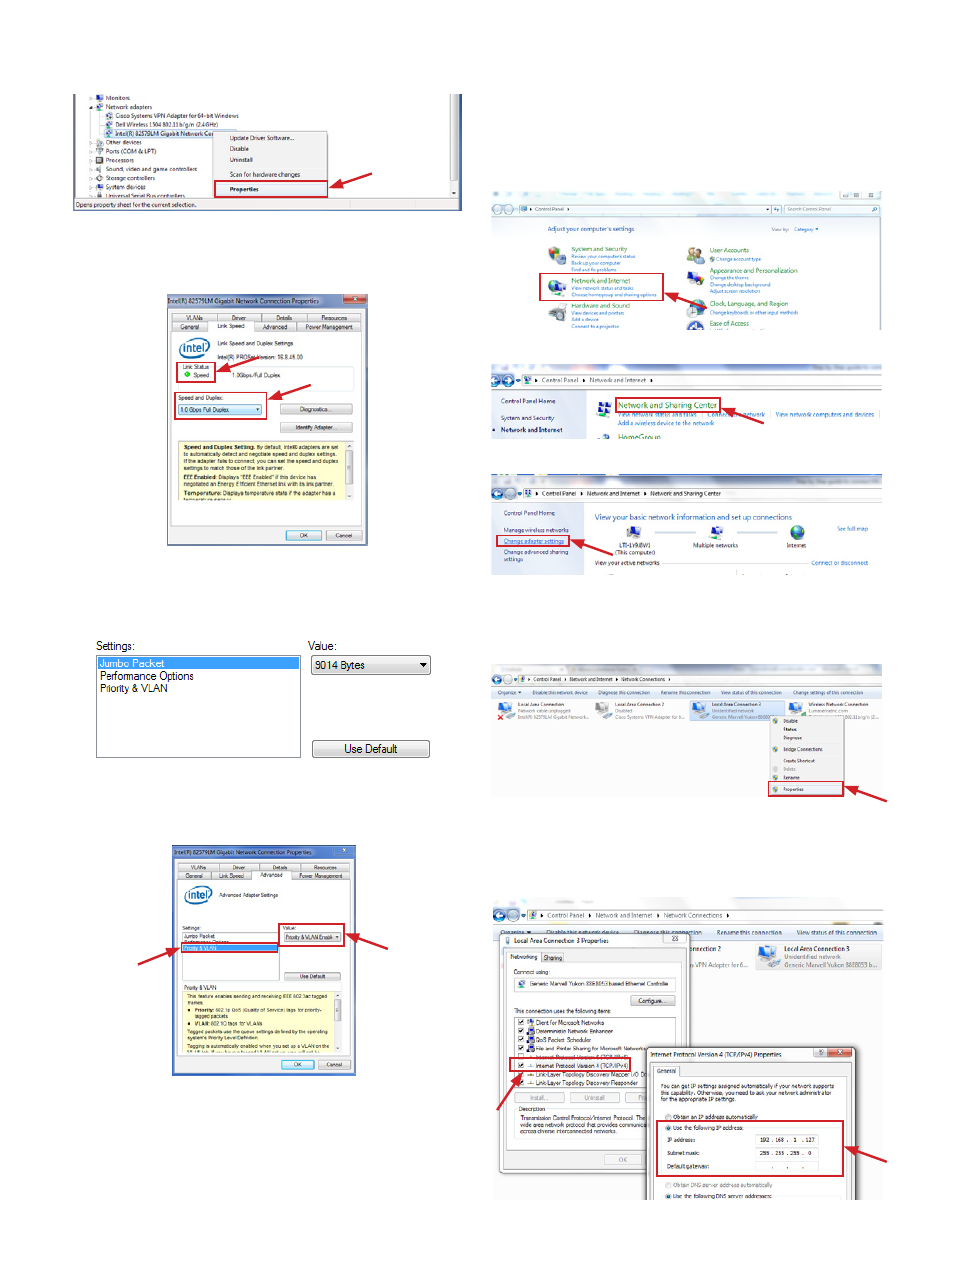
4. Right click on the network interface card on which
the camera is connected and select Properties.
5. In the Link Speed tab, use the drop down box under
Speed and Duplex to select 1.0 Gbps/full duplex. If
the camera is already connected and powered up,
the Link Status LED will be green, as shown below.
6. Click on the Advanced tab and select Jumbo packets
in the Settings box on the left. Using the drop down
box under Value, select 9014 Bytes.
Note: Only the MCS640 Camera requires jumbo packets.
7. Verify the Priority & VLAN is set to Enabled by click-
ing on Priority & VLAN and ensure Priority & VLAN
Enabled is selected in the drop down box under
Value.
Note: Not all network adapters have this feature.
8. Click OK to save these settings.
Note: Since there are different types of Ethernet controllers,
the tabs on the Ethernet controller properties window may
be different. See the manual for another example.
Set the IP Address
Note: Your instructions may vary slightly based upon which ver-
sion of Windows you are using. These instructions were written
using Windows 7.
1. Access Network and Internet Settings by clicking
Start, selecting Control Panel, and selecting Network
and Internet.
2. Click on Network and Sharing Center.
3. Click Change adapter settings.
4. Right click on the network adapter the camera is con-
nected to and click Properties.
Note: The MCS320 has a factory set IP address of
192.168.1.100 and a subnet mask of 255.255.255.0
.
5. Click Internet Protocol Version 4 (TCP/IP) and click
Properties. Next, select Use the following IP address
radio button and enter an IP address. The IP address
could be any number in the form of 192.168.1.127
and subnet mask 255.255.255.0. Click OK.