Easy flush application – Burcam 450475 EASYFLUSH TOILET SYSTEM 1/2HP 115V User Manual
Page 7
7
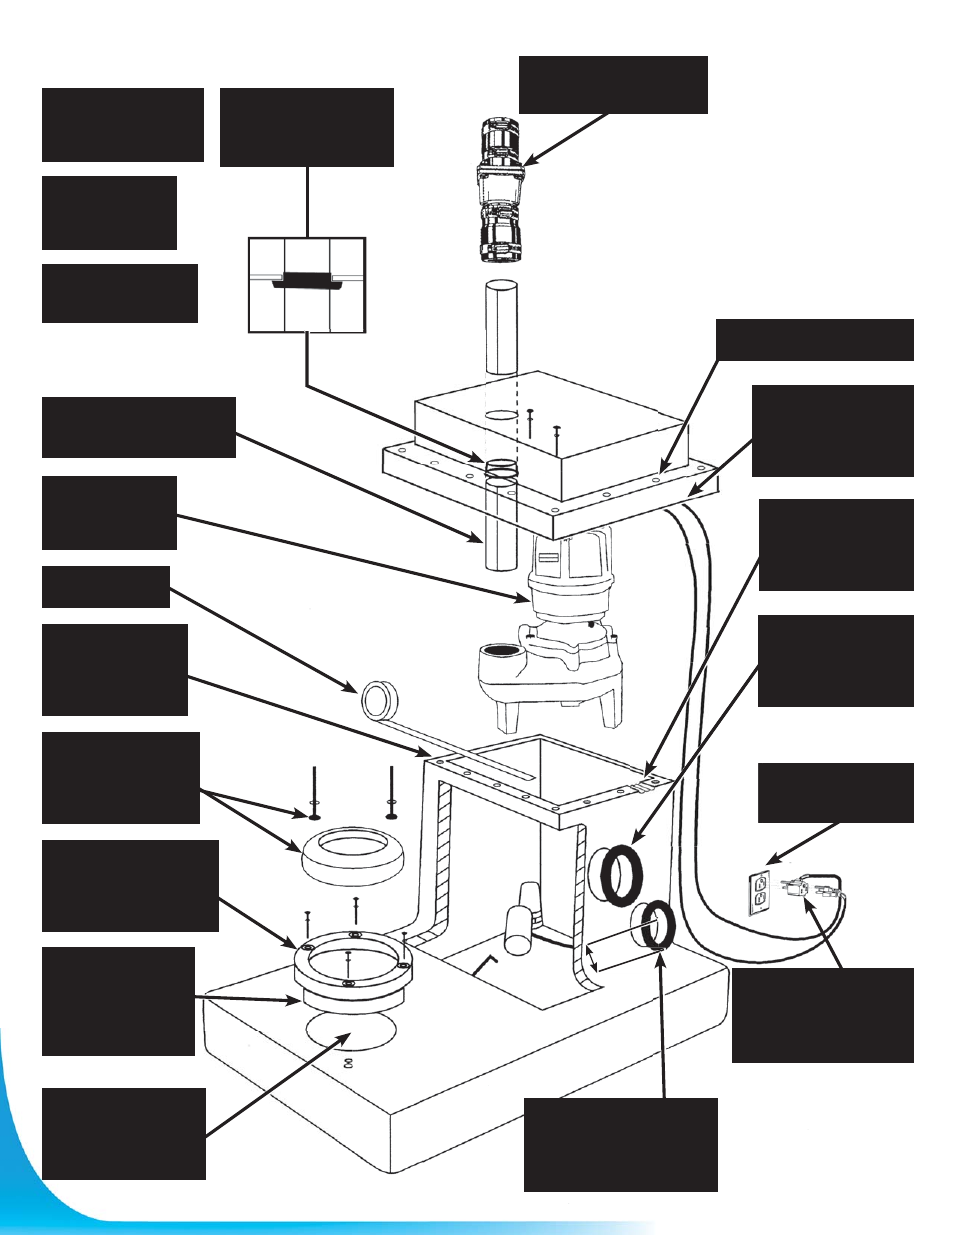
STEP 1
Position your
"Easy Flush" System
as per instructions.
STEP 7
Align the pump
with the cavities
inside the basin.
STEP 2
Install the unit
between 2" X 6"
floor joist.
STEP 3
Purchase required
plumbing parts.
STEP 16
Install the 2" check valve
in a vertical position.
STEP 19
Install the wax ring
and the toilet. Use
long brass screws,
nuts and washers.
STEP 17
Insert the switch in the
receptacle, then plug
the pump in the piggy-
back.
STEP 15
Install a 2" "Aqua Flex"
rubber gasket under
the pump cover.
STEP 12
Apply the seal.
STEP 5
Install the flange. Do
not forget the "O" ring
between the tank and
the flange.
STEP 13
Make pilot holes
into the foam seal
to allow the bolts
of the lid.
"GFCI" Plug type
P
"GFCI" P
STEP 4
Properly grounded
receptacle.
STEP 11
Install a short
piece of foam seal
(3 3/4") as the basic
wire slot seal.
STEP 20
Install a short piece
of foam seal (3 3/4")
to the appropriate
space inside the lid.
EASY FLUSH APPLICATION :
STEP 14
Screw the discharge pipe
to the pump base.
STEP 22
Additional fixtures can
be installed using the
additional 2" "Aqua Flex"
rubber gasket enclosed.
STEP 21
Fix the lid using the bolts.
STEP 18
Fill the basin. Check
water level. Pump
should start at 4
1/2"
.
STEP 6
Align and install
the flange. Use
the short screws,
nuts, "O" rings and
washers.
STEP 8-9-10
Install the vent line
with the 3" "Aqua
Flex" rubber gasket
enclosed.
2 1/4"