Easy flush measurements – Burcam 450475 EASYFLUSH TOILET SYSTEM 1/2HP 115V User Manual
Page 6
6
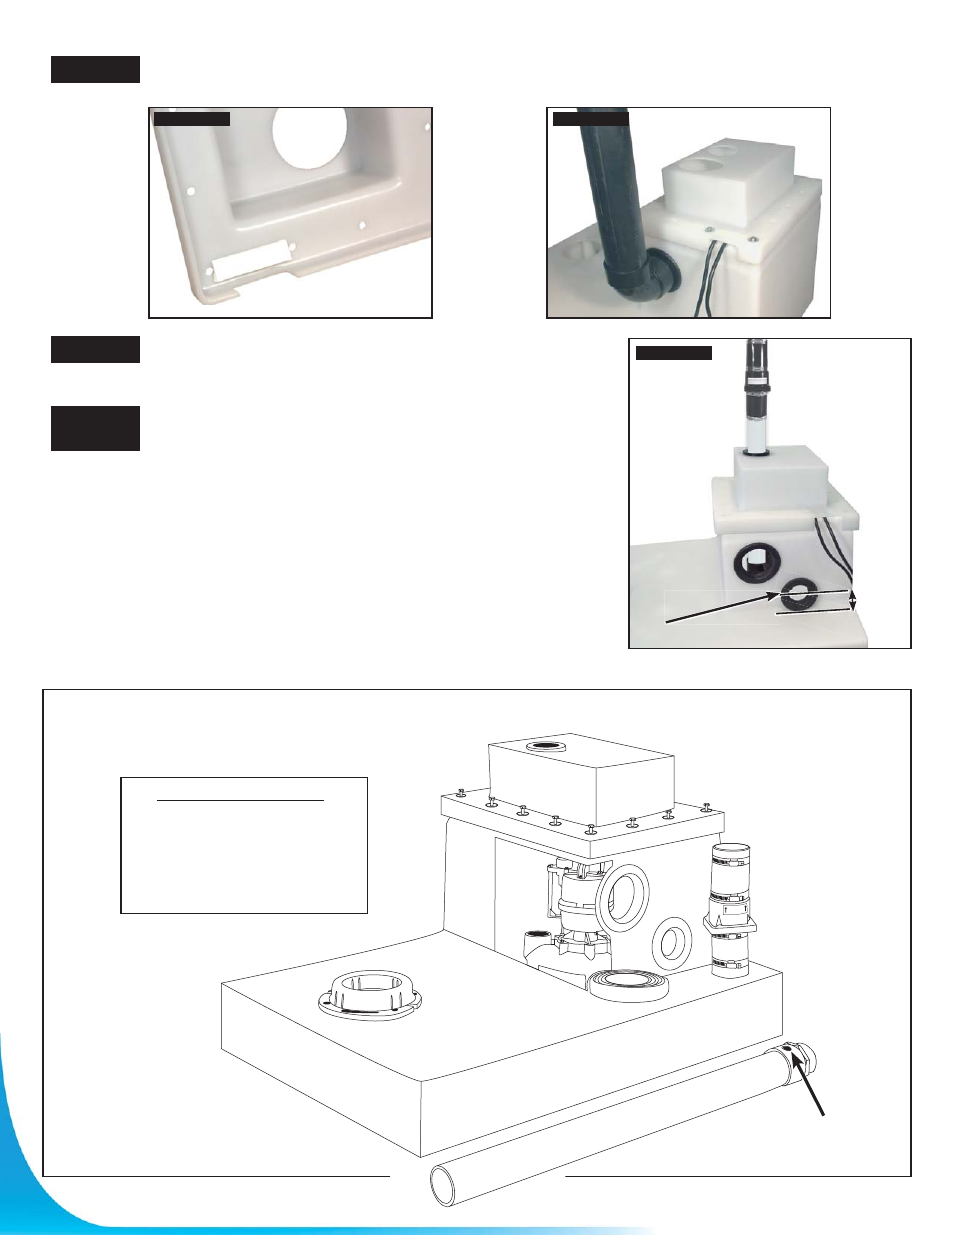
Cut another short piece of foam seal (3 3/4") and glue it to the appropriate space inside the lid of the tank.
(Photo N)
After completing the pump installation, fix the lid using the bolts.
This will seal the wires. Fasten the top lid by using screws and
washers. (Photo O)
To install an additional shower or sink unit to the "Easy Flush"
System, use the additional 2" "Aqua Flex" gasket. The extra
fixture piping must be installed on the same side as the
illustration (Photo P) to prevent direct water flow on pump switch.
Drill a 3
" hole on the illustrated side of the basin. It is
mandatory to connect the piping above the base of the unit (Photo P),
to prevent any waste water back flow in the additional fixtures.
It’s also required that the center of the gasket hole should not
be less than 2 1/4
" from the base. Failure to drill the 3" hole in
proper location will void the unit warranty. It is also recommended
that if you hook up more than one fixture, that these two or more
be connected to the same discharge piping. Each additional unit
must also be vented.
STEP 20
STEP 21
STEP 22
"OPTION"
PHOTO N
PHOTO O
EASY FLUSH MEASUREMENTS:
Airlock Preventer
Hole 5/8’’
PRACTICAL INFORMATIONS
WEIGHT ..................
73 lbs, 33 Kg
WIDTH ....................±
24 1/4", ± 61 1/2 cm
LENGTH .................±
34", ± 86 cm
HEIGHT ...................±
20 1/2", ± 52 cm
BASE HEIGHT ........±
5 3/4", ± 14 1/2 cm
PHOTO P
2 1/4"