Step 3, Removing the panel, Step 4 – Anthro POC Cart Assembly Instructions User Manual
Page 2
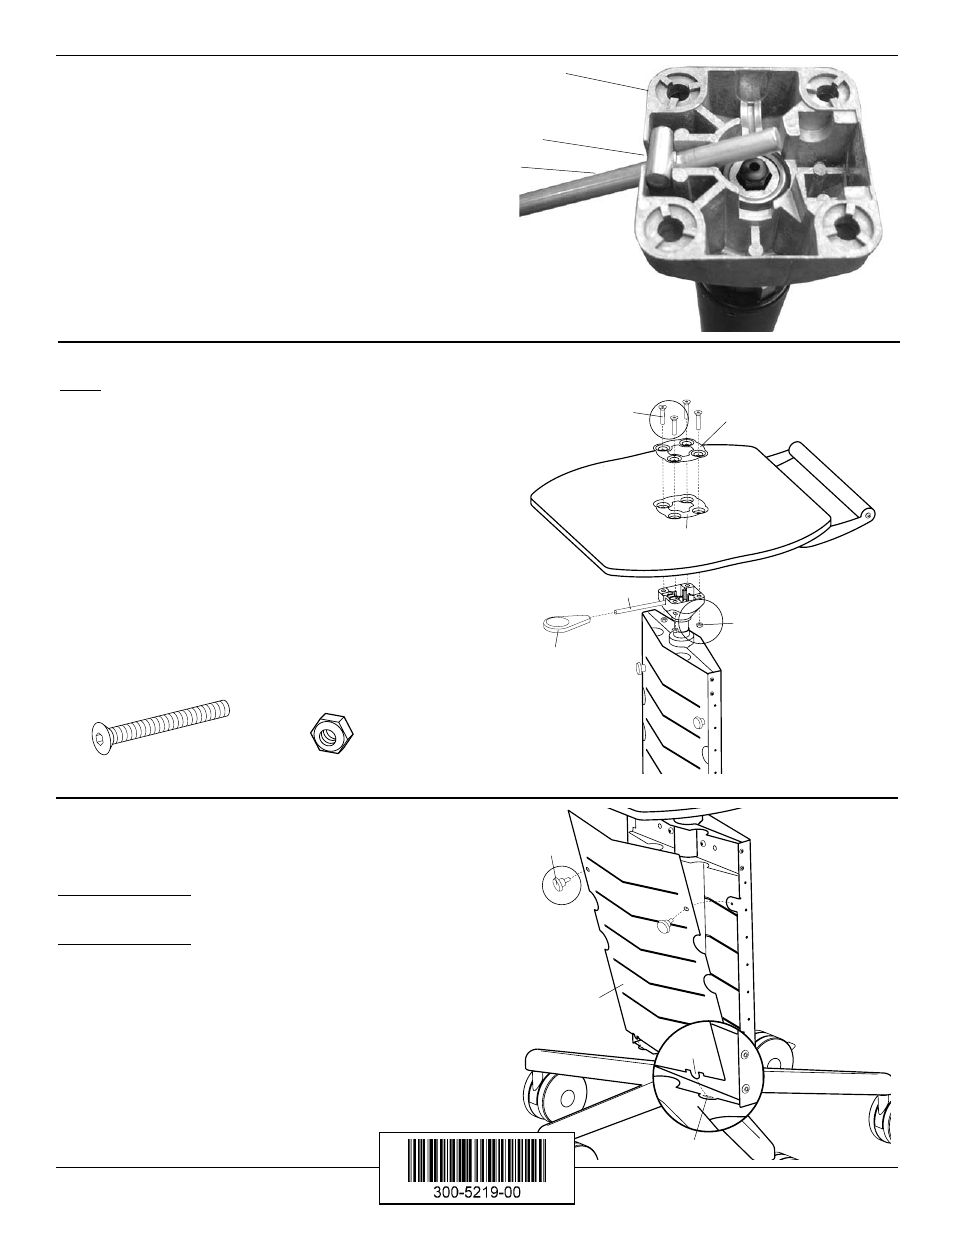
Step 3
.
Orient the Release Lever with the top of the Trunk
Assembly as shown.
Place (and.hold) the Lever into the slot.
Questions?
1-800-325-3841
anthro.com
5
/
16
-18 Nylon Lock Nut
325-5189-00
Removing the Panel
The front Panel of the Trunk may be removed so you can
conceal and organize your cables.
To.remove.the.Panel: Unscrew both Knobs. Tilt the Panel
forward and lift up from the Base.
To.replace.the.Panel: Align the two tabs with the two slots
on the Trunk. Tilt the Panel against the Trunk, then tighten
both Knobs.
Knob
Tabs
front Panel
Nylon Lock
Nut
Top Plate
Paddle
Slots
flat Head
Cap Screw
Shelf Recess
5
/
16
-18X1.75” Flat Head Cap Screw
325-5215-00
Lever
Anthro
Corporation Technology Furniture
®
10450 SW Manhasset Drive Tualatin, Oregon 97062 anthro.com
Slot
Lever
Top of Trunk
Assembly
Step 4
NOTE:.The.Release.Lever.will.still.need.to.be.held.on.the.top.of.
the.Trunk.until.the.Shelf.is.in.place...
Rotate the Top Shelf Assembly onto the Trunk. Place the
Top Plate into the recesses of the Shelf.
Insert the four Flat Head Cap Screws through the Plate,
Shelf and top of Trunk. Secure each Screw using a Nylon
Lock Nut.
Press the Release Paddle onto the Lever end.
Test the column by pulling up on the lever to move the
column up and down. Repeat a few times to make sure
the column moves smoothly. If the lever was installed
upside down, the column won’t move. If that happens,
remove the top plate, invert the lever, and try it again.
Congratulations! Your assembly is complete.