Step 1, Step 2, Step 3 – Anthro POC Cart 2 Assembly Instructions User Manual
Page 3
POC Cart - 2 Assembly Instructions
3
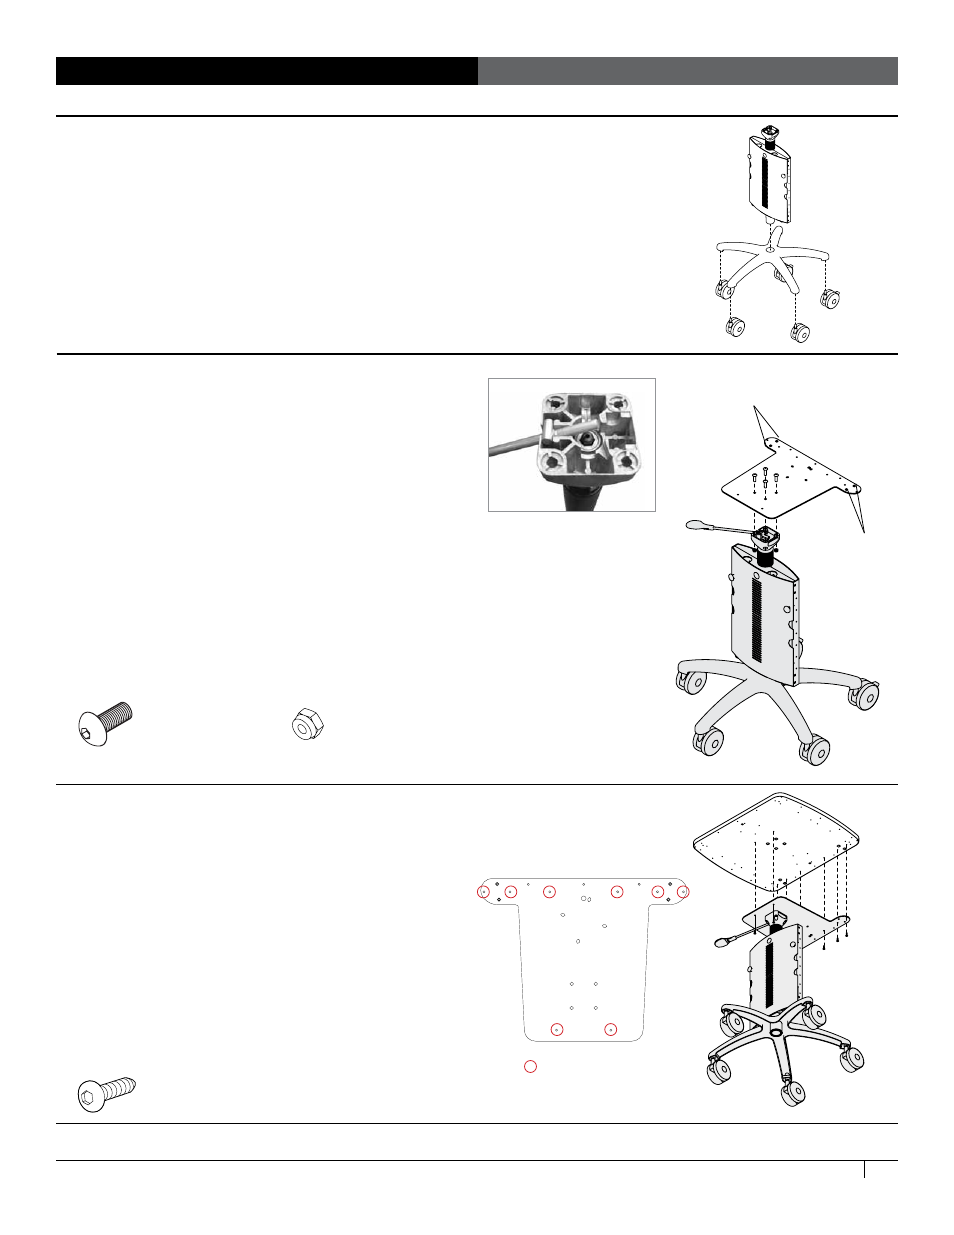
steP 1
Assemble cart base and column
Insert the casters into the base so that the two locking casters (with tabs) are
next to each other.
Place the base on the floor and lock the two locking casters. Align the column
with the base as shown. Push the column into the base.
steP 2
install the Adjustment lever and shelf bracket
Align the lever with the top of the column as shown
so the lever sets in the slot and bends away from the
locking casters.
Set the lever into the top of the column, then cover it
with the Shelf Bracket. Align the bracket with the
column so the bumps are on the top, so the square hole pattern on the bracket
lines up with the holes on the top of the column, and so the lever extends out
from the side of the bracket.
Using the 3/16" hex key, attach the bracket to the column with four 1" Button-
head Screws (325-5537-00) captured by four Lock Nuts (325-5263-00) inserted
through the bottom of the column block.
steP 3
Attach Shelf to Shelf Bracket
Align the cart shelf with the shelf bracket so the
center array of four notches in the shelf line up over
the four screw-heads on the bracket and the two pairs
of notches on the edge of the shelf line up over the
bumps on the bracket.
Using the Anthro driver, attach the shelf to the bracket
with eight 3/4" Wood Screws (325-5575-00).
1” Button-head Screw
325-5537-00
Lock Nut
325-5263-00
3/4" (#10-9) Wood Screw
325-5575-00
congrAtulAtions! your cArt Assembly is comPlete!
shelf bracket
(back)
shelf bracket
(side)
bumps
bumps
wood screw holes
Shelf Bracket