Step 1, Step 2, Step 3 – Anthro Adjustable Laptop Cart 2 Assembly Instructions User Manual
Page 3
Adjustable Laptop Cart - 2 Assembly Instructions
3
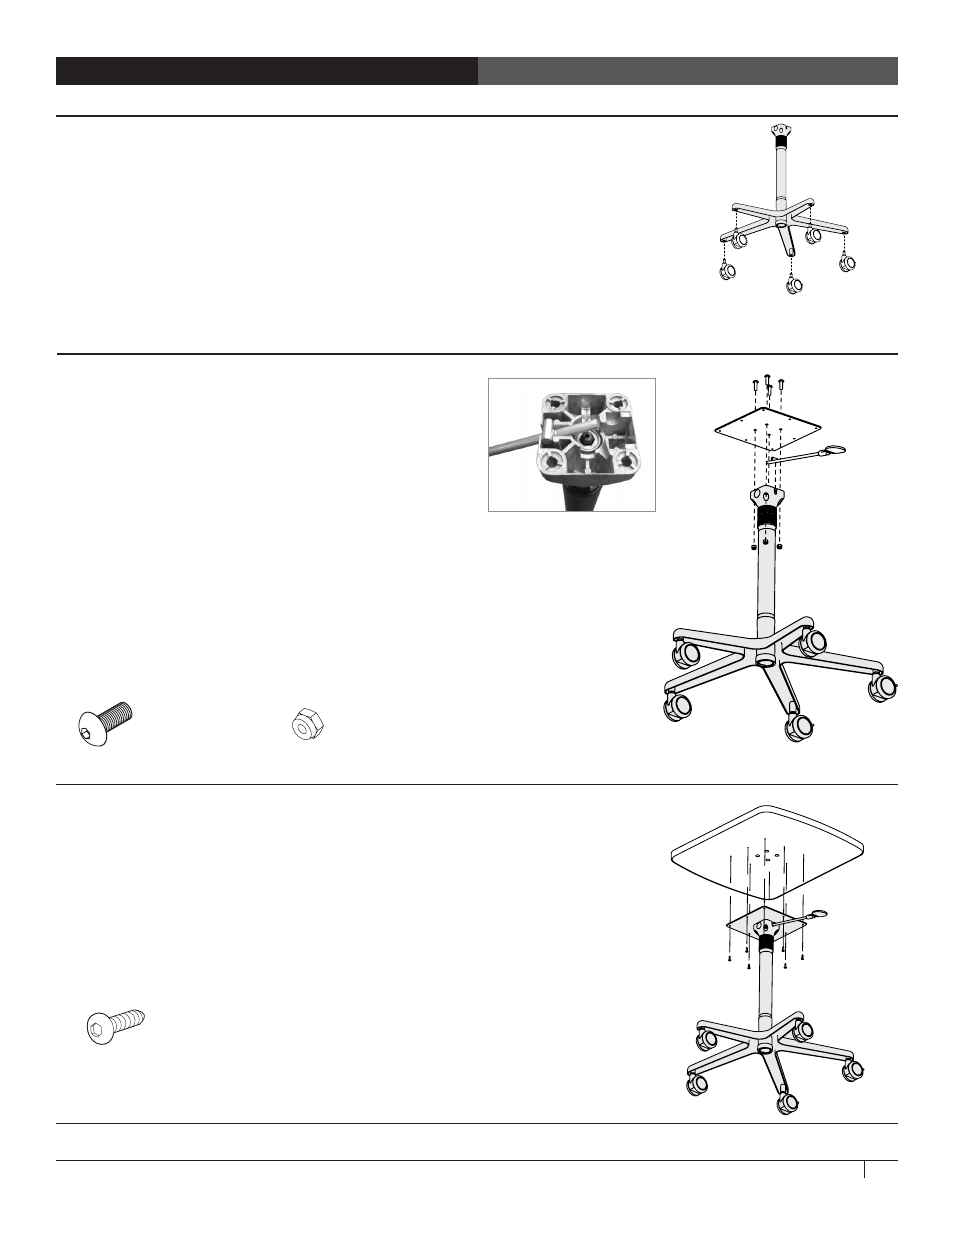
STEP 1
Assemble Cart Base and Column
Insert the casters into the base so that the two locking casters (with tabs) are
next to each other.
Place the base on the floor and lock the two locking casters. Align the column
with the base as shown. Push the column into the base.
STEP 2
Install the Adjustment Lever and Shelf Bracket
Align the lever with the top of the column as shown so
the lever sets in the slot.
Set the lever into the top of the column, then cover it
with the Shelf Bracket. Align the bracket with the
column so the set of four holes at the center of the bracket line up with the
four holes at the column.
One at a time, insert a 1" Button-head Screw through the bracket and into the
column, then capture the screw with a Lock Nut. Hold the Lock Nut in place
and tighten the screw using the 3/16" hex key provided. Install loosely first,
then tighten all.
STEP 3
Attach Shelf to Shelf Bracket
Align the cart shelf with the shelf bracket so the four screw-heads on the
bracket rest in the notches on the bottom of the shelf and the holes along the
perimeter of the bracket line up with the pre-drilled holes ont he bottom of the
shelf.
Attach the shelf to the bracket with eight 3/4" Wood Screws using the 5/32"
hex Anthro driver.
1” Button-head Screw
325-5537-00
Lock Nut
325-5263-00
3/4" (#10-9) Wood Screw
325-5575-00
CONGRATULATIONS! YOUR CART ASSEMBLY IS COMPLETE!
Shelf Bracket