Zeroing your scope, Battery installation – NcSTAR SEFM83250G User Manual
Page 5
5
Zeroing your Scope
After you have completed the installation of your scope it will be necessary to adjust the scopes point
of aim to match the rifles point of impact. This can be accomplished using several methods, but we
recommend the use of a Bore Sighting Device to save time and ammunition. Using a Bore Sighting
Device will ensure that your shots land “on paper”. Follow the Manufacturer’s Instructions for the
Bore Sighting Device that you choose in order to achieve the best results. You are now ready to
finalize your Zero.
CAUTION: ALWAYS BE SURE TO REMOVE THE BORE SIGHTING DEVICE BEFORE
SHOOTING LIVE AMMUNITION. FAILURE TO DO SO CAN CAUSE DAMAGE TO YOUR
FIREARM OR INJURY TO YOURSELF AND THOSE AROUND YOU.
CAUTION: WHEN OPERATING ANY TYPE OF FIREARM ALWAYS USE PROPER EYE
AND EAR PROTECTION. BE SURE TO USE YOUR FIREARM IN AN AREA THAT IS
PERMISSIBLE UNDER LOCAL, STATE, AND FEDERAL LAW.
Bore Sighting alone is not sufficient enough to ensure and accurate Zero. You must shoot you
firearm at the range in order to confirm a 100% accurate Zero. Follow these steps to fine tune your
scope adjustments:
1. Secure your firearm using a steady platform, such as a bench rest
2. Fire 3-5 shots at a target that is set to your desired Zeroing distance (100 yards is
recommended).
3. Observe where the bullets have struck the target and make adjustments to the Elevation and
Windage settings as necessary until your point of aim matches your point of impact.
4. Continue with this process until you have achieved your desired level of accuracy.
5. Your scope is now Zeroed to your firearm at the distance that you have chosen.
6. Don’t forget to reinstall the Turret Caps over the Turret Dials after your done zeroing. You do
not want to lose/leave behind the Turret Caps at the shooting range.
It is important to remember that many factors can affect the accuracy of your scopes zero including
temperature, humidity, elevation, distance, angle, and other conditions. Changing ammunition
brands can affect accuracy as well.
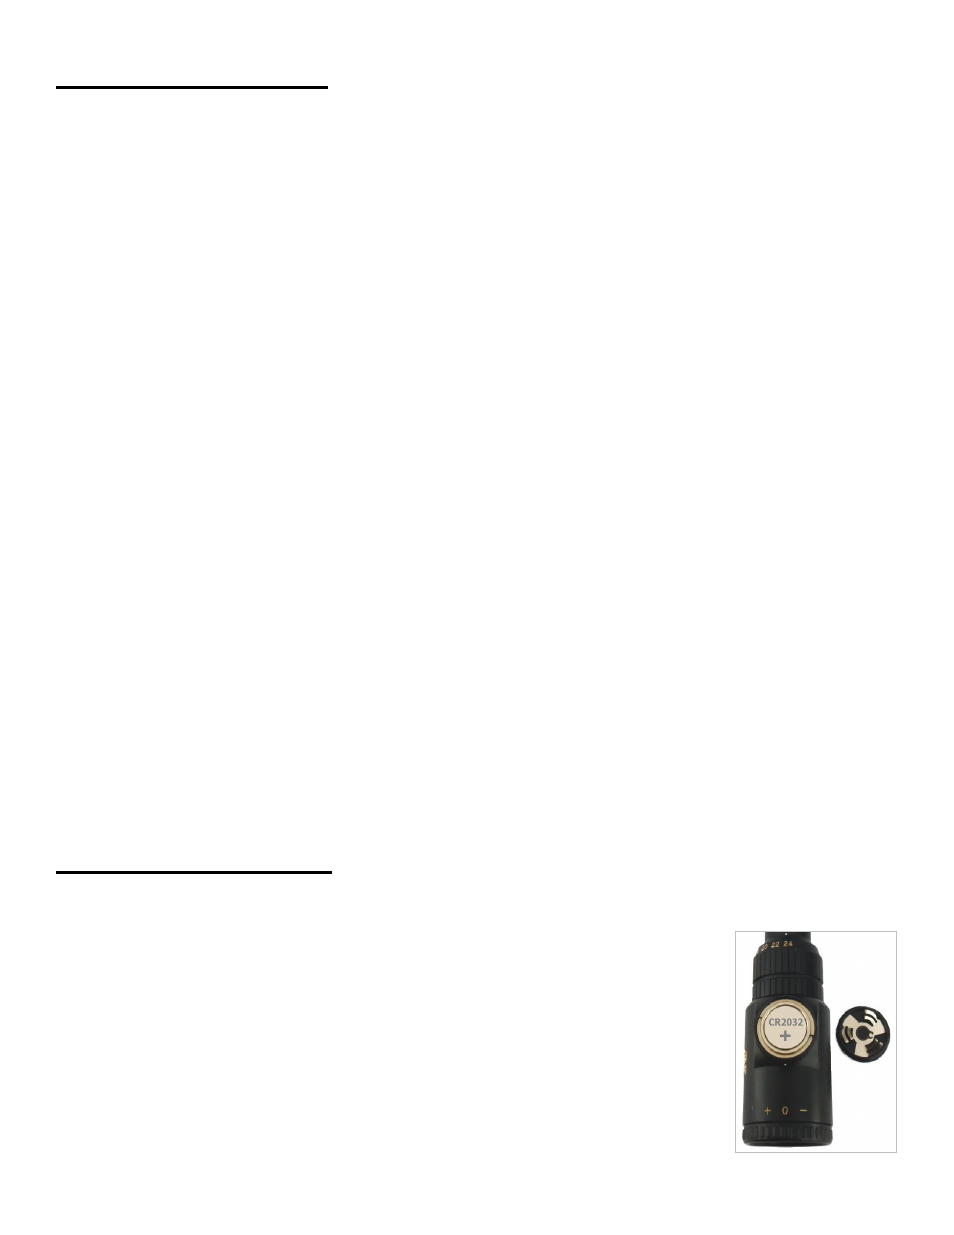
Battery Installation
Your Shooter II Series Scope comes with a battery pre-installed from the factory. To replace the
battery follow these simple steps:
1. The Battery Compartment is located within the Rheostat Knob on top of the
Ocular Lens Housing.
2. On top of the Rheostat Knob you will notice a thin cap. To remove this cap
grasp it firmly with one hand, and twist it counter-clockwise while holding the
Rheostat Knob firmly in place with your other hand.
3. Remove the old battery, and dispose of it properly. Replace it with a new 3 volt
Lithium Battery Type CR2032 only. Twist the battery cap back on the Rheostat
Knob and hand tighten. Avoid using tools (such as pliers) to perform this
procedure as this may cause damage to the Illumination System.