PreSonus Studio One User Manual
Page 17

17
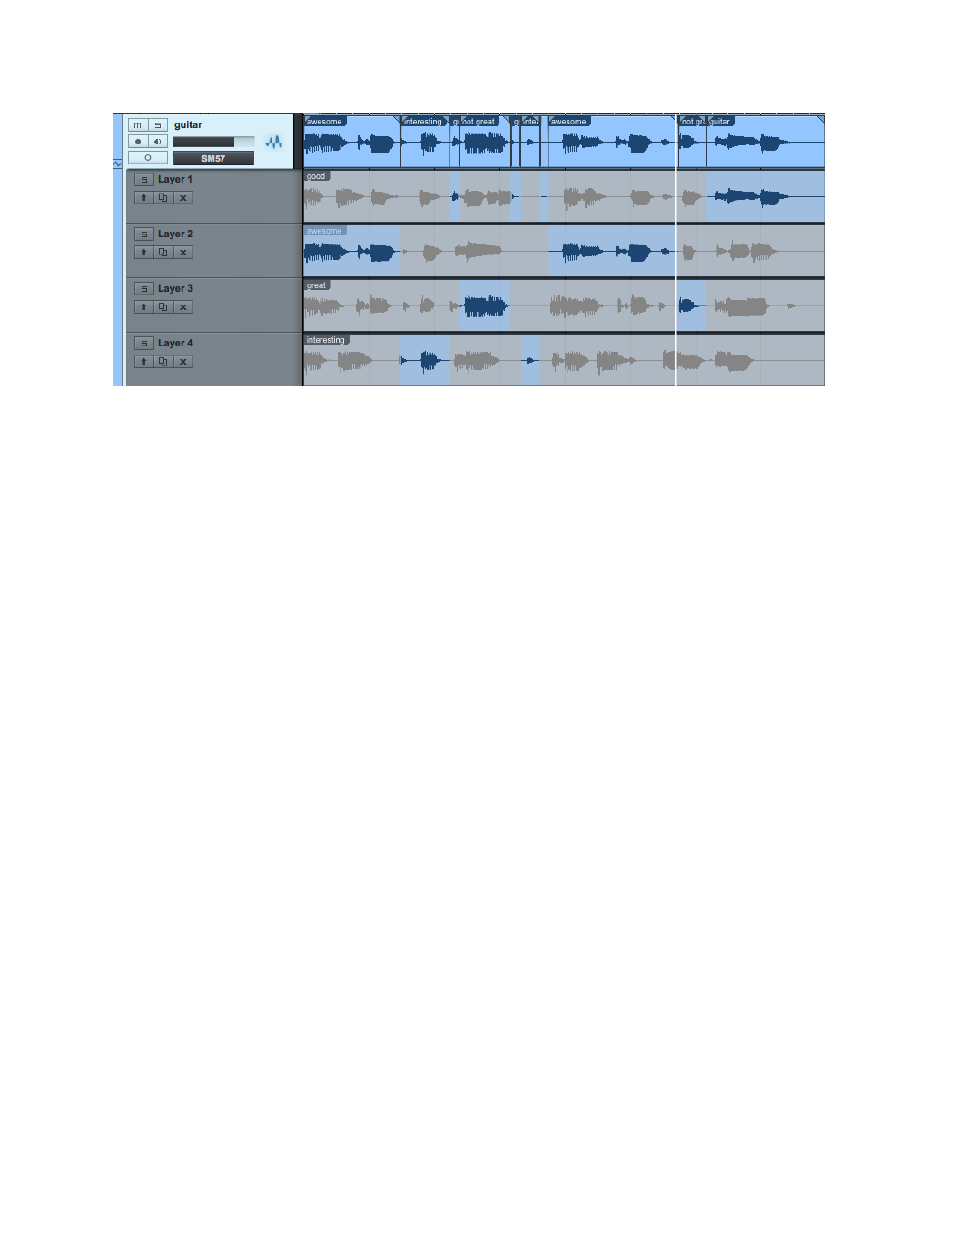
To
hide
or
show
layers,
[Right]/[Control]-‐click
on
a
track,
and
then
click
on
Expand
Layers.
Layers
have
their
own
track
controls,
including
Solo,
Activate,
Duplicate,
and
Remove.
Click
on
the
layer’s
Solo
button
to
solo
the
layer
on
the
track.
Clicking
on
the
Activate
button
will
place
that
layer
on
the
track,
and
the
current
contents
of
the
track
will
take
the
place
of
that
layer
on
a
new
layer
located
under
the
track.
Duplicate
will
create
a
duplicate
of
the
layer
on
a
new
layer.
Remove
will
remove
the
layer
from
the
track.
If
you
would
like
layers
to
follow
the
track
event
in
the
arrangement—for
instance,
when
moved
or
duplicated—engage
the
Layers
Follow
Events
option
in
the
Inspector
for
the
track.
6.8.2 Auditioning Takes
When
comping,
it
is
helpful
to
be
able
to
quickly
audition
the
various
takes
to
determine
the
desired
parts
of
each
take.
The
Listen
tool
is
well
suited
to
auditioning
takes
on
layers.
When
floating
the
mouse
over
any
layer,
hold
[Alt]/[Option]
and
click
anywhere
on
any
layer
to
instantly
hear
it,
starting
from
the
point
in
time
where
you
clicked.
Alternatively,
hold
[Shift]+[Alt]/[Option]
and
click
on
a
selected
range
on
any
layer
to
solo
the
layer;
looping
will
be
automatically
engaged
around
the
selected
range
for
playback.
It
is
also
possible
to
solo
entire
layers
to
quickly
switch
between
takes,
as
only
one
layer
of
a
track
may
be
soloed
at
a
time.
To
do
this,
click
on
the
Solo
button
on
any
layer.
Note
that
Track
Solo
is
independent
of
this,
so
you
can
solo
the
track
or
not,
depending
on
whether
you
would
like
to
hear
the
performances
you
are
comping
in
the
context
of
the
other
tracks
in
your
Song.
6.8.3 Copying Ranges to the Track
Studio
One
makes
the
comping
process
very
simple.
With
the
Arrow
tool
selected,
floating
the
mouse
over
any
layer
will
switch
to
a
special
Range
tool,
indicated
with
the
Range
cursor
icon.
Click-‐and-‐drag
with
this
tool
to
instantly
promote
any
range
of
a
take
to
the
track.
Once
a
range
has
been
copied
to
the
track,
it
will
be
highlighted
in
the
track
color
so
that
you
can
always
be
sure
where
material
on
the
track
is
coming
from.
Where
a
newly
copied
range
overlaps
with
an
existing
range
on
the
track,
an
automatic
crossfade
will
be
applied
to
help
avoid
clicks
or
other
undesirable
artifacts.
This
crossfade
can
be
edited,
just
like
any
other,
and
it
can
be
removed.
