Installation – Sterling EV User Manual
Page 8
–
8
–
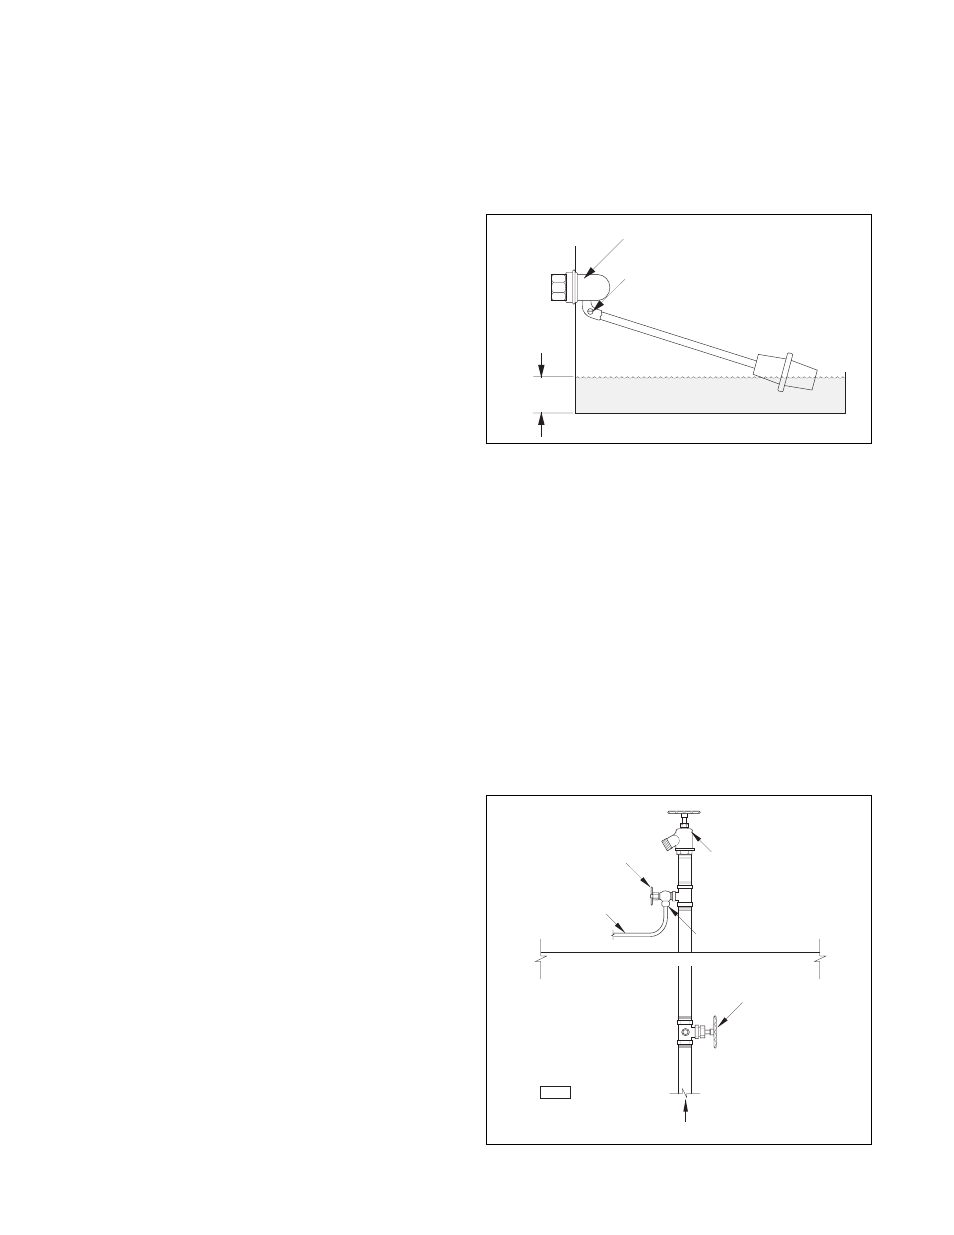
Figure 7 - Float Valve Assembly
NOTICE: There will be a slight odor during the initial
start-up of the unit. The odor will disappear within
the fi rst few days of operation if the bleed-off is
adjusted correctly.
Faucet Use
1. To connect the water line to the water supply, install
a sillcock and water valve on the faucet.
2. Place tubing nut and ferrule on tube end, and insert
valve.
3. Tighten the nuts on the valve and the tube.
NOTICE: If a faucet is not to be used for the water
supply, install the valve on the water line to be used.
Follow the procedure above for securing the tubing
to the valve.
Figure 8 - Evaporative Cooler Water Connections
Mounting to Roof
1. Before positioning the unit in its permanent
location, make certain that the roof is capable
of carrying the load of this equipment. Note that
when the cooler is fi lled with water, the unit will be
much heavier than when dry. See “Performance and
Dimension Data” table for appropriate operating
weight.
2. If unit is to be mounted on a curb, refer to the curb
specifi cations for installation requirements.
3. Make certain that the mounting surface is level in
all directions.
4. Make certain that you have suffi cient means for
lifting the unit into place.
5. Installation must conform to local and national
building and safety codes.
6. The units are mounted on skid rails and are suitable
for use on combustible fl ooring. It is recommended
that the skids be mounted either on solid planking or
on steel channels, but never on a soft tar roof where
the skids could sink and reduce the 4" clearance
between the bottom pan and the roof.
7. Inspect all internal parts of the cooler section to
determine if any damage has occurred during
shipment. See roof curb specifi cations at the end of
the manual.
Connecting the Water Supply
NOTICE: Soft water equipment should not be
attached to water lines going to the cooler. “Soft
Water” will cause corrosion and decrease the
effective life of the cooler.
1. A water valve should be installed at a convenient
location to allow water to be turned on and off. Use
1/4" tubing to supply water to Evaporative Cooler.
A water connector kit is available at your local
wholesaler.
2. Place tube nut and ferrule over the end of the
tubing.
3. Insert tubing into factory-installed fl oat valve and
tighten securely.
INSTALLATION
This manual is for Evaporative Cooler Module Installations only.
Refer to the Installation and Service Manuals for Rooftop Packaged Units
and Outdoor Furnaces for these unit installations.
3-1/4"
FLOAT VALVE
ROD LEVEL
ADJUSTMENT SCREW
1/4" TUBING
FROM COOLER
FAUCET WITH
HOSE BIBB
BRASS NEEDLE COCK
BRASS STOP COCK
WITH DRAIN
WATER SUPPLY
ROOF LINE
NUT AND FERRULE
D3870