Sterling EV User Manual
Page 13
–
13
–
Washing the Media
Avoid splashing water on the blower
motor at all times (this could cause electrical
problems)!
1. Scale and dust should be washed off the intake side of
the media annually, using a garden hose and nozzle;
this will help to unclog passages.
2. Using a stiff brush, lightly brush the intake edges of
the media. This will not harm the openings, but will
remove any hardened scale.
3. Occasionally, there will be a build-up of algae or odors.
The best solution for both of these problems is to
allow the pads to dry thoroughly on a regular basis.
If cooling is not needed at night during the cooling
season, allow the blower to run for a few hours after
the pump has been shut-down to dry pads daily.
4. During the cooling season, we recommend that
the pads be shut down nightly if possible with the
blower running to dry the pads out for a few hours
before the unit is shut down.
Washing the Inlet Filter
The pre-fi lter should be cleaned periodically as follows:
1. Turn the four latches and remove filter frame
assemblies.
2. Carefully remove the aluminum fi lters. Wash the fi lters
with warm water and a mild soap, rinse thoroughly.
3. Re-install in unit.
4. If the aluminum mesh fi lters are damaged or cannot
be cleaned, replace the mesh fi lter (See replacement
parts section).
Cabinet Cleaning and Touch-Up
The cabinet and all internal parts of the Evaporative Cooler
should be cleaned annually using a soft cloth, warm water,
and a mild cleanser.
NOTE: Avoid using steel wool or sandpaper in normal
cleaning of the unit.
Winter Shut Down
1. Clean and fl ush out Evaporative Cooler media and
sump.
2. Clean water distributor holes.
3. Drain fi ll pipe and leave open. DO NOT LEAVE ANY
WATER IN THE SYSTEM. FREEZING CAN CAUSE
MAJOR DAMAGE TO THE UNIT.
4. Remove and clean pump if necessary.
5. Check sump tank for leaks and repair if necessary.
Sump tank is fabricated from stainless steel.
6. Replace with new CELdek
®
media sections. (See
replacement part section).
Aspen and other evaporative media will not work.
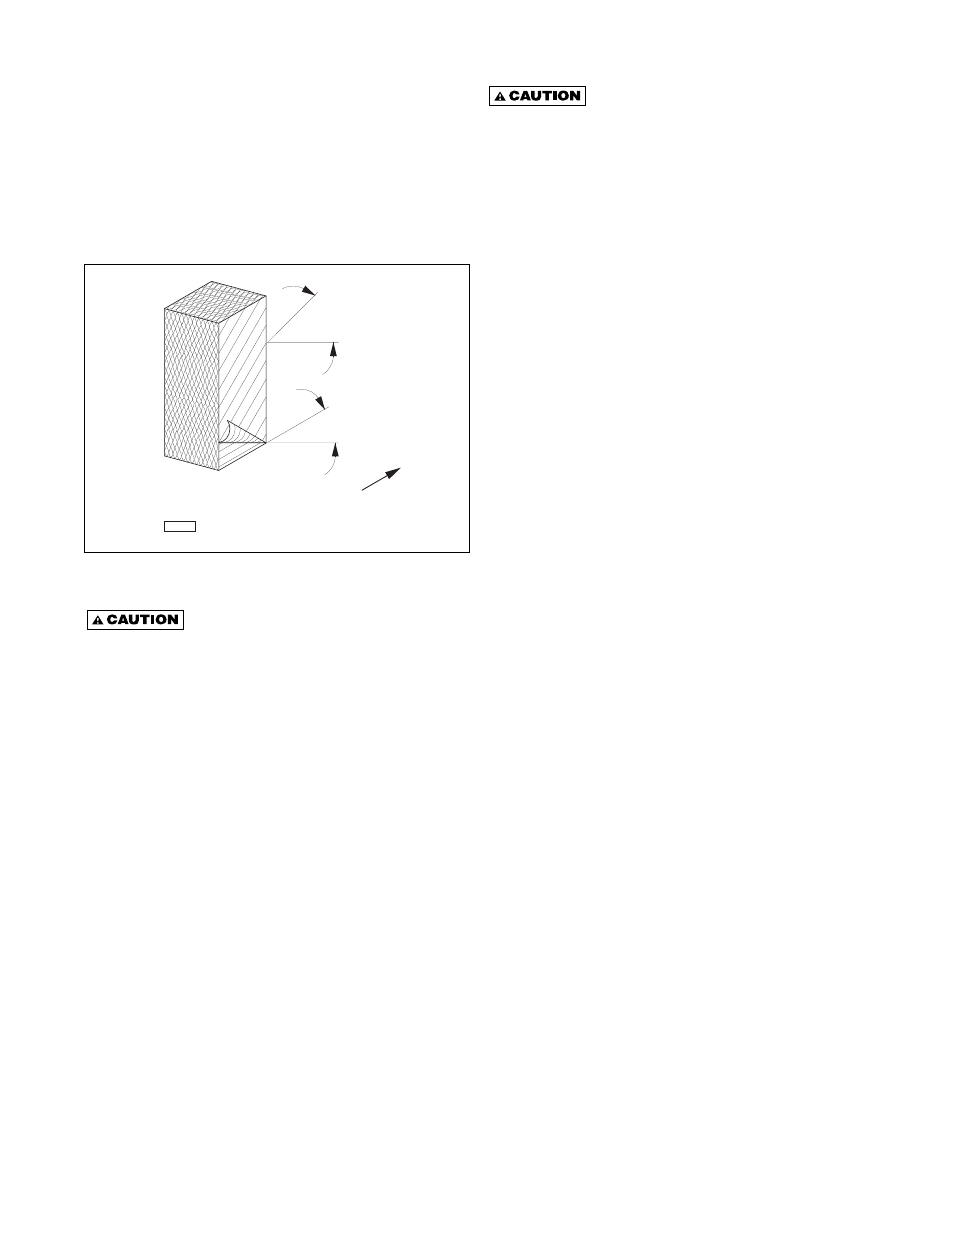
7. When re-installing media, be sure all media
sections are installed in the proper direction. See
Figure 11.
8. Replace top media distribution pad, water dis-
tribution system, water hood panel, and fi lter/frame
assemblies.
Figure 11 - Evaporative Cooling Media Pad Section
Cleaning the Water Pump
Do not allow the pump to topple over
or become submerged. Water will damage the pump
motor. This is not a submersible pump.
Disassemble and clean water pump as follows:
1. Disconnect
power.
2. Disconnect the liquid tight connector from the
junction box to remove cord and connector.
3. Disconnect the pump mounting bracket and hose.
4. Remove the pump and basket screen.
5. To clean pump, snap out base of the pump; notice
the impeller.
6. Using a mild detergent solution, wash all deposits
from the impeller and the impeller base plate.
7. Spin the impeller to dislodge any foreign material.
Make sure that the impeller spins freely.
8. Carefully snap the impeller and impeller base plate
back onto the pump.
9. Wash the pump basket screen using the same
detergent solution, and rinsing thoroughly to remove
any debris. If unable to clean, replace with a new
screen (See replacement part section).
NOTICE: The pump motor does not require any
lubrication.
45° TYP.
15° TYP.
AIR FLOW
D3883