Pfister 016-600SP User Manual
Page 6
8
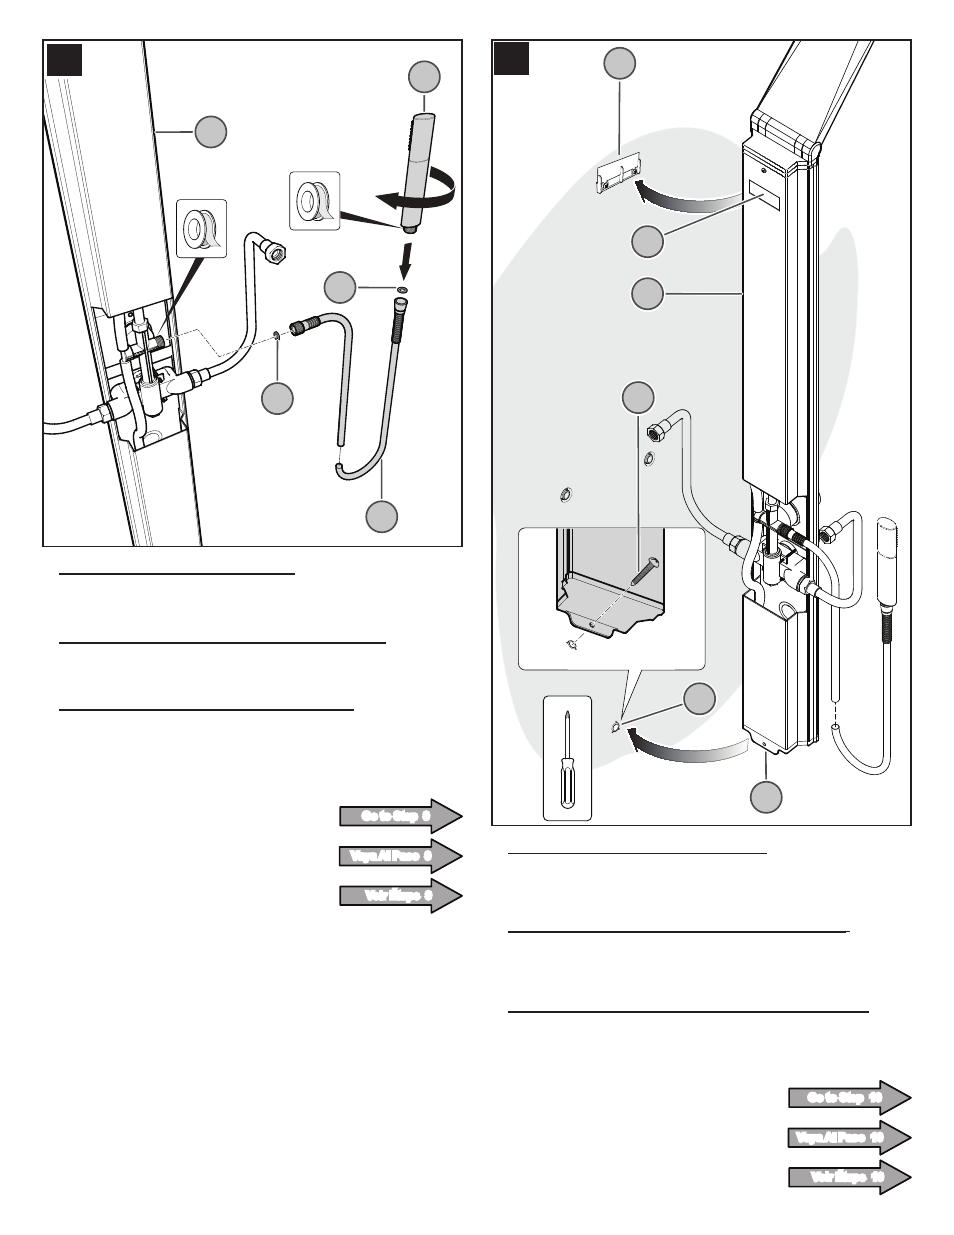
7 INSTALACIÓN DE LA REGADERA DE MANO
Ponga sello de goma (7C) entre la regadera de mano (7A) y la manguera (7B).
Conecte el otro extremo de la manguera (7B) al panel de la ducha (7D).
7 INSTALLATION DE LA DOUCHE À MAIN
Mettre un joint d'étanchéité en caoutchouc (7C) entre la douche à main (7A) et la
conduite (7B). Mettre un joint d'étanchéité en caoutchouc (7C) et fixer la conduite
sur le panneau de douche (7D).
8 INSTALACIÓN DEL PANEL EN PARED PLANA
Coloque el panel (8A) en la pared enganchando la arboleda (8D) adentro de el
soporte de montaje (8B). Asegure el panel (8A) usando un tornillo de 1/8 pulg. x 2
pulg. (8C) a través del agujero (8E) y dento de la ancla (8F), tal como se muestra.
8 INSTALLATION DU PANNEAU POUR MUR DROIT
Placez le panneau (8A) sur le mur en accrochant la rainure (8D) au support de fixa-
tion (8B). Montez le panneau (8A) avec une vis de 1/8 po. x 2 po. à travers le trou
(8E) et la pièce d'ancrage (8F), comme montré.
7 HAND SHOWER INSTALLATION
Put rubber seal (7C) between hand shower and flexible hose (7B) then screw hand
shower (7A) into hose. Connect hose (7B) to shower panel (7D)
8 FLAT WALL PANEL INSTALLATION
Place Panel (8A) into wall by hooking groove (8D) into Mounting Brackets (8B).
Secure Panel (8A) by screwing an 1/8" x 2" Screw (8C) through Bottom Hole (8E)
and into Anchor (8F), as shown.
6
8A
8D
8C
8E
8F
8B
7
7B
7A
7C
7C
7D
FOR CORNER WALL INSTALLATION
Go to Step 9
PARA INSTALACIÓN EL PARED DE ESQUINA
Vaya Al Paso 9
POUR INSTALLATION SUR MUR PLAT
Voir Étape 9
FOR FLAT WALL INSTALLATION
Go to Step 10
PARA INSTALACIÓN EL PARED PLANA
Vaya Al Paso 10
POUR INSTALLATION SUR MUR PLAT
Voir Étape 10