Mount the oit to the panel – Watlow Silver Series OIT User Manual
Page 10
10
Watlow Silver Series OIT Installation Guide
0600-0069-0000 Rev D
OIT should be mounted into a panel with a depth of at least 4” (105mm).
Allow a clearance of at least 1” (25mm) on each side for mounting
hardware. Consider proper clearance for cable connections when mounting.
The area of the panel or mounting surface where the gasket comes into
contact must be flat and free of scratches, pits, and other features that
prevent the gasket from sealing properly. If the panel or mounting
surface is not uniform, thick, flat, stiff, or smooth enough, then a sealant
such as silicone may be required.
NOTE: Clean and deburr the panel cutout before the OIT is installed.
Warning: The OIT requires a stiff, flat, smooth mounting
surface free of blemishes to seal properly to NEMA 4.
Mount the OIT to the Panel
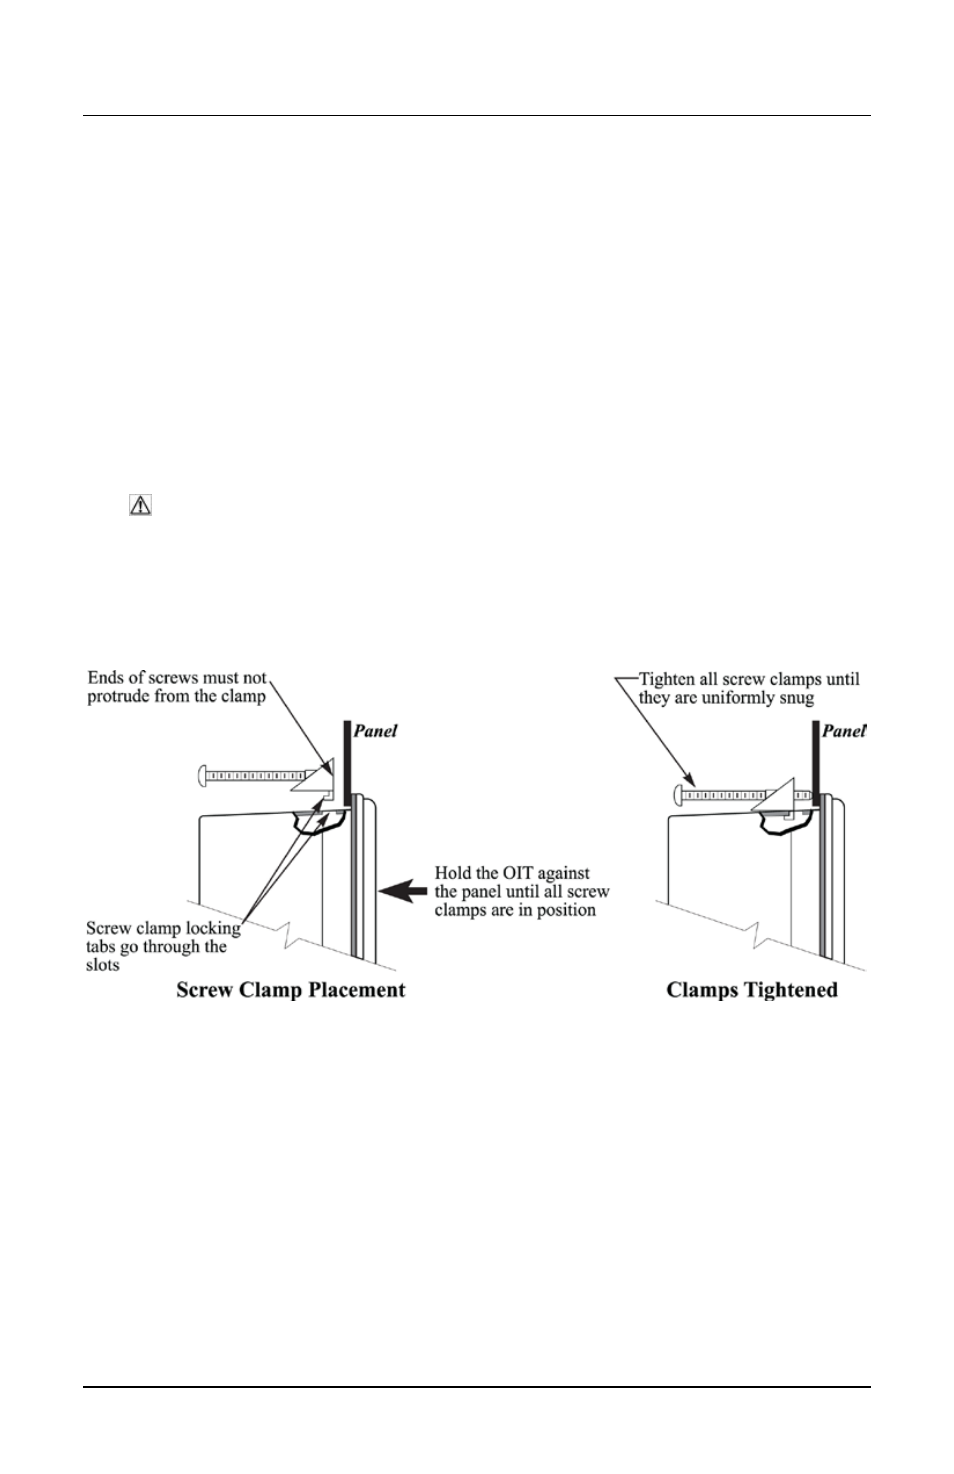
Figure 4: Installing Screws to the OIT
STEPS:
1. Prepare the clamps for the OIT by positioning the metal brackets
at the mid-points of the screws. Position the screws so that the
ends don’t protrude from the plastic portion.
Set the OIT in the panel cutout and hold it in place until all
clamps are in position.
2. Tighten the screw clamps in an even pattern until all are
uniformly snug.