Addonics Technologies RUBY CIPHER AES RCHD256ES User Manual
Page 3
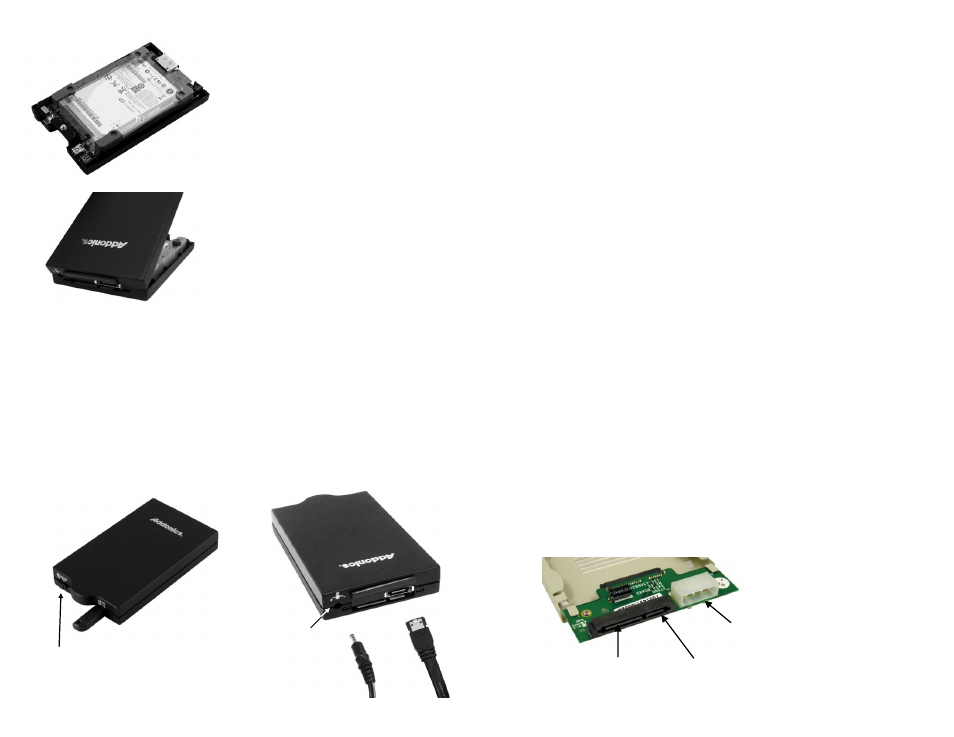
Step 5 Mount the board to the bottom
cover.
Step 6 Put the top cover on by holding it in
near vertical position and sliding the two
metal clips inside the two small slots on the
rear of the bottom cover.
Step 7 Lower the front of the top cover and making sure the two covers lined up
properly. Tighten the small retaining screw on the front of the bottom cover to
close the enclosure.
Cable Connections
When Used as an External Hard Drive
Switch:
INT: This mode is used when the enclosure is placed inside a drive cradle. For
drive cartridge system kits, this is the mode used.
EXT: This mode is used if the enclosure is used as an external hard drive.
Ruby Drive Cradle
Power: Connect the power cable (provided) to the 5V power connector located at
the back of the enclosure.
Data:
Model: RCHD256ES
Connect the eSATA to eSATA cable to the eSATA connector located at the back
of the enclosure and the other end of the eSATA cable to the eSATA connector
on your SATA host controller with eSATA ports.
Model: RCHD256EU
Connect the eSATA to eSATA cable to the eSATA connector located at the back
of the enclosure and the other end of the eSATA cable to the eSATA connector
on the USB2.0 to eSATA adapter. You can now plug the adapter to a USB port
on your system.
Powering On Enclosure:
Note: Be sure the Ruby cipher key is inserted into the drive enclosure prior to
turning on the power of the drive cradle. The hard drive will not be
detected by the computer if the power to the drive cradle is turned on
without the Cipher key. Under such condition, the power on the drive
cradle will have to be turned off and turned back on again with the
Cipher key already inserted into the drive enclosure in order to detect
the hard drive.
To power on the enclosure, move the switch located at the front of the enclosure
to the EXT mode. When the switch is turned on, the LED light beside it would
light up to indicate power and also drive access.
Note: There are no drivers needed to use the eSATA cable as long as the
drivers are installed for the Serial ATA Controller card/chip. It is plug
and play.
Brand New Hard drive must be partitioned and formatted first before a
drive letter is assigned by the OS.
Cable Connections
When Used as an Internal Hard Drive
Note: You can only use one power connector at a time. Either use the 4-pin
Molex or 15-pin SATA connector but do not simultaneously use them.
Internal/External
Power Switch
Power connection
using 5V power adapter
or USB power cable
15-pin SATA
power connector
4-pin Molex
power connector
7-pin SATA
data connector