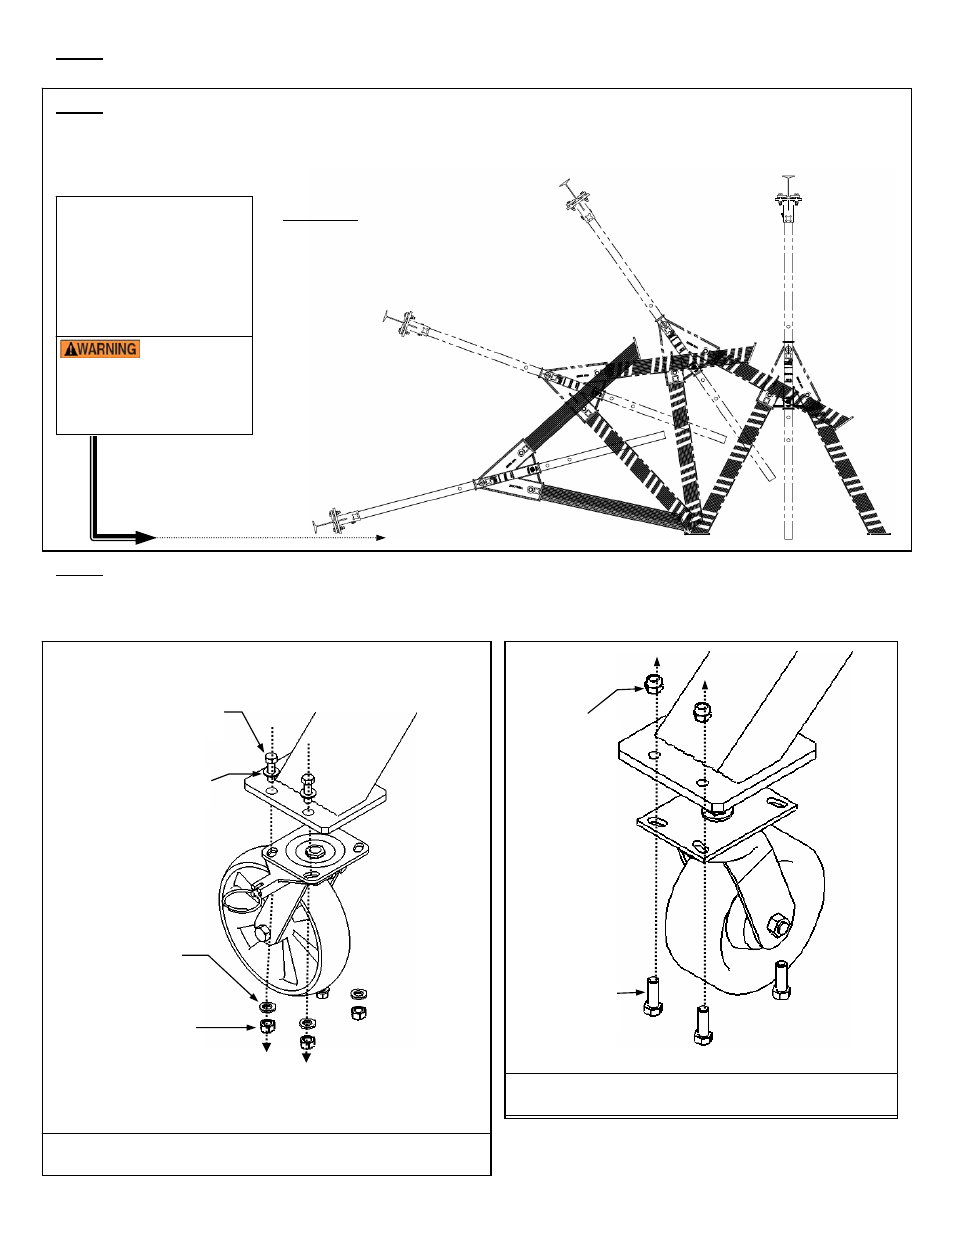
Diagram 6: rotate crane onto its feet – Vestil AHA User Manual
Page 20
Copyright 2011 Vestil Manufacturing Corp.
Page 20 of 25
Step 5: Tighten the beam clamp fasteners. Make sure that the I-beam is centered on the beam brackets and that the beam
clamps significantly overlap the beam flange on both sides.
Step 6: Stand the crane on its feet.
Rotate the crane onto its feet in a controlled manner. [For instance, attach a hoist chain to the I-beam and then slowly
raise the beam until the crane rotates to stand on its feet. Alternatively, raise the crane with a fork truck: Position the forks
under the I-beam and slowly raise the beam until the crane rotates onto its feet in a controlled manner.]
Step 7: Connect the casters to the legs (Diagrams 5A & 5B show standard casters).
Attach each caster to the caster mount bracket of each leg using the hardware shown in Diagrams 5A & 5B. Raise the
crane 8 to 10 inches off of the ground with a fork lift or hoist. Position a caster underneath each foot as shown in the
diagram below and fasten it to the caster mount bracket.
3
Approach the crane with a
fork truck from this side, and
slide the forks under the I-
beam.
Slowly raise the beam and
slowly drive forward until the
crane stands on its feet.
DO NOT raise
the beam unless all other
persons have moved to a
location away from and
behind the fork truck.
3
3
/
8
in. -16 x 1¼ in. HHCS
#2 zinc-plated bolt
3
/
8
in. zinc-plated
lock washer
3
/
8
in. zinc-plated
hex
nut
Diagram 7B: Caster installation for 6,000 lb. capacity
models (AHA-6-#-#)
Diagram 7A: Caster installation for 2,000 pound and 4,000
pound capacity models (AHA-2-#-# and AHA-4-#-#)
½ in. -13 x 1½ in.
HHCS #2 zinc-
plated bolt
½ in. – 13 nylon
insert lock nut
3
/
8
in. SAE zinc-plated
flat washer
Diagram 6: Rotate crane onto its feet
Slide a lock washer followed by a flat washer onto a 1¼ in. bolt, and
feed the bolt up through the bolt holes in the caster and caster mount
bracket. Put a lock washer onto the bolt and fasten a nut to the end of
the bolt.