Assembling tool – Harwin Z80-299 User Manual
Page 2
IS-30 Issue: 2 Date: 22.09.10 C/Note: 10949
Page 2 of 4
DE-LATCHING TOOL Z80-299
Assembling Tool
Notes:
When assembling tool for operation the following procedures must be observed carefully to prolong
tool life and ensure damage to tool is avoided.
When assembling parts, visually inspect threads to ensure they are clean and undamaged.
Ensure care is taken when screwing components together to prevent cross threading.
Parts should only be tightened by hand, the use of spanners, levers vices and so on is not required,
and could damage tool.
Positional screws in adjustable jaws need not be tampered with or altered.
If in doubt, of replacement parts are required, please contact
for advice and
assistance.
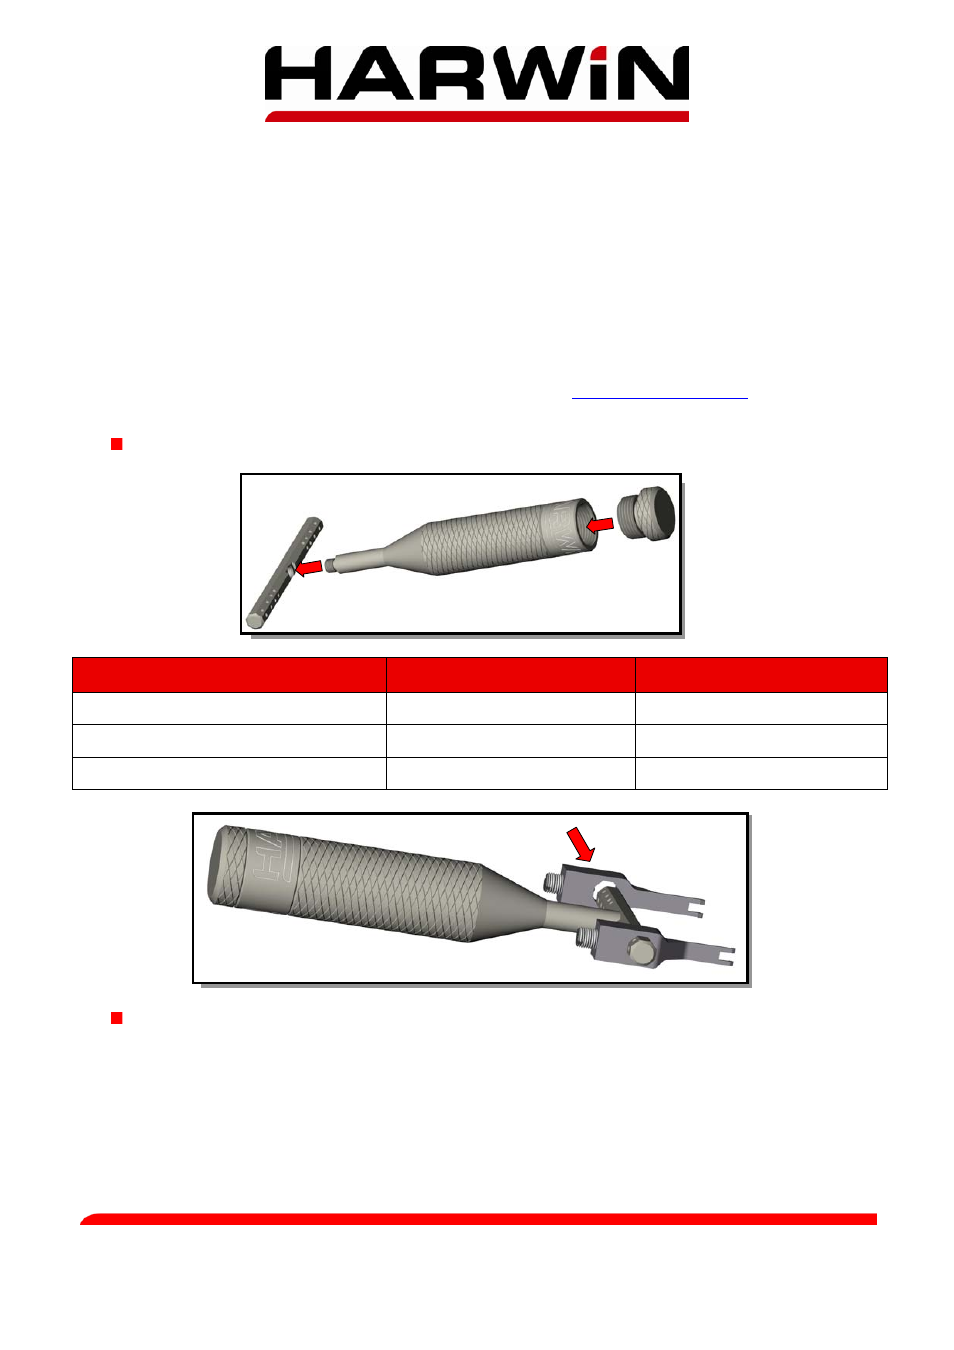
Assemble the cap to the handle (if required) and the handle to the correct multi-positional bar.
Assemble adjustable Jaws by orientating the octagonal sections, then slide jaws onto bar as shown
above. Alternatively, the jaws can be assembled at a 45° angle, which may be more convenient for
horizontally mated connectors. The Jaws will “ratchet” along the bar and lock into various positions.
Keep the jaws symmetrical about handle; push the jaws to the correct positions for the size of the
connector.
Harwin North America
Harwin Europe
Harwin Asia
T: +1 603 893 5376 F: +1 603 893 5396
T: +44 (0) 23 9231 4545 F: +44 (0) 23 9231 4590
T: +65 6 779 4909 F: +65 6 779 3868
E: [email protected] W: www.harwin.com
E: [email protected] W: www.harwin.com
E: [email protected] W: www.harwin.com.sg
Description
DIL connectors
SIL connectors
60mm long multi-positional bar
20, 26, 34, 44 contacts
17, 22 contacts
34mm long multi-positional bar
06, 10, 14, 18 contacts
03, 05, 07 contacts
32mm long multi-positional bar
04, 08, 12, 16 contacts
02, 04, 06 contacts