Sonnet Technologies Tempo RAID66 ATA Hardware RAID Controller Card User Manual
Page 3
3
Installation Steps – Striping Configuration (continued)
Tempo RAID66 Macintosh
ATA Hardware RAID Controller
normal
mode
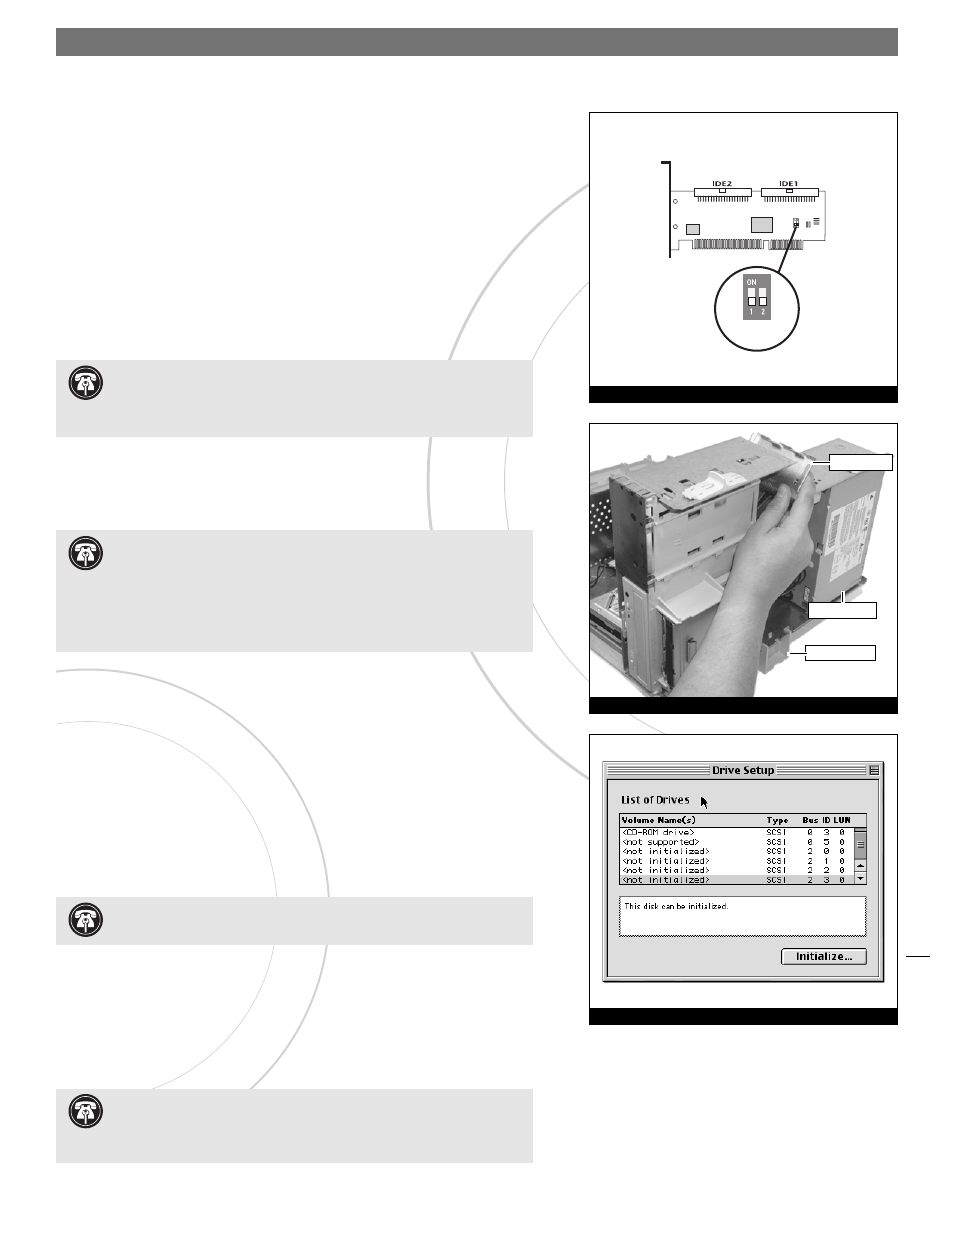
Figure 5
6. Locate the existing hard drive in your computer and find the power connec-
tor plugged into it. You should find at least one extra power connector near
the existing drive; connect it to the supplied power connector Y-adapter. If
you are installing only two additional hard drives, connect the Y-adapter to
the new hard drives. Otherwise, connect additional Y-adapters (sold separate-
ly) as necessary to power all four hard drives. Verify the connectors are
plugged in securely.
7. Remove the Tempo RAID66 card from the packaging materials.
8. Locate an available PCI slot inside your computer and remove its port access
cover (if present) from the rear of the computer.
9. Install the Tempo card into the PCI slot; make sure the card is firmly seated
in the slot. Leave the DIP switches in the normal mode setting for now
(Figure 5).
10. Route the ATA/66 cables to the Tempo RAID66 card; avoid the processor’s
heatsink and make sure they will not get crushed or pinched by any part of
the case when the computer is reassembled.
11. Attach the ATA/66 cables’ host connectors to the Tempo RAID66 card
(Figures 3 and 4).
12. Check the cable connections; make sure all cables are properly connected to
the Tempo RAID66 and the hard drives.
13. Turn on your computer.
14. Prepare each of the newly installed hard drives by initializing (formatting)
them with Apple’s Drive Setup utility (Figure 7). (The Drive Setup applica-
tion is installed during the Mac OS installation process and is usually located
in the Utilities folder on the hard drive containing your active System
Folder.) For drives larger than 2 Gigabytes, you should format them as HFS+
to take full advantage of their storage capacity.
.
Support Note:
When you first install the Tempo RAID66 into your com-
puter, leave the DIP switches set in the normal mode setting (both DIP
switches off.) You must first initialize (format) each of the hard drives connected
to the Tempo RAID66 individually, before initializing the striped volumes.
Figure 6
Support Note:
IDE hard drives attached to the Tempo RAID66 will
register as a SCSI devices to the computer. For example, in Figure 7 the
newly installed hard drives show up as
and SCSI under Type.
Support Note:
Desktop G3 users must remove the access panel on
the main chassis to route the ATA/66 cables from the drives to the
Tempo RAID66 card. You may need tools to perform this procedure. To remove the
access panel, first unlock and tilt up the internal assembly; remember to lower
the assembly support stand. Next, firmly twist the top edge of the panel forward
toward the power supply, then lift the panel out (Figure 6). Save the panel in
case you ever need to use it again.
Support Note:
IDE hard drives attached to the Tempo RAID66 will not
mount (appear on the desktop) until they are initialized (formatted.)
Figure 7
power supply
access cover
support stand