Calibration – SKC 225-105 GS-1 Cyclone User Manual
Page 2
4.
Hold cyclone upside down (cassett e adapter facing downward). Insert cassett e
adapter into cassett e middle ring section. Press until a fi rm seal is established.
5. Ensure thumbscrew on cyclone is secure and that the grit pot remains on the
cyclone body during sampling.
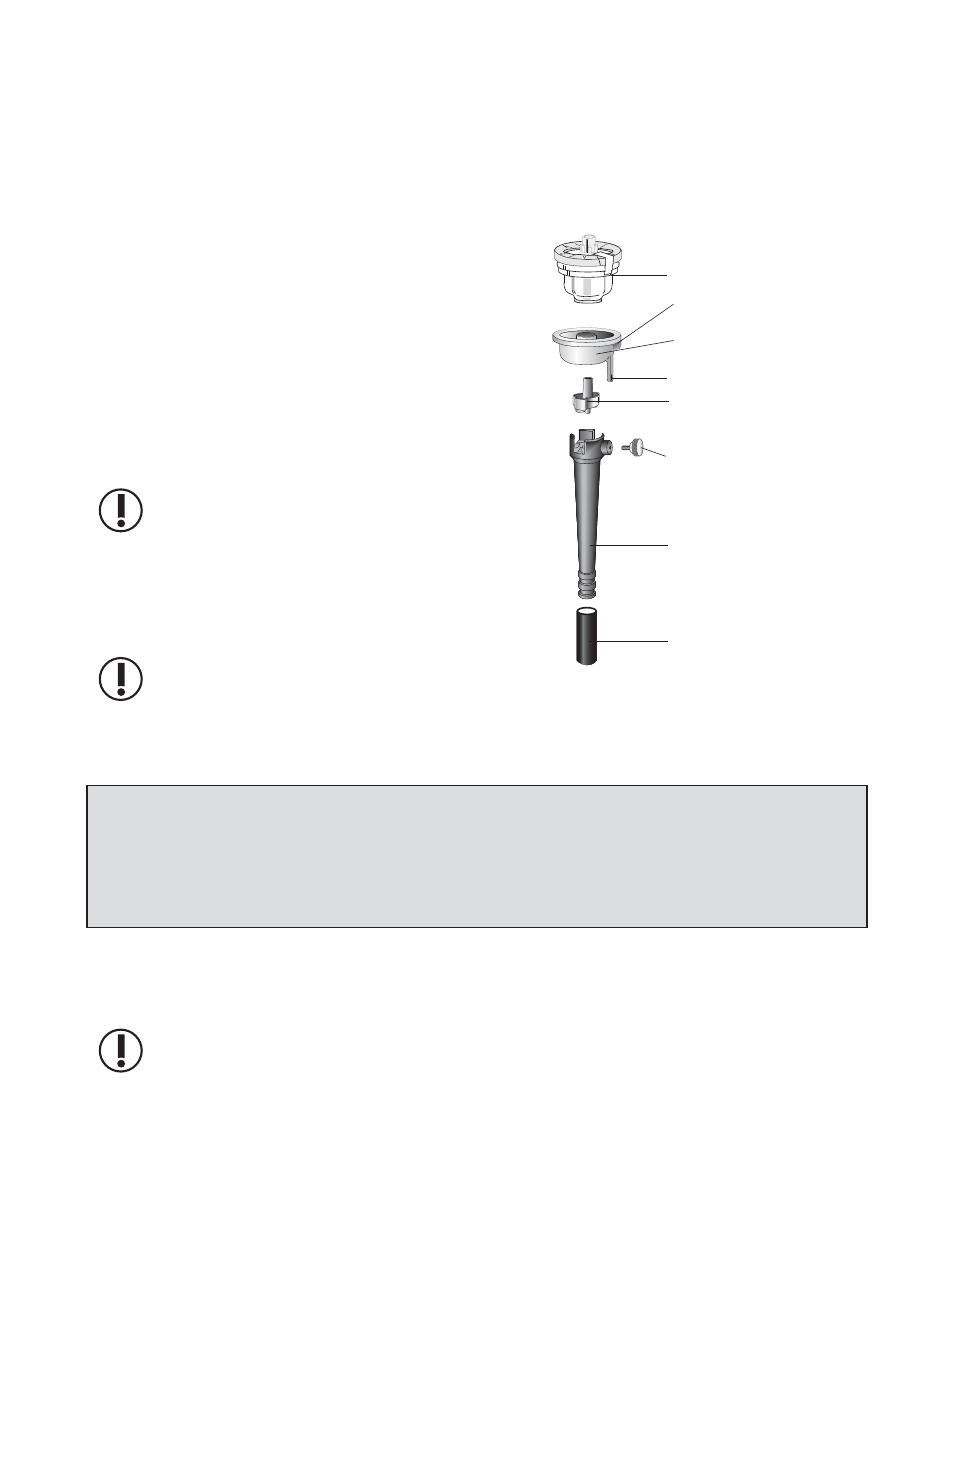
Assembly with Diesel Particulate
Matter (DPM) Cassette (Figure 2)
The GS-1 Cyclone is supplied fully
assembled with bowl adapter and 37-mm
cassett e adapter.
1. Remove cassett e adapter from cyclone.
2.
Remove inlet plug from DPM Cassett e
and gently push cassett e inlet on top
of cyclone until seated fi rmly.
For secure sampling, use
DPM Cassette/GS-1 Cyclone
assembly with SKC Cassette
Holder (Cat. No. 225-1) during
sampling. See DPM Cassette
Operating Instructions.
Leave grit pot in place during
calibration and sampling.
Calibration
Flow rate:
• 2.0 L/min for 4.0 μm 50% cut-point (see Reference)
• 3.0 L/min for 3.5 μm 50% cut-point*
• 1.7 or 2.0 L/min for removing large particles when sampling
with the DPM Cassett e (fl ow rates used by MSHA)
* Determined using experimental data obtained at fl ows from 2.0 to 4.0 L/min.
Option 1: Using a Calibration Jar
1. Prepare a cyclone/cassett e assembly (see Figures 1 and 2). Ensure grit pot
remains on cyclone body during calibration.
SKC recommends using the smallest calibration jar possible. To
achieve this, do NOT use Cassette Holder 225-1 during calibration.
2. Place
cyclone/cassett e assembly into an airtight calibration jar that contains an
inlet and outlet (SKC Cat. No. 225-111; see Figure 3).
3. Using
fl exible tubing, connect inlet of calibrator to inlet of calibration jar.
4. Run tubing from outlet of cyclone/cassett e assembly through outlet of
calibration jar and to the inlet of a sample pump. If using the SKC 225-111 jar,
connect the Luer adapter inside the jar to the cyclone/cassett e outlet. Connect
jar outlet to inlet of a sample pump.
5. Turn on pump and calibrate to desired fl ow rate following directions in the
pump and calibrator operating instructions.
6. Aft er calibration, disassemble calibration jar, remove cyclone/cassett e
assembly, and replace cassett e used for calibration with a fresh (unused)
cassett e to be used for sampling.
Figure 2
GS-1 Cyclone with cassette adapter removed
and preloaded DPM fi lter cassette installed -
exploded view
Bowl adapter (supplied
assembled with cyclone body)
Cyclone top
(supplied assembled
with cyclone body)
Thumbscrew
Cyclone body
Grit pot
Nodule for holder
Retaining tab
DPM preloaded fi lter cassette