Operation, Setup – SKC 224-PCXR4 Universal Pump User Manual
Page 7
5
Operation
High Flow Applications (1000 to 5000 ml/min)
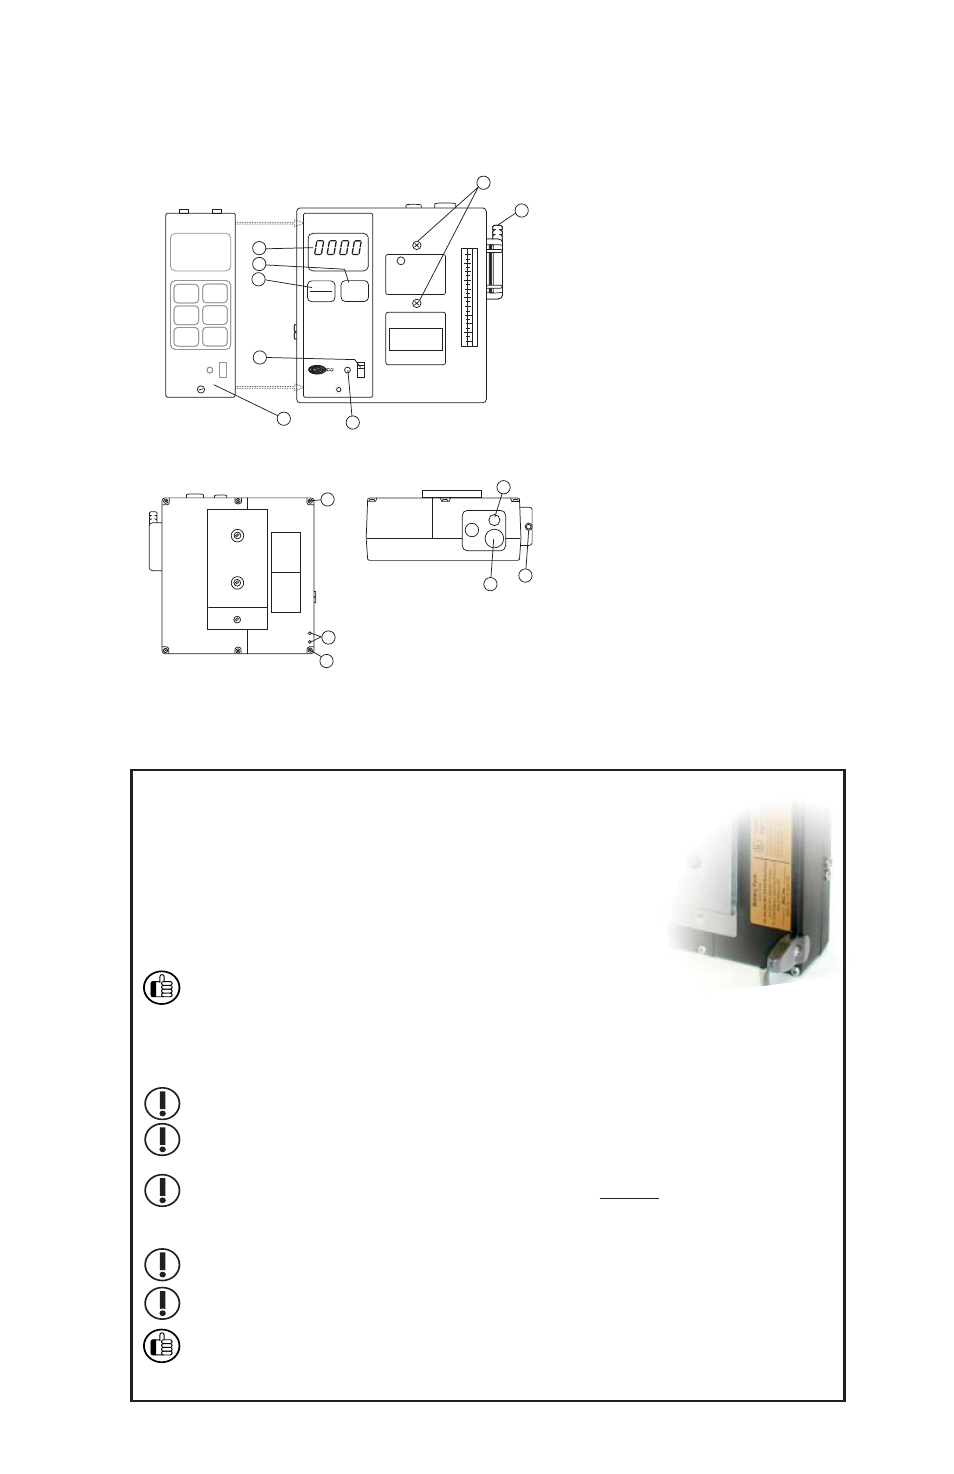
Figure 1
Front, back, and top views of PCXR4 Sampler
For additional drawings, see pages 21 and 23.
Setup
Install battery (see Installing the Battery Pack on page
18). For optimum charging, ensure pump is not running.
Charge the battery by connecting the charger plug to the
sampler charging jack (Figure 1, #18). Ensure that the
battery is fully charged before sampling.
After charging the battery pack, it is good practice
to run the pump for approximately fi ve minutes
before calibrating. This ensures the battery is in
more steady-state conditions and improves the
agreement in pre and post-sampling calibrations.
Do not charge or operate pump from charger in hazardous locations.
Use only an SKC-approved charger designated for this model to
ensure reliable performance. Failure to do so voids any warranty.
Ensure proper orientation of charging cable before plugging it into
the charging jack. Improper orientation/contact will short-circuit the
battery and voids any warranty.
Short-circuiting the battery pack will render it immediately inoperative.
Failure to follow warnings and cautions voids any warranty.
The battery pack may be kept on the SKC-approved charger for an
indefi nite time.
AIRCHEK
SAMPLER
5
4
3
2
1
SAMPLE PERIOD Ñ MINUTES
START
HOLD
FLOW
AND
BATTERY
CHECK
FLOW
ADJ
ON
AIRCHEK SAMPLER
MODEL 224-PCXR4
LISTED 124U
4
3
2
1
BACK
TOP
FRONT
5
16
16
18
8
9
9
14
7
15
Charger and battery
connected
1 LCD
2 Flow and Battery
Check Key
3 Start/Hold Key
4 On/Off Switch
5 Tamper-resistant Cover
7 Flow Adjustment Screw
8 Accessory Mounting
Screws (2)
9 Intake/Filter Housing
14 Cap Screw to Regulator
15 Cap Screw to Air
Discharge Port
16 Battery Pack Screws (2)
18 Charging Jack
1