Saving and restoring configuration settings – Adder Technology AdderView CATx 1000 User Manual
Page 28
Saving and restoring configuration settings
The AdderView CATx 1000 can store up to 256 computer names and 5 sets
of user access rights in addition to the ADMIN user account. Particularly in
cascaded configurations, manually re-entering all computer names, port
numbers and access rights can be a lengthy process. Therefore, the AdderView
CATx 1000 provides a method to save and, if required, restore configuration
settings using its serial port. Further to this, the saved file can be opened
and edited within a text editor or spreadsheet and then restored back to the
AdderView CATx 1000 – a useful way to make multiple setup changes.
Note: You must be logged-in as the ADMIN user for this procedure.
Preparations for configuration save/load
• Download the Adder Data Transfer utility - contact Adder Technical Support
for details.
• Connect the serial port on the rear panel of the AdderView CATx 1000,
labelled
OPTIONS
, to a serial port on your computer using the optional serial
flash upgrade cable. See
Appendix 2
for pin-out specifications.
To transfer configuration settings
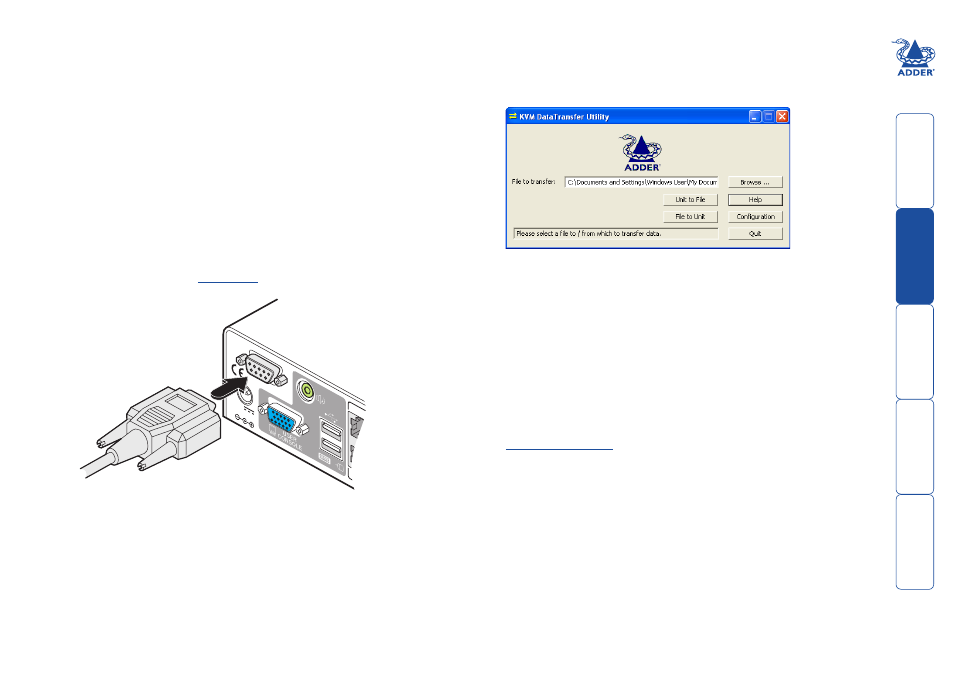
1 Run the Adder Data Transfer utility on the computer that is connected to the
AdderView CATx 1000 Options serial port. The utility has a single window:
2 Click the Configuration button and ensure that the appropriate serial port of
the computer is selected.
3 Click the Browse... button to locate or create a text file that will either
provide or receive the AdderView CATx 1000 data.
4 Choose the direction of data flow:
• Click the Unit to File button to download the existing AdderView CATx
1000 configuration to the selected text file, or
• Click the File to Unit button to upload the contents of the file to the
AdderView CATx 1000 unit.
A pop-up dialog box will request you to set-up the unit to either send or
receive RS232 data.
5 Using the local port of the AdderView CATx 1000 unit, display the
. Note: You must be logged-in as the ADMIN user.
6 Select the ‘Functions’ option.
7 Select either ‘Send Data to RS232 port’ (if you chose the Unit to File button)
or ‘Read Data from RS232 port’ (if you chose the File to Unit button).
8 On the computer, click the OK button of the pop-up dialog box to begin
downloading or uploading. The process will end automatically when all data
have been transferred.
continued
5V
2.0A
12
1
16
1
OPTIONS
COMPU
T